
Pineapple ice cream homemade – just the thought conjures up images of sunny days, tropical breezes, and the sweet, tangy taste of paradise! Forget the store-bought stuff loaded with artificial flavors; we’re diving headfirst into creating a creamy, dreamy, and utterly irresistible frozen treat right in your own kitchen.
While the exact origins of pineapple ice cream are a bit hazy, the pineapple itself boasts a rich history, traveling from South America to become a symbol of luxury and hospitality in Europe and beyond. Imagine serving this vibrant dessert at your next gathering – it’s a conversation starter and a guaranteed crowd-pleaser!
But what makes pineapple ice cream homemade so universally loved? It’s the perfect balance of sweet and tart, the smooth, velvety texture that melts in your mouth, and the sheer convenience of whipping up a batch whenever the craving strikes. Plus, you control the ingredients, ensuring a healthier and more flavorful experience than anything you’ll find on supermarket shelves. So, grab your ice cream maker (or don’t, we have a no-churn option too!), and let’s embark on this delicious adventure together. Get ready to experience the pure joy of homemade pineapple ice cream!

Ingredients:
- 1 large ripe pineapple (about 3-4 pounds), peeled, cored, and chopped
- 1 cup granulated sugar
- 1/2 cup water
- 2 cups heavy cream
- 1 cup whole milk
- 1/4 cup light corn syrup (optional, for smoother texture)
- 1 tablespoon lemon juice (optional, to brighten the flavor)
- 1/4 teaspoon salt
- 1 teaspoon vanilla extract (optional, for added flavor depth)
Preparing the Pineapple Base:
- First, let’s tackle the pineapple! Make sure your pineapple is nice and ripe. You’ll know it’s ready when it smells sweet and gives slightly when you press on it. Peel it carefully, removing all the eyes, and then core it. Chop the pineapple into roughly 1-inch pieces.
- Next, we’ll create a pineapple puree. Place the chopped pineapple in a blender or food processor. Blend until completely smooth. You might need to scrape down the sides a few times to ensure everything is evenly pureed.
- Now, let’s cook the pineapple puree. This step helps to concentrate the pineapple flavor and reduce the water content, resulting in a richer, more intense ice cream. Pour the pineapple puree into a medium saucepan. Add the granulated sugar and water.
- Bring the mixture to a simmer. Place the saucepan over medium heat and bring the mixture to a gentle simmer, stirring constantly until the sugar is completely dissolved.
- Simmer and reduce. Once simmering, reduce the heat to low and continue to simmer for about 15-20 minutes, stirring occasionally, until the mixture has thickened slightly and reduced in volume by about 1/4. This step is crucial for preventing icy ice cream.
- Cool the pineapple base. Remove the saucepan from the heat and let the pineapple base cool completely to room temperature. This is important because adding hot mixture to the dairy can cause curdling. You can speed up the cooling process by transferring the mixture to a shallow bowl.
Preparing the Ice Cream Custard:
- Combine the dairy. In a large bowl, whisk together the heavy cream, whole milk, light corn syrup (if using), lemon juice (if using), salt, and vanilla extract (if using). The corn syrup helps prevent ice crystals from forming, resulting in a smoother ice cream. The lemon juice brightens the pineapple flavor.
- Incorporate the pineapple base. Once the pineapple base has cooled completely, gradually whisk it into the dairy mixture until well combined. Make sure there are no lumps.
- Chill the mixture thoroughly. Cover the bowl with plastic wrap, pressing it directly onto the surface of the ice cream base to prevent a skin from forming. Refrigerate for at least 4 hours, or preferably overnight. This allows the flavors to meld together and the mixture to chill completely, which is essential for proper freezing.
Churning the Ice Cream:
- Prepare your ice cream maker. Follow the manufacturer’s instructions for your ice cream maker. If you’re using a freezer bowl type, make sure the bowl has been frozen solid for at least 24 hours.
- Churn the ice cream. Pour the chilled ice cream base into the prepared ice cream maker. Churn according to the manufacturer’s instructions, usually for about 20-25 minutes, or until the ice cream has reached a soft-serve consistency.
- Check the consistency. The ice cream should be thick and creamy, but still soft enough to scoop. If it’s too soft, you can freeze it for a bit longer.
Freezing and Serving:
- Transfer to a freezer-safe container. Spoon the soft-serve ice cream into a freezer-safe container with a tight-fitting lid.
- Press plastic wrap onto the surface. Gently press a piece of plastic wrap directly onto the surface of the ice cream to prevent ice crystals from forming.
- Freeze until firm. Freeze for at least 2-3 hours, or preferably overnight, until the ice cream is firm enough to scoop.
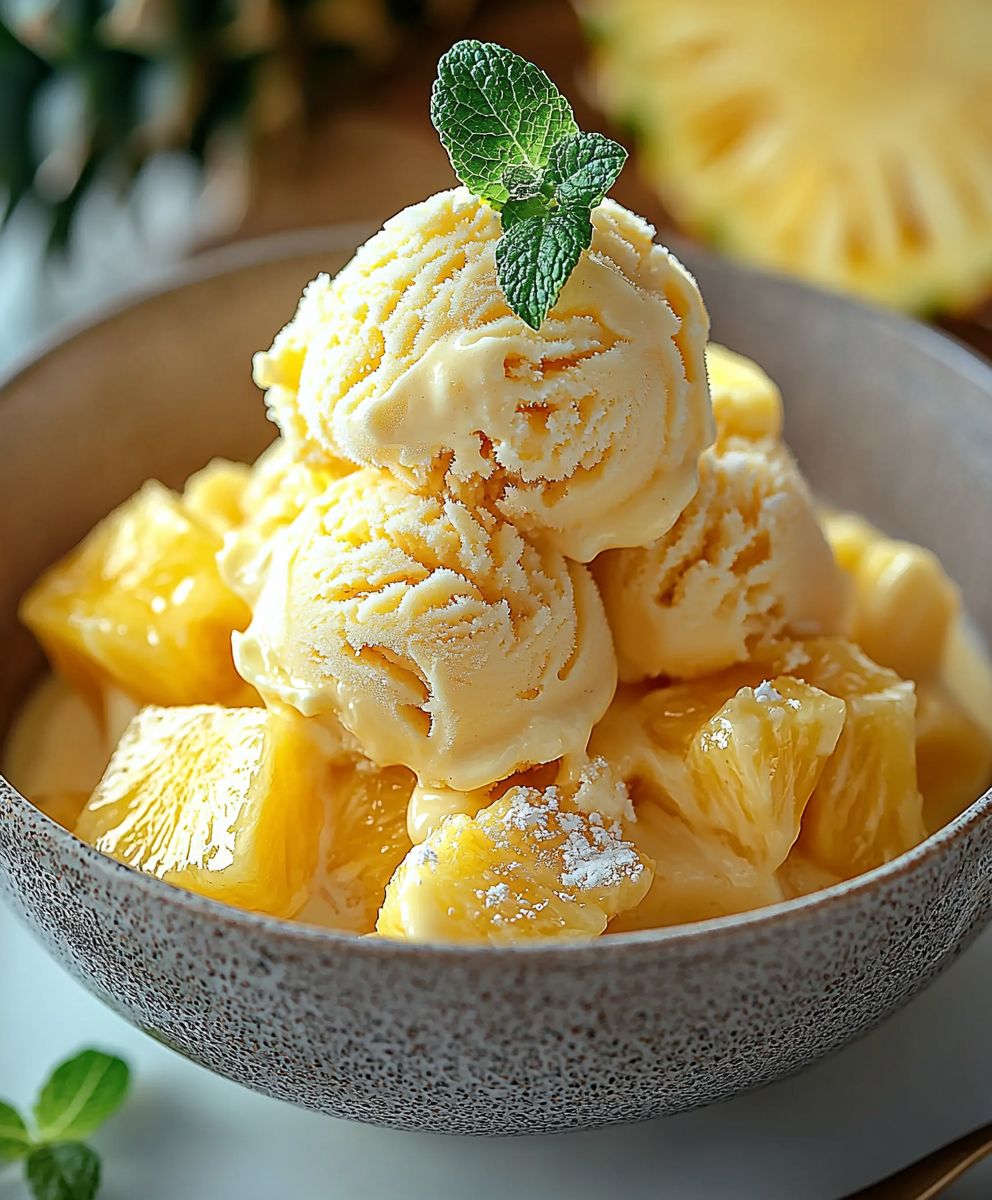
- Scoop and serve! Let the ice cream sit at room temperature for a few minutes before scooping to soften it slightly. Serve in bowls or cones and enjoy! You can garnish with fresh pineapple chunks, toasted coconut flakes, or a drizzle of caramel sauce, if desired.
Tips for the Best Pineapple Ice Cream:
- Use a ripe pineapple: The riper the pineapple, the sweeter and more flavorful your ice cream will be. Look for a pineapple that smells sweet and gives slightly when you press on it.
- Don’t skip the simmering step: Simmering the pineapple puree helps to concentrate the flavor and reduce the water content, resulting in a richer, less icy ice cream.
- Chill the mixture thoroughly: Chilling the ice cream base for at least 4 hours, or preferably overnight, is essential for proper freezing and flavor development.
- Use high-quality ingredients: Using high-quality heavy cream and whole milk will result in a richer, creamier ice cream.
- Adjust the sweetness to your liking: If you prefer a less sweet ice cream, you can reduce the amount of sugar.
- Add a splash of rum (optional): For an adult twist, add a tablespoon or two of dark rum to the ice cream base before churning.
- Store properly: Store leftover ice cream in a freezer-safe container with a tight-fitting lid in the freezer for up to 2 weeks.
Conclusion:
And there you have it! This homemade pineapple ice cream recipe is truly a must-try, and I’m not just saying that because I created it. The vibrant, tropical flavor is an absolute explosion of sunshine in every spoonful. It’s the perfect balance of sweet and tangy, creamy and refreshing – everything you could possibly want in a summer dessert, or honestly, any dessert! Forget the store-bought stuff loaded with artificial flavors and preservatives; this is the real deal, made with love and simple, wholesome ingredients.
What makes this recipe so special? It’s the sheer simplicity. You don’t need any fancy equipment beyond a blender or food processor and an ice cream maker. The active prep time is minimal, leaving you with plenty of time to relax and anticipate the deliciousness to come. Plus, the fresh pineapple flavor is unparalleled. It’s a taste of paradise that will transport you to a sunny beach with every bite.
But the best part? It’s incredibly versatile! While I adore it just as it is, served in a simple bowl or cone, there are so many ways to elevate this pineapple ice cream even further.
Serving Suggestions and Variations:
* Tropical Sundae: Layer scoops of pineapple ice cream with toasted coconut flakes, macadamia nuts, and a drizzle of caramel sauce. Top it off with a maraschino cherry for the ultimate tropical treat.
* Pineapple Ice Cream Float: Combine a scoop or two of pineapple ice cream with pineapple juice or coconut soda for a refreshing and fizzy float.
* Grilled Pineapple Parfait: Grill some pineapple slices until caramelized and slightly charred. Layer them with pineapple ice cream and crumbled graham crackers for a sophisticated and flavorful parfait.
* Pineapple Ice Cream Sandwiches: Use homemade or store-bought cookies (like shortbread or coconut macaroons) to create delightful ice cream sandwiches.
* Spiked Pineapple Ice Cream: For an adult twist, add a splash of rum or coconut liqueur to the ice cream mixture before churning. Just be mindful of the alcohol content, as it can affect the freezing process.
* Dairy-Free Option: Substitute the heavy cream and milk with coconut cream and coconut milk for a delicious dairy-free version. The coconut flavor complements the pineapple beautifully.
* Add Some Spice: A pinch of cayenne pepper or a dash of ginger can add a subtle kick to the pineapple ice cream, creating a more complex and intriguing flavor profile.
I truly believe that this recipe is a winner, and I’m confident that you’ll love it as much as I do. It’s the perfect way to impress your friends and family, or simply treat yourself to a little bit of homemade happiness.
So, what are you waiting for? Gather your ingredients, dust off your ice cream maker, and get ready to experience the magic of homemade pineapple ice cream. I promise you won’t regret it!
And most importantly, I want to hear about your experience! Did you try the recipe? Did you make any variations? What did you think? Share your photos and comments below – I can’t wait to see your creations and hear your feedback. Happy ice cream making! Let me know if you have any questions, and I’ll do my best to help. Enjoy!
Pineapple Ice Cream Homemade: The Ultimate Guide to Making It
Creamy, refreshing homemade pineapple ice cream bursting with tropical flavor. Fresh pineapple is simmered to perfection, then churned into a delightful frozen dessert.
Ingredients
- 1 large ripe pineapple (about 3-4 pounds), peeled, cored, and chopped
- 1 cup granulated sugar
- 1/2 cup water
- 2 cups heavy cream
- 1 cup whole milk
- 1/4 cup light corn syrup (optional, for smoother texture)
- 1 tablespoon lemon juice (optional, to brighten the flavor)
- 1/4 teaspoon salt
- 1 teaspoon vanilla extract (optional, for added flavor depth)
Instructions
- Peel, core, and chop the pineapple into roughly 1-inch pieces.
- Place the chopped pineapple in a blender or food processor. Blend until completely smooth, scraping down the sides as needed.
- Pour the pineapple puree into a medium saucepan. Add the granulated sugar and water.
- Bring the mixture to a gentle simmer over medium heat, stirring constantly until the sugar is completely dissolved.
- Reduce the heat to low and continue to simmer for about 15-20 minutes, stirring occasionally, until the mixture has thickened slightly and reduced in volume by about 1/4.
- Remove the saucepan from the heat and let the pineapple base cool completely to room temperature. You can speed up the cooling process by transferring the mixture to a shallow bowl.
- In a large bowl, whisk together the heavy cream, whole milk, light corn syrup (if using), lemon juice (if using), salt, and vanilla extract (if using).
- Once the pineapple base has cooled completely, gradually whisk it into the dairy mixture until well combined. Make sure there are no lumps.
- Cover the bowl with plastic wrap, pressing it directly onto the surface of the ice cream base to prevent a skin from forming. Refrigerate for at least 4 hours, or preferably overnight.
- Follow the manufacturer’s instructions for your ice cream maker. If you’re using a freezer bowl type, make sure the bowl has been frozen solid for at least 24 hours.
- Pour the chilled ice cream base into the prepared ice cream maker. Churn according to the manufacturer’s instructions, usually for about 20-25 minutes, or until the ice cream has reached a soft-serve consistency.
- The ice cream should be thick and creamy, but still soft enough to scoop. If it’s too soft, you can freeze it for a bit longer.
- Spoon the soft-serve ice cream into a freezer-safe container with a tight-fitting lid.
- Gently press a piece of plastic wrap directly onto the surface of the ice cream to prevent ice crystals from forming.
- Freeze for at least 2-3 hours, or preferably overnight, until the ice cream is firm enough to scoop.
- Let the ice cream sit at room temperature for a few minutes before scooping to soften it slightly. Serve in bowls or cones and enjoy! You can garnish with fresh pineapple chunks, toasted coconut flakes, or a drizzle of caramel sauce, if desired.
Notes
- Use a ripe pineapple for the best flavor.
- Simmering the pineapple puree concentrates the flavor and reduces water content.
- Chilling the ice cream base thoroughly is essential for proper freezing.
- High-quality heavy cream and whole milk will result in a richer, creamier ice cream.
- Adjust the sweetness to your liking by reducing the amount of sugar.
- For an adult twist, add a tablespoon or two of dark rum to the ice cream base before churning.
- Store leftover ice cream in a freezer-safe container with a tight-fitting lid in the freezer for up to 2 weeks.