
Mango Strawberry Sorbet: Prepare to be transported to a tropical paradise with every spoonful of this vibrant and refreshing dessert! Imagine the sweet tang of ripe mangoes mingling perfectly with the juicy burst of strawberries, all transformed into a light and airy frozen treat. This isn’t just a dessert; it’s an experience, a celebration of summer flavors that will leave you feeling invigorated and wanting more.
While sorbets have a long and fascinating history, dating back to ancient civilizations who used snow and ice to create cooling concoctions, the combination of mango and strawberry is a more modern, globally inspired delight. Mangoes, revered in many cultures for their sweetness and nutritional benefits, pair beautifully with the familiar and beloved strawberry, creating a harmonious blend of flavors that appeals to everyone.
What makes this Mango Strawberry Sorbet so irresistible? It’s the perfect balance of sweet and tart, the incredibly smooth texture that melts in your mouth, and the sheer convenience of making it at home. Forget store-bought versions loaded with artificial ingredients; this recipe allows you to control exactly what goes into your sorbet, ensuring a healthy and delicious treat for yourself and your loved ones. Plus, it’s naturally vegan and gluten-free, making it a crowd-pleasing option for any occasion. Get ready to whip up a batch of sunshine in a bowl!

Ingredients:
- 4 cups ripe mango chunks (about 2 large mangoes)
- 2 cups fresh strawberries, hulled
- ½ cup granulated sugar (adjust to taste depending on the sweetness of the fruit)
- ¼ cup water
- 2 tablespoons lime juice (freshly squeezed is best!)
- Pinch of sea salt
Preparing the Mango Strawberry Base:
Okay, let’s get started! The key to a fantastic sorbet is using the ripest, most flavorful fruit you can find. Trust me, it makes all the difference. We’re aiming for a smooth, vibrant base that will freeze into a refreshing treat.
- Prep the Mangoes: First things first, peel and chop your mangoes into roughly 1-inch chunks. Don’t worry about being too precise; they’re going into the blender anyway. Make sure you remove the pit completely. Nobody wants a mango pit surprise in their sorbet!
- Prep the Strawberries: Hull your strawberries. This just means removing the green leafy part at the top. I usually just use a paring knife or a strawberry huller if I’m feeling fancy. Then, cut the strawberries in half or quarters, depending on their size. You want them to be roughly the same size as the mango chunks so they blend evenly.
- Combine Fruit and Sugar: In a large bowl, combine the mango chunks and strawberries. Sprinkle the granulated sugar over the fruit. The sugar not only adds sweetness but also helps to draw out the natural juices from the fruit, which will contribute to a smoother sorbet texture.
- Macerate the Fruit: Gently toss the fruit and sugar together. Cover the bowl with plastic wrap and let it sit in the refrigerator for at least 30 minutes, or even better, for an hour. This process, called maceration, allows the sugar to dissolve and the fruit to release its juices. You’ll notice a lovely syrupy liquid forming at the bottom of the bowl. This is exactly what we want!
- Blend Until Smooth: Now, it’s blending time! Transfer the fruit mixture, including all the syrupy liquid, to a high-powered blender or food processor. Add the water, lime juice, and a pinch of sea salt. The lime juice brightens the flavors and the salt enhances the sweetness. Blend until completely smooth. This might take a minute or two, depending on your blender. You want to make sure there are no chunks of fruit remaining. The mixture should be a beautiful, vibrant pink-orange color.
- Taste and Adjust: Give the blended mixture a taste. This is your chance to adjust the sweetness. If it’s not sweet enough for your liking, add a little more sugar, a tablespoon at a time, and blend again until dissolved. Remember, the flavor will be slightly less intense once it’s frozen, so it’s better to err on the side of slightly sweeter.
- Strain (Optional): For an ultra-smooth sorbet, you can strain the mixture through a fine-mesh sieve. This will remove any small seeds or fibers that might have escaped the blender. However, this step is optional. I usually skip it because I don’t mind a little bit of texture.
Churning the Sorbet:
This is where the magic happens! An ice cream maker is essential for achieving that perfect sorbet texture – light, airy, and not too icy. If you don’t have one, don’t worry, I’ll give you an alternative method later on.
- Chill the Mixture: Pour the blended fruit mixture into a container with a lid. Cover and refrigerate for at least 4 hours, or preferably overnight. This is crucial for ensuring that the sorbet freezes properly in the ice cream maker. The colder the mixture, the finer the ice crystals will be, resulting in a smoother sorbet.
- Prepare the Ice Cream Maker: Follow the manufacturer’s instructions for your ice cream maker. Most ice cream makers require you to freeze the bowl for at least 24 hours before use. Make sure the bowl is completely frozen solid before you start churning.
- Churn the Sorbet: Once the bowl is frozen and the fruit mixture is chilled, pour the fruit mixture into the ice cream maker. Turn on the machine and let it churn according to the manufacturer’s instructions. This usually takes about 20-30 minutes. The sorbet will gradually thicken and become a soft-serve consistency.
- Check the Consistency: After about 20 minutes, check the consistency of the sorbet. It should be thick and creamy, but still slightly soft. If it’s too soft, continue churning for a few more minutes. Be careful not to over-churn, as this can result in a grainy texture.
Freezing and Serving:
Almost there! Now we just need to firm up the sorbet in the freezer before we can enjoy it.
- Transfer to a Freezer-Safe Container: Transfer the churned sorbet to a freezer-safe container. I like to use a loaf pan or a plastic container with a tight-fitting lid.
- Freeze to Harden: Cover the container tightly and freeze for at least 2-3 hours, or until the sorbet is firm enough to scoop. The longer you freeze it, the harder it will become.
- Soften Before Serving: Before serving, let the sorbet sit at room temperature for about 5-10 minutes to soften slightly. This will make it easier to scoop.
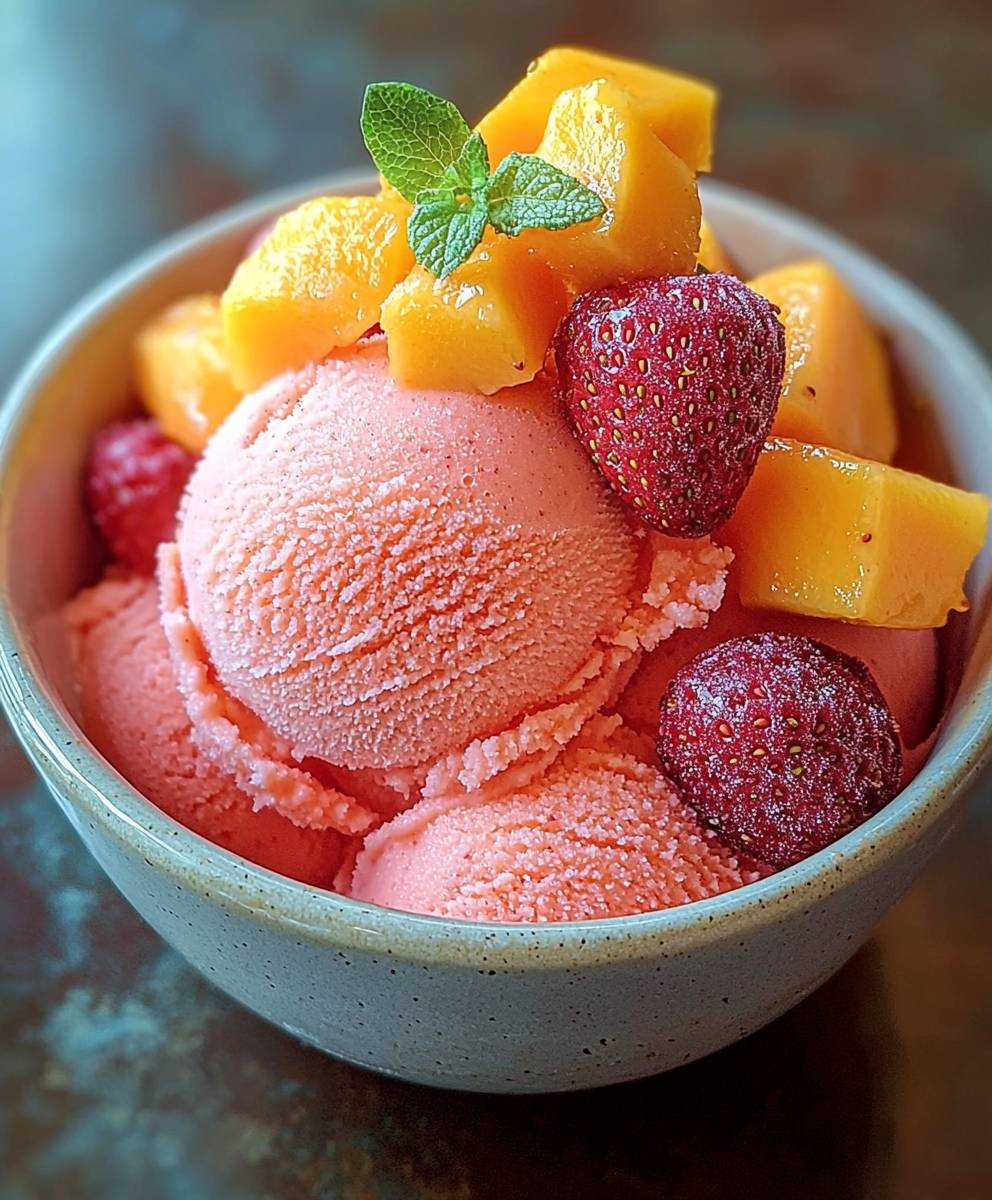
- Serve and Enjoy!: Scoop the sorbet into bowls or cones and enjoy immediately! You can garnish it with fresh strawberries, mango slices, or a sprig of mint for an extra touch of elegance.
No Ice Cream Maker? No Problem!
If you don’t have an ice cream maker, you can still make this sorbet, although the texture might be slightly different. Here’s how:
- Freeze in a Shallow Dish: Pour the chilled fruit mixture into a shallow, freezer-safe dish, such as a baking pan.
- Freeze and Stir: Freeze for about 30 minutes, or until the edges start to freeze. Remove from the freezer and use a fork to break up the ice crystals and stir the mixture vigorously.
- Repeat: Return the dish to the freezer and repeat the freezing and stirring process every 30 minutes for about 2-3 hours, or until the sorbet is frozen to your desired consistency. This process helps to break up the ice crystals and create a smoother texture.
- Soften and Serve: Before serving, let the sorbet sit at room temperature for about 5-10 minutes to soften slightly. Scoop and enjoy!
Tips for the Best Mango Strawberry Sorbet:
- Use Ripe Fruit: As I mentioned before, the key to a great sorbet is using ripe, flavorful fruit. Look for mangoes that are slightly soft to the touch and have a fragrant aroma. Strawberries should be bright red and plump.
- Adjust the Sweetness: The amount of sugar you need will depend on the sweetness of your fruit. Taste the blended mixture and adjust accordingly.
- Don’t Over-Churn: Over-churning the sorbet can result in a grainy texture. Stop churning when it reaches a soft-serve consistency.
- Store Properly: Store leftover sorbet in a freezer-safe container with a tight-fitting lid. It will keep in the freezer for up to a week.
- Get Creative with Flavors: Feel free to experiment with other fruits and flavors. You could add a splash of rum or vodka for a boozy sorbet, or try adding a pinch of chili powder for a spicy kick.
Conclusion:
This Mango Strawberry Sorbet isn’t just another dessert; it’s a vibrant explosion of summer flavors that will tantalize your taste buds and leave you feeling refreshed. The combination of sweet, juicy mangoes and tangy strawberries creates a symphony of taste that’s both satisfying and guilt-free. Trust me, once you try this, you’ll be making it all season long!
But why is this recipe a must-try? It’s incredibly easy to make, requiring minimal ingredients and effort. Forget complicated ice cream makers and lengthy churning processes. This sorbet comes together quickly in your blender or food processor, making it perfect for those spontaneous dessert cravings or last-minute gatherings. Plus, it’s naturally vegan and gluten-free, making it a crowd-pleaser for everyone, regardless of dietary restrictions.
Beyond its simplicity and inclusivity, the real magic lies in the taste. The natural sweetness of the fruits means you can avoid excessive added sugars, making it a healthier alternative to store-bought sorbets. You control the ingredients, ensuring a pure and delicious treat that you can feel good about serving to your family and friends.
Looking for serving suggestions? The possibilities are endless! Serve it in elegant dessert glasses for a sophisticated touch, or simply scoop it into bowls for a casual treat. It’s fantastic on its own, but you can also elevate it with a few simple additions. A sprig of fresh mint adds a refreshing aroma and visual appeal. A drizzle of honey or agave nectar can enhance the sweetness, while a sprinkle of toasted coconut flakes provides a delightful textural contrast.
For variations, consider adding a squeeze of lime juice for an extra zing, or a pinch of ginger for a subtle warmth. You could also experiment with other fruits, such as raspberries, blueberries, or peaches, to create your own unique sorbet blends. If you’re feeling adventurous, try adding a splash of rum or vodka for an adult-friendly twist. Just remember to adjust the liquid accordingly to maintain the desired consistency.
Another fun variation is to layer the Mango Strawberry Sorbet with other frozen treats, like coconut milk ice cream or a dairy-free yogurt parfait. This creates a visually stunning and incredibly delicious dessert that’s perfect for special occasions. You could even use it as a topping for waffles or pancakes for a summery breakfast treat.
I truly believe that this recipe is a game-changer. It’s a simple, healthy, and incredibly delicious way to enjoy the flavors of summer. It’s a recipe that you’ll turn to again and again, whether you’re looking for a quick and easy dessert, a refreshing snack, or a crowd-pleasing treat for your next gathering.
So, what are you waiting for? Grab your mangoes and strawberries, and get ready to whip up a batch of this amazing sorbet. I’m confident that you’ll love it as much as I do.
And most importantly, I want to hear about your experience! Did you try the recipe? Did you make any variations? What did your family and friends think? Share your photos and comments in the comments section below. I can’t wait to see your creations and hear your feedback. Happy sorbet-making! Let me know if you have any questions, and I’ll do my best to help. Enjoy!
Mango Strawberry Sorbet: A Refreshing Summer Dessert Recipe
Refreshing Mango Strawberry Sorbet, bursting with fruity flavors. A perfect homemade treat for a hot day!
Ingredients
- 4 cups ripe mango chunks (about 2 large mangoes)
- 2 cups fresh strawberries, hulled
- ½ cup granulated sugar (adjust to taste depending on the sweetness of the fruit)
- ¼ cup water
- 2 tablespoons lime juice (freshly squeezed is best!)
- Pinch of sea salt
Instructions
- Prep the Mangoes: Peel and chop mangoes into roughly 1-inch chunks, removing the pit.
- Prep the Strawberries: Hull strawberries and cut them in half or quarters.
- Combine Fruit and Sugar: In a large bowl, combine mango chunks and strawberries. Sprinkle with sugar.
- Macerate the Fruit: Gently toss fruit and sugar. Cover and refrigerate for at least 30 minutes (or up to an hour).
- Blend Until Smooth: Transfer fruit mixture (including liquid) to a blender or food processor. Add water, lime juice, and salt. Blend until completely smooth.
- Taste and Adjust: Taste and add more sugar if needed, blending again until dissolved.
- Strain (Optional): For an ultra-smooth sorbet, strain the mixture through a fine-mesh sieve.
- Chill the Mixture: Pour the blended fruit mixture into a container with a lid. Cover and refrigerate for at least 4 hours, or preferably overnight.
- Prepare the Ice Cream Maker: Follow the manufacturer’s instructions for your ice cream maker.
- Churn the Sorbet: Pour the fruit mixture into the ice cream maker. Turn on the machine and let it churn according to the manufacturer’s instructions (usually 20-30 minutes).
- Check the Consistency: Check the consistency of the sorbet. It should be thick and creamy, but still slightly soft.
- Transfer to a Freezer-Safe Container: Transfer the churned sorbet to a freezer-safe container.
- Freeze to Harden: Cover the container tightly and freeze for at least 2-3 hours, or until the sorbet is firm enough to scoop.
- Soften Before Serving: Before serving, let the sorbet sit at room temperature for about 5-10 minutes to soften slightly.
- Serve and Enjoy!: Scoop the sorbet into bowls or cones and enjoy immediately!
Notes
- Use ripe, flavorful fruit for the best results.
- Adjust the amount of sugar based on the sweetness of your fruit.
- Don’t over-churn the sorbet, as it can result in a grainy texture.
- If you don’t have an ice cream maker, freeze the mixture in a shallow dish, stirring every 30 minutes for 2-3 hours to break up ice crystals.
- Store leftover sorbet in a freezer-safe container for up to a week.
- Get creative with flavors by adding rum, vodka, or chili powder.