
Jalapeno Strawberry Jam: Prepare to have your taste buds tantalized! Imagine spreading a vibrant, ruby-red jam across your morning toast, the initial sweetness of ripe strawberries giving way to a delightful, lingering warmth. This isn’t your grandmother’s preserve; it’s a sophisticated, sweet-and-spicy condiment that will elevate everything from breakfast to appetizers.
The concept of combining sweet and spicy flavors has roots stretching back centuries, with many cultures incorporating chili peppers into fruit-based sauces and relishes. While the exact origins of jalapeno strawberry jam are somewhat hazy, its modern popularity likely stems from a desire for more adventurous and complex flavor profiles. It’s a testament to the culinary creativity that thrives when seemingly disparate ingredients are brought together in perfect harmony.
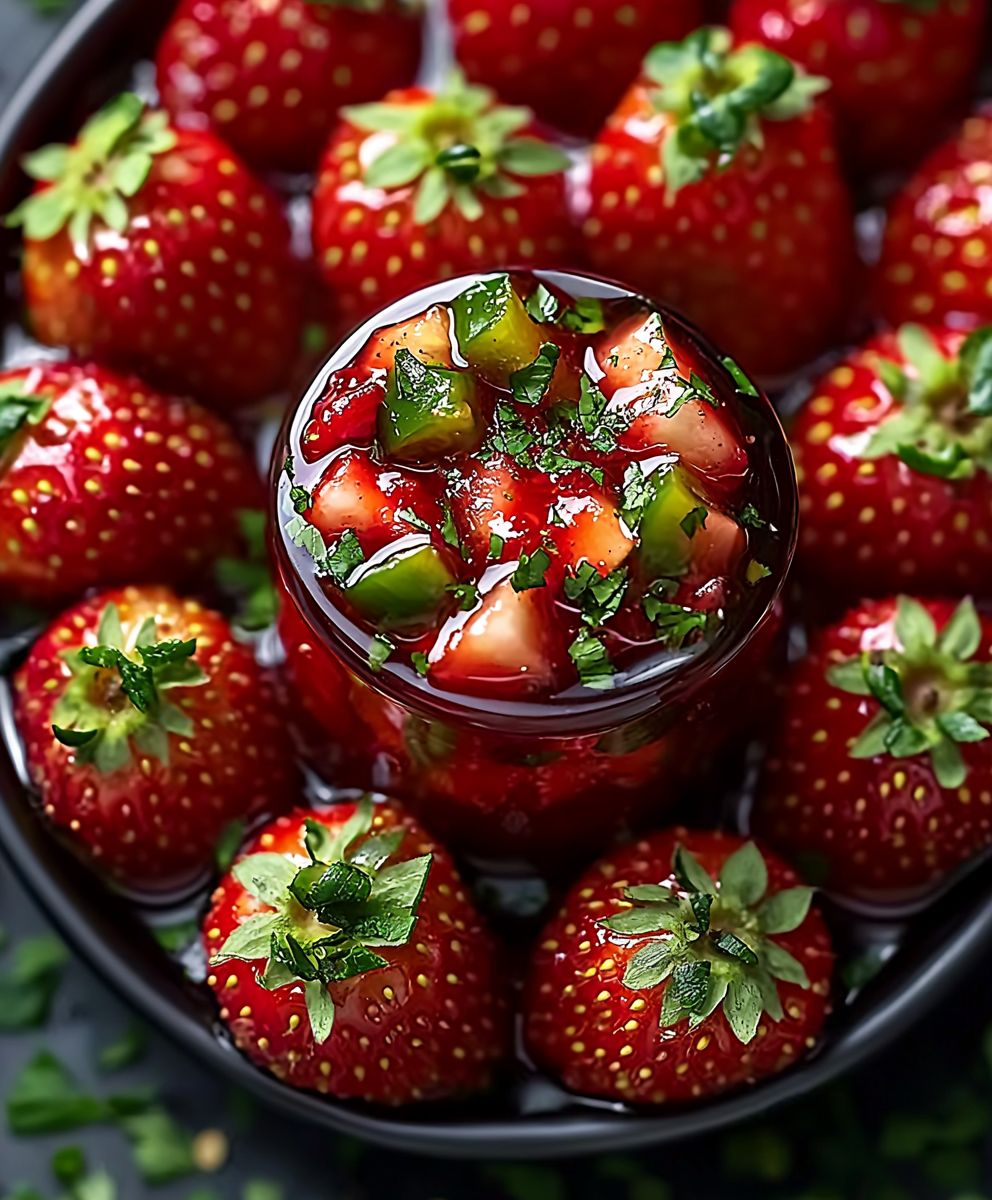
People adore this jam for its unexpected yet incredibly satisfying flavor combination. The sweetness of the strawberries provides a familiar comfort, while the jalapenos add a playful kick that keeps you coming back for more. The texture is also key – a smooth, spreadable consistency that’s perfect for pairing with creamy cheeses, grilled meats, or even swirling into yogurt. Plus, making your own jalapeno strawberry jam is surprisingly easy, allowing you to control the level of heat and sweetness to perfectly suit your preferences. Get ready to experience a flavor explosion that will redefine your definition of jam!

Ingredients:
- 6 cups hulled and quartered fresh strawberries
- 2-4 fresh jalapeño peppers, stemmed, seeded, and finely minced (adjust to your spice preference)
- 1/4 cup lemon juice, freshly squeezed
- 1 package (1.75 ounces) powdered pectin
- 5 1/2 cups granulated sugar
- 1/4 cup water
- 1/2 teaspoon butter (optional, to reduce foaming)
Preparing the Jalapeños and Strawberries:
Okay, let’s get started! The first step is all about prepping our key ingredients. This is where we control the heat level, so pay close attention!
- Prepare the Strawberries: Gently wash your strawberries under cool water. Hull them (remove the green tops) and then quarter them. We want them in relatively uniform pieces so they cook evenly. Place the quartered strawberries into a large, heavy-bottomed pot or Dutch oven. This is important because we need even heat distribution to prevent scorching.
- Handle the Jalapeños with Care: This is crucial! Wear gloves when handling jalapeños. Trust me, you don’t want to accidentally rub your eyes later. Remove the stems from the jalapeños. Now, for the heat control: remove the seeds and membranes completely if you want a milder jam. Leave some seeds and membranes in for a medium heat, or leave everything in for a fiery jam. Finely mince the jalapeños. The finer you mince them, the more evenly the heat will distribute throughout the jam.
- Combine Strawberries and Jalapeños: Add the minced jalapeños to the pot with the strawberries. Stir them together gently to ensure the jalapeños are evenly distributed.
Cooking the Jam:
Now comes the fun part – transforming our strawberries and jalapeños into delicious jam! This requires a little patience and attention, but the reward is well worth it.
- Add Lemon Juice and Pectin: Stir in the lemon juice. The lemon juice not only adds a bright flavor but also helps with the setting process of the jam. Next, in a separate small bowl, combine the powdered pectin with 1/4 cup of sugar. This helps prevent the pectin from clumping when added to the fruit. Add the pectin-sugar mixture to the strawberry-jalapeño mixture and stir well to combine.
- Bring to a Rolling Boil: Place the pot over medium-high heat. Add the 1/4 cup of water. Stir constantly to prevent sticking and scorching. Bring the mixture to a full rolling boil that cannot be stirred down. This is a crucial step for activating the pectin.
- Add the Remaining Sugar: Once you’ve reached a rolling boil, quickly add the remaining granulated sugar all at once. Stir vigorously to dissolve the sugar completely.
- Boil Hard for One Minute: Return the mixture to a full rolling boil that cannot be stirred down. Boil hard for exactly one minute, stirring constantly. Use a timer to ensure accuracy. Overcooking can result in a tough jam, while undercooking can prevent it from setting properly. Add the butter (if using) to reduce foaming.
- Test for Setting: After boiling for one minute, remove the pot from the heat. To test for setting, place a small spoonful of the jam onto a chilled plate (you can chill a plate in the freezer beforehand). Let it sit for about 30 seconds. Then, gently push the jam with your finger. If it wrinkles slightly, it’s set. If it’s still runny, return the pot to the heat and boil for another 30 seconds, then test again. Repeat as needed, but be careful not to overcook.
Canning the Jam (Optional):
If you want to store your jam for longer than a few weeks, canning is the way to go. This process ensures a safe and shelf-stable product. If you plan to eat the jam within a few weeks, you can skip this step and simply store it in the refrigerator.
- Prepare Jars and Lids: Wash your canning jars, lids, and bands in hot, soapy water. Rinse well. Sterilize the jars by placing them in a boiling water bath for 10 minutes. Keep the jars hot until ready to fill. You can also sterilize them in a dishwasher with a sterilization cycle. Place the lids in a small saucepan and simmer (do not boil) in hot water to soften the sealing compound.
- Fill the Jars: Ladle the hot jam into the hot sterilized jars, leaving 1/4 inch headspace (the space between the top of the jam and the rim of the jar). Use a clean, damp cloth to wipe the rims of the jars to remove any spills or drips.
- Apply Lids and Bands: Place a lid on each jar, centering it carefully. Screw on a band until it is fingertip tight (snug, but not overly tight).
- Process in a Boiling Water Bath: Place the filled jars in a boiling water bath canner. The water should cover the jars by at least 1 inch. Bring the water to a rolling boil and process for 10 minutes for half-pint or pint jars. Adjust processing time for altitude: add 1 minute for every 1,000 feet above sea level.
- Cool and Check Seals: After processing, turn off the heat and carefully remove the jars from the canner using a jar lifter. Place them on a towel-lined surface, leaving space between the jars. Let the jars cool completely, undisturbed, for 12-24 hours. As the jars cool, you should hear a popping sound as the lids seal. After 24 hours, check the seals by pressing down on the center of each lid. If the lid doesn’t flex or pop back up, it’s sealed. If a lid flexes, it’s not sealed and the jar should be refrigerated and used within a few weeks, or reprocessed with a new lid.
- Store the Jam: Remove the bands from the sealed jars (this prevents rust). Wipe the jars clean and label them with the date. Store the jars in a cool, dark place. Properly canned jam can be stored for up to a year.
Serving and Storage:
Whether you canned your jam or not, here’s how to best enjoy and store your creation.
- Refrigerate After Opening: Once a jar of jam is opened, it must be refrigerated. It will typically last for several weeks in the refrigerator.
- Serving Suggestions: This jalapeño strawberry jam is incredibly versatile! Spread it on toast, biscuits, or scones. Use it as a glaze for grilled meats or poultry. Serve it with cheese and crackers for a sweet and spicy appetizer. Add a dollop to yogurt or oatmeal for a flavor boost. Get creative and experiment!
- Freezing (Not Recommended): While you *can* freeze jam, it’s not generally recommended as it can affect the texture. The jam may become slightly watery upon thawing. If you do choose to freeze it, use freezer-safe containers and leave some headspace to allow for expansion.
Troubleshooting:
Sometimes, things don’t go exactly as planned. Here are a few common issues and how to address them.
- Jam Didn’t Set: This is usually due to insufficient pectin, not enough acid (lemon juice), or undercooking. If your jam is runny, you can try recooking it with more pectin and lemon juice. Follow the instructions on the pectin package carefully.
- Jam is Too Thick: This is usually due to overcooking. Unfortunately, there’s not much you can do to fix this. Be sure to monitor the cooking time closely and test for setting frequently.
- Mold Growth: If you see mold growing on your jam, discard it immediately. This is a sign that the jar wasn’t properly sealed or that the jam was contaminated.
- Foaming: Foaming is a common occurrence when making jam. Adding a small amount of butter can help reduce foaming. You can also skim off the foam with a spoon before ladling the jam into jars.
Spice Level Adjustment:
The beauty of this recipe is that you can customize the heat level to your liking. Here are some tips for adjusting the spice.
- Milder Jam: Remove all the seeds and membranes from the jalapeños. You can also use fewer jalapeños.
- Medium Jam: Leave some of the seeds and membranes in the jalapeños.
- Spicy Jam: Leave all the seeds and membranes in the jalapeños. You can also use more jalapeños or choose a hotter variety of jalapeño.
- Experiment: Don’t be afraid to experiment with different types of peppers. Habaneros or serranos can add a different level of heat and flavor. Just
Conclusion:
So, there you have it! This Jalapeno Strawberry Jam isn’t just another condiment; it’s a flavor explosion waiting to happen. It’s sweet, it’s spicy, and it’s surprisingly versatile. I truly believe this recipe is a must-try for anyone looking to add a little zing to their culinary repertoire. The unique combination of sweet strawberries and the subtle heat of jalapenos creates a jam that’s both comforting and exciting.
Why is it a must-try? Because it’s unexpected! It’s a conversation starter. It’s the kind of thing that makes people say, “Wow, what is this?” And trust me, they’ll be asking for more. It elevates simple dishes to something special, and it’s incredibly easy to make. You don’t need to be a master chef to whip up a batch of this deliciousness.
But the best part? The possibilities are endless!
Serving Suggestions and Variations:
Don’t limit yourself to just spreading it on toast (although, let me tell you, it’s amazing on toast!). Think outside the jar!
* Cheese Board Champion: This jam is a fantastic addition to any cheese board. Pair it with creamy brie, sharp cheddar, or tangy goat cheese for a truly unforgettable experience. The sweetness cuts through the richness of the cheese, while the jalapeno adds a delightful kick.
* Grilled Cheese Upgrade: Elevate your grilled cheese game by adding a layer of this jam. Trust me, it’s a game-changer.
* Meat Glaze Magic: Use it as a glaze for grilled chicken, pork, or even salmon. The sweet and spicy combination creates a beautiful caramelized crust and adds a ton of flavor.
* Breakfast Boost: Swirl it into your yogurt or oatmeal for a flavorful and exciting breakfast.
* Cocktail Companion: Get creative and use it in cocktails! A little bit of this jam can add a unique twist to margaritas or other fruity drinks.
* Spice Level Adjustment: If you’re not a fan of too much heat, you can easily adjust the amount of jalapeno to your liking. Remove the seeds and membranes for a milder flavor, or add more for an extra kick.
* Berry Variations: While I love the classic strawberry, feel free to experiment with other berries like raspberries or blackberries. Just be sure to adjust the sugar accordingly.
* Herb Infusion: Try adding a sprig of fresh rosemary or thyme to the jam while it’s simmering for an extra layer of flavor.I’m confident that once you try this recipe, you’ll be hooked. It’s a fun and easy way to add a little excitement to your cooking. The balance of sweet and spicy is truly addictive, and the versatility of this Jalapeno Strawberry Jam makes it a staple in my kitchen.
So, what are you waiting for? Grab some strawberries and jalapenos and get cooking! I can’t wait to hear what you think.
Please, please, please try this recipe! And when you do, I’d love to hear about your experience. Share your photos, your variations, and your serving suggestions in the comments below. Let’s create a community of jam lovers! I’m excited to see what culinary creations you come up with using this recipe. Happy jamming!
Jalapeno Strawberry Jam: Sweet Heat You'll Love!
Sweet and spicy strawberry jam with a kick of fresh jalapeños. Perfect on toast, biscuits, or as a glaze for meats.
Ingredients
- 6 cups hulled and quartered fresh strawberries
- 2-4 fresh jalapeño peppers, stemmed, seeded, and finely minced (adjust to your spice preference)
- 1/4 cup lemon juice, freshly squeezed
- 1 package (1.75 ounces) powdered pectin
- 5 1/2 cups granulated sugar
- 1/4 cup water
- 1/2 teaspoon butter (optional, to reduce foaming)
Instructions
- Prepare the Strawberries: Gently wash strawberries, hull, and quarter them. Place in a large, heavy-bottomed pot or Dutch oven.
- Handle the Jalapeños with Care: Wear gloves! Remove stems from jalapeños. Remove seeds and membranes for milder jam, leave some for medium heat, or leave all for spicy jam. Finely mince the jalapeños.
- Combine Strawberries and Jalapeños: Add minced jalapeños to the pot with strawberries. Stir gently.
- Add Lemon Juice and Pectin: Stir in lemon juice. In a separate bowl, combine pectin with 1/4 cup of sugar. Add to the strawberry-jalapeño mixture and stir well.
- Bring to a Rolling Boil: Place the pot over medium-high heat. Add the 1/4 cup of water. Stir constantly. Bring to a full rolling boil that cannot be stirred down.
- Add the Remaining Sugar: Quickly add the remaining sugar all at once. Stir vigorously to dissolve.
- Boil Hard for One Minute: Return to a full rolling boil. Boil hard for exactly one minute, stirring constantly. Add butter (if using).
- Test for Setting: Remove from heat. Place a spoonful on a chilled plate. Let sit for 30 seconds. Push with your finger. If it wrinkles, it’s set. If runny, return to heat and boil for 30 seconds, then test again.
- (Optional) Canning:
- Wash and sterilize jars, lids, and bands.
- Ladle hot jam into hot jars, leaving 1/4 inch headspace. Wipe rims.
- Place lids and bands on jars, fingertip tight.
- Process in a boiling water bath for 10 minutes (adjust for altitude: add 1 minute for every 1,000 feet above sea level).
- Cool completely for 12-24 hours. Check seals.
- Remove bands, wipe jars, label, and store in a cool, dark place.
- Serving and Storage: Refrigerate after opening. Spread on toast, use as a glaze, or serve with cheese.
Notes
- Spice Level: Adjust the amount of jalapeño seeds and membranes to control the heat.
- Troubleshooting:
- Jam Didn’t Set: Recook with more pectin and lemon juice.
- Jam is Too Thick: Overcooked.
- Mold Growth: Discard immediately.
- Foaming: Add butter or skim off foam.
- Freezing: Not recommended, as it can affect the texture.