
Hawaiian Coconut Pudding, or Haupia as it’s known in the islands, is more than just a dessert; it’s a taste of paradise in every spoonful. Imagine a creamy, cool, and subtly sweet treat that melts in your mouth, transporting you to sun-kissed beaches and swaying palm trees. Have you ever wanted to experience the authentic flavors of Hawaii without leaving your kitchen? Well, you’re in for a treat!
Haupia holds a special place in Hawaiian culture, often served at luaus and other celebrations. Its simple elegance belies its rich history, deeply rooted in the traditions of the Polynesian people. Originally, it was made with pia (arrowroot) starch, but modern versions commonly use cornstarch, making it incredibly easy to prepare at home.
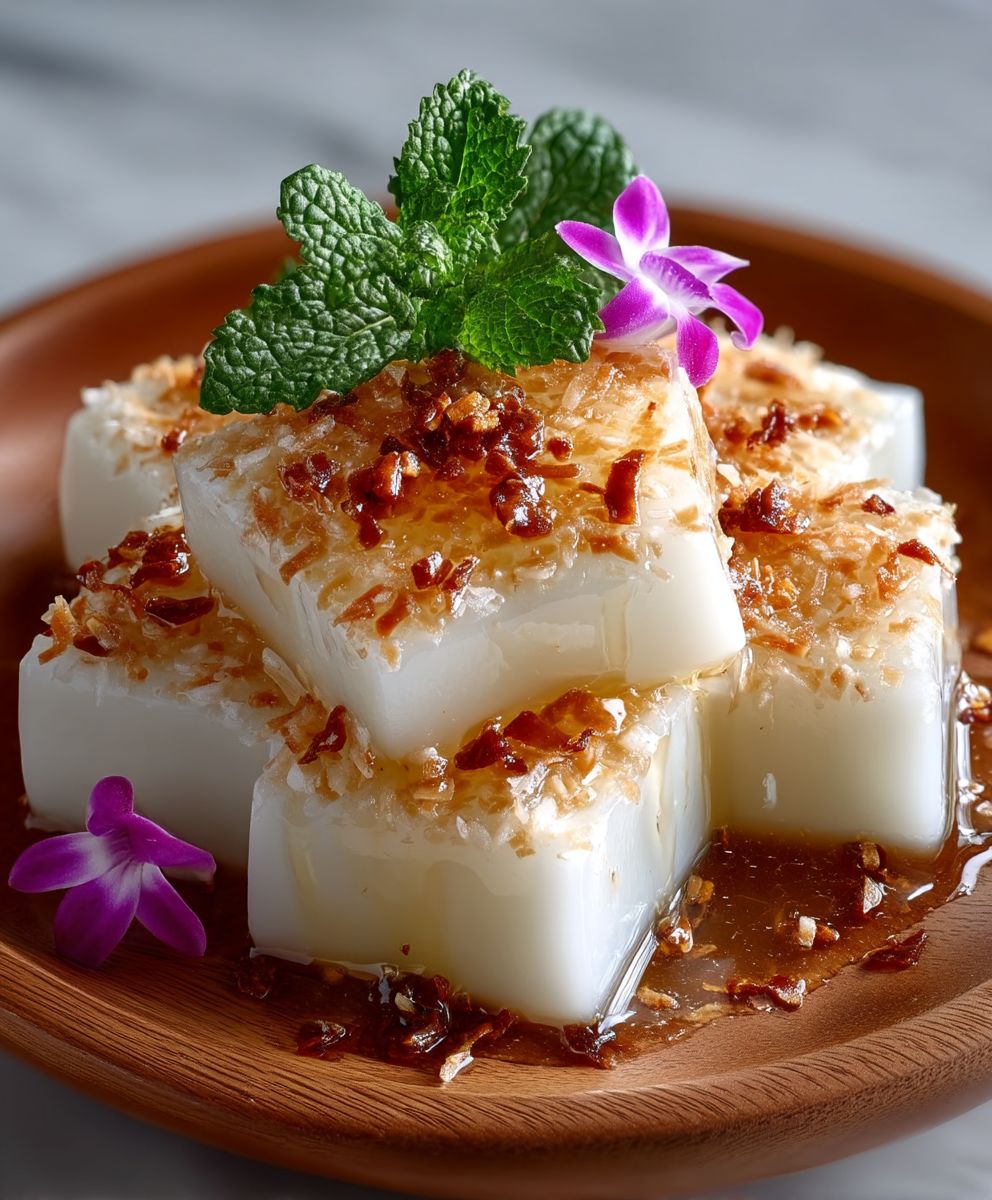
What makes Hawaiian Coconut Pudding so beloved? It’s the perfect balance of creamy texture and delicate coconut flavor. It’s light, refreshing, and not overly sweet, making it a delightful dessert after any meal. Plus, it’s incredibly versatile! Enjoy it chilled on its own, use it as a filling for pies and cakes, or even cut it into squares for a delightful bite-sized treat. I find it’s the perfect dessert to bring to potlucks because it’s always a crowd-pleaser and so easy to transport. Let’s dive into this easy recipe and bring a little bit of Aloha into your home!

Ingredients:
- 1 (13.5 ounce) can full-fat coconut milk
- 1 (14 ounce) can sweetened condensed milk
- 1/2 cup granulated sugar
- 1/4 cup cornstarch
- 1/4 teaspoon salt
- 1 teaspoon vanilla extract
- 1/2 cup shredded coconut, toasted (for garnish)
- Optional: Fresh pineapple chunks, for garnish
- Optional: Maraschino cherries, for garnish
Preparing the Coconut Pudding Base
Okay, let’s get started! This Hawaiian Coconut Pudding, or Haupia as it’s traditionally known, is surprisingly simple to make. The key is to get the base right, so follow these steps carefully.
- Combine the Coconut Milk and Sweetened Condensed Milk: In a medium-sized saucepan, pour in the entire can of full-fat coconut milk and the entire can of sweetened condensed milk. Make sure to scrape the bottom and sides of the cans to get every last bit of that sweet, creamy goodness!
- Add Sugar, Cornstarch, and Salt: Now, add the granulated sugar, cornstarch, and salt to the saucepan. The cornstarch is crucial for thickening the pudding, so don’t skip it! The salt helps to balance the sweetness and enhance the coconut flavor.
- Whisk Thoroughly: This is important! Using a whisk, vigorously combine all the ingredients until the cornstarch is completely dissolved and there are no lumps. This will ensure a smooth and creamy pudding. If you skip this step and have lumps, your pudding will not be as enjoyable. Trust me, I’ve been there!
Cooking the Pudding
Now comes the cooking process. Patience is key here. We want to cook the pudding slowly and evenly to prevent scorching and ensure a perfectly smooth texture.
- Cook Over Medium Heat: Place the saucepan over medium heat. It’s important to use medium heat to avoid burning the pudding.
- Stir Constantly: This is the most important part! Using a whisk or a heat-resistant spatula, stir the mixture constantly. Don’t stop stirring! This will prevent the pudding from sticking to the bottom of the pan and forming lumps.
- Watch for Thickening: As the mixture heats up, it will gradually begin to thicken. This usually takes about 5-10 minutes, but it can vary depending on your stove. Keep stirring!
- Continue Cooking Until Thickened: Continue cooking and stirring until the pudding has thickened to the consistency of a thick custard or yogurt. It should coat the back of a spoon and leave a clear line when you run your finger through it. You’ll notice it starts to bubble gently as it thickens.
- Reduce Heat if Necessary: If you notice the pudding is thickening too quickly or starting to scorch, reduce the heat to low and continue stirring. It’s better to cook it slowly and evenly than to rush the process.
- Remove from Heat: Once the pudding has reached the desired consistency, remove it from the heat immediately.
- Stir in Vanilla Extract: Stir in the vanilla extract. This adds a lovely aroma and enhances the overall flavor of the pudding.
Cooling and Setting the Pudding
Now that the pudding is cooked, it’s time to let it cool and set. This is where the magic happens! The pudding will firm up as it cools, transforming from a thick liquid into a creamy, sliceable dessert.
- Pour into a Dish: Pour the hot pudding into a 8×8 inch square baking dish or individual serving dishes. If you’re using a baking dish, make sure it’s lightly greased to prevent the pudding from sticking.
- Smooth the Surface: Use a spatula to smooth the surface of the pudding. This will ensure an even and attractive presentation.
- Cover with Plastic Wrap: Place a piece of plastic wrap directly on the surface of the pudding. This will prevent a skin from forming as it cools. Make sure the plastic wrap is touching the pudding to create a tight seal.
- Refrigerate for at Least 4 Hours: Refrigerate the pudding for at least 4 hours, or preferably overnight. This will allow it to cool completely and set properly. The longer it chills, the firmer it will become.
Toasting the Coconut (Optional but Recommended!)
Toasting the coconut adds a wonderful nutty flavor and crispy texture to the pudding. It’s an optional step, but I highly recommend it!
- Preheat Oven to 350°F (175°C): Preheat your oven to 350°F (175°C).
- Spread Coconut on a Baking Sheet: Spread the shredded coconut in a single layer on a baking sheet.
- Toast in the Oven: Bake the coconut in the preheated oven for 5-10 minutes, or until it’s lightly golden brown. Keep a close eye on it, as it can burn quickly.
- Stir Occasionally: Stir the coconut occasionally to ensure even toasting.
- Remove from Oven and Let Cool: Remove the toasted coconut from the oven and let it cool completely before using it as a garnish.
Serving and Garnishing
Finally, it’s time to serve and enjoy your homemade Hawaiian Coconut Pudding! Here are some tips for serving and garnishing:
- Cut into Squares or Scoops: Once the pudding is set, cut it into squares or use an ice cream scoop to create individual servings.
- Garnish with Toasted Coconut: Sprinkle the toasted coconut generously over the top of the pudding.
- Add Fresh Pineapple Chunks (Optional): For an extra touch of Hawaiian flavor, garnish with fresh pineapple chunks.
- Add Maraschino Cherries (Optional): Maraschino cherries add a pop of color and sweetness.
- Serve Chilled: Serve the pudding chilled for the best flavor and texture.
- Enjoy! Take a bite and savor the creamy, coconutty goodness of your homemade Hawaiian Coconut Pudding!
Tips for Success
- Use Full-Fat Coconut Milk: For the richest and creamiest pudding, use full-fat coconut milk. Light coconut milk will result in a thinner pudding.
- Don’t Overcook: Be careful not to overcook the pudding, as it can become rubbery. Cook it until it’s thickened to the consistency of a thick custard.
- Chill Thoroughly: Make sure to chill the pudding for at least 4 hours, or preferably overnight, to allow it to set properly.
- Adjust Sweetness to Taste: If you prefer a less sweet pudding, you can reduce the amount of sugar.
- Experiment with Flavors: Feel free to experiment with other flavors, such as chocolate, mango, or passion fruit.
Variations
- Chocolate Haupia: Add 1/4 cup of unsweetened cocoa powder to the saucepan along with the other ingredients.
- Mango Haupia: Puree 1 cup of fresh mango and stir it into the pudding after it’s cooked.
- Passion Fruit Haupia: Stir in 1/4 cup of passion fruit pulp after the pudding is cooked.
Storage Instructions
Store leftover Hawaiian Coconut Pudding in an airtight container in the refrigerator for up to 3 days.
Conclusion:
This Hawaiian Coconut Pudding is more than just a dessert; it’s a mini-vacation for your taste buds! The creamy texture, the sweet coconut flavor, and the subtle hint of tropical sunshine all combine to create an unforgettable experience. I truly believe this recipe is a must-try because it’s incredibly easy to make, uses readily available ingredients, and delivers a taste that’s both comforting and exotic. It’s the perfect way to end a meal, impress your guests, or simply treat yourself to something special.
But don’t just take my word for it! The real magic happens when you bring this recipe to life in your own kitchen. Imagine the aroma of coconut filling your home as it simmers on the stove, the anticipation building as it chills in the refrigerator, and the pure joy of that first spoonful. It’s a sensory experience that’s hard to beat.
And the best part? This recipe is incredibly versatile! While it’s absolutely divine on its own, there are so many ways to customize it to your liking. For a truly decadent treat, try topping it with toasted coconut flakes, a dollop of whipped cream, or a drizzle of honey. If you’re feeling adventurous, add a splash of rum extract for an extra layer of tropical flavor. You could also incorporate fresh fruit like mango, pineapple, or papaya for a burst of freshness and color.
Here are a few serving suggestions to get you started:
Serving Suggestions:
- Serve chilled in individual ramekins for an elegant presentation.
- Layer it with crushed graham crackers and sliced bananas for a Hawaiian-inspired parfait.
- Use it as a filling for coconut cream pies or tarts.
- Top with a scoop of vanilla ice cream for an extra indulgent dessert.
- Garnish with edible flowers for a touch of tropical flair.
Don’t be afraid to experiment and find your own perfect combination! The possibilities are endless. I encourage you to get creative and make this Hawaiian Coconut Pudding your own.
I’m so confident that you’ll love this recipe that I can’t wait to hear about your experience. Did you try any of the variations I suggested? Did you add your own special touch? What did your family and friends think? Please, please, please share your thoughts and photos in the comments below! Your feedback is invaluable, and it helps me to continue creating recipes that you’ll love.
So go ahead, give this recipe a try. I promise you won’t be disappointed. It’s a little taste of paradise, right in your own kitchen. And who knows, it might just become your new favorite dessert! Happy cooking, and I can’t wait to hear all about your Hawaiian Coconut Pudding adventures! Let me know if you have any questions, and I’ll do my best to help. Enjoy!
Hawaiian Coconut Pudding: A Tropical Dessert Recipe
Creamy Hawaiian Coconut Pudding (Haupia) with coconut milk, sweetened condensed milk, and vanilla. Easy tropical dessert!
Ingredients
- 1 (13.5 ounce) can full-fat coconut milk
- 1 (14 ounce) can sweetened condensed milk
- 1/2 cup granulated sugar
- 1/4 cup cornstarch
- 1/4 teaspoon salt
- 1 teaspoon vanilla extract
- 1/2 cup shredded coconut, toasted (for garnish)
- Optional: Fresh pineapple chunks, for garnish
- Optional: Maraschino cherries, for garnish
Instructions
- Combine Ingredients: In a medium saucepan, combine coconut milk, sweetened condensed milk, sugar, cornstarch, and salt.
- Whisk Thoroughly: Whisk vigorously until cornstarch is completely dissolved and there are no lumps.
- Cook Over Medium Heat: Place the saucepan over medium heat.
- Stir Constantly: Stir constantly with a whisk or heat-resistant spatula to prevent sticking and lumps.
- Watch for Thickening: Cook until the mixture thickens to the consistency of a thick custard or yogurt (about 5-10 minutes). It should coat the back of a spoon.
- Reduce Heat if Necessary: If the pudding thickens too quickly or starts to scorch, reduce the heat to low.
- Remove from Heat: Once thickened, remove from heat.
- Stir in Vanilla: Stir in the vanilla extract.
- Pour into Dish: Pour the hot pudding into an 8×8 inch square baking dish (lightly greased) or individual serving dishes.
- Smooth Surface: Smooth the surface with a spatula.
- Cover with Plastic Wrap: Place plastic wrap directly on the surface of the pudding to prevent a skin from forming.
- Refrigerate: Refrigerate for at least 4 hours, or preferably overnight, to allow it to set.
- Toast Coconut (Optional): Preheat oven to 350°F (175°C). Spread shredded coconut on a baking sheet and toast for 5-10 minutes, stirring occasionally, until lightly golden brown. Let cool.
- Serve and Garnish: Cut the pudding into squares or scoops. Garnish with toasted coconut, fresh pineapple chunks, and/or maraschino cherries. Serve chilled.
Notes
- Use full-fat coconut milk for the richest flavor and texture.
- Stir constantly while cooking to prevent sticking and lumps.
- Don’t overcook the pudding, as it can become rubbery.
- Chill thoroughly for at least 4 hours to allow it to set properly.
- Adjust sweetness to taste by reducing the amount of sugar.
- Experiment with flavors like chocolate, mango, or passion fruit.