
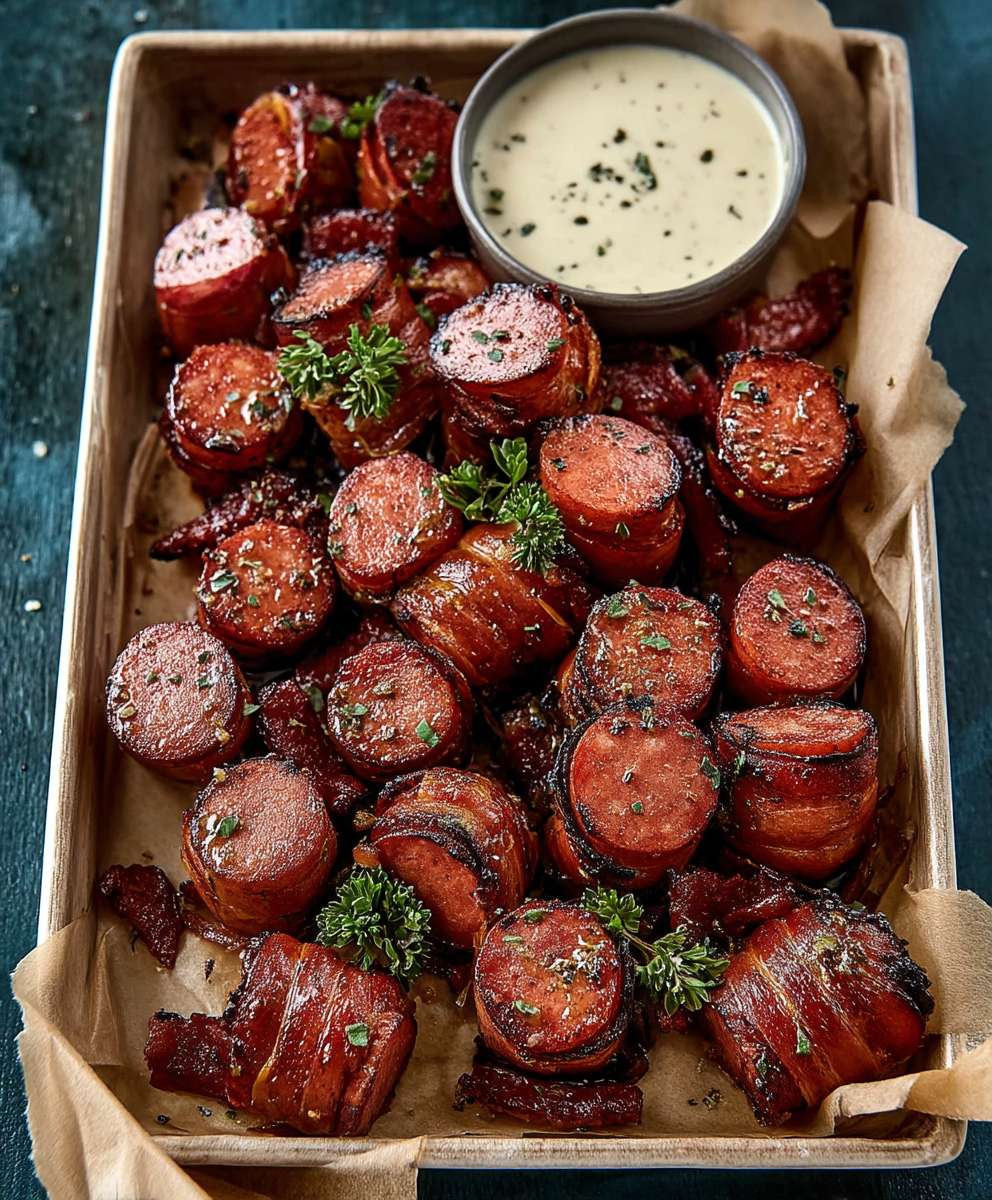
Hasselback Kielbasa Bites: A Deliciously Easy Appetizer
Hasselback Kielbasa Bites are the perfect appetizer for your next gathering, offering a delightful blend of savory and satisfying flavors in a surprisingly simple package. I’ve always loved the elegant presentation of Hasselback potatoes, and adapting that technique to these flavorful kielbasa bites was a revelation! The thinly sliced kielbasa, crisped to perfection, creates a beautiful visual appeal that’s sure to impress your guests, but it’s the taste that truly steals the show.
While the precise origins of the Hasselback technique remain somewhat obscure, its popularity has soared in recent years, thanks to its stunning visual impact and surprisingly easy execution. The technique, characterized by thinly sliced, yet still-intact, food, allows for maximum surface area, resulting in wonderfully crispy exteriors and tender interiors. This method, traditionally applied to potatoes, works exceptionally well with kielbasa, enhancing its natural smoky flavor and juicy texture.
What makes Hasselback Kielbasa Bites so irresistible? It’s the perfect combination of textures and tastes. The crispy, slightly caramelized exterior gives way to a tender, succulent interior, bursting with the savory goodness of the kielbasa. These bites are incredibly easy to prepare, making them ideal for busy weeknights or large gatherings where you want a crowd-pleasing appetizer without spending hours in the kitchen. They’re also incredibly versatile; you can easily customize them with your favorite seasonings and dipping sauces.
So, whether you’re a seasoned chef or a kitchen novice, get ready to experience the magic of Hasselback Kielbasa Bites. This recipe is guaranteed to become a new favorite in your culinary repertoire. Let’s get started!

Ingredients:
- 1 lb Kielbasa sausage, sliced 1/4 inch thick
- 1 cup all-purpose flour
- 1 teaspoon baking powder
- 1/2 teaspoon salt
- 1/4 teaspoon black pepper
- 1/2 teaspoon garlic powder
- 1/4 teaspoon onion powder
- 1 cup milk
- 1 large egg, beaten
- 1/2 cup vegetable oil, for frying
- 1/2 cup bread crumbs
- 1/4 cup grated Parmesan cheese
- 2 tablespoons chopped fresh parsley
- Optional: 1/4 cup shredded cheddar cheese
- Optional: Your favorite dipping sauce (e.g., honey mustard, BBQ sauce)
Preparing the Kielbasa:
- I start by carefully slicing the Kielbasa sausage. I aim for slices about 1/4 inch thick. It’s important not to slice all the way through; leave about 1/8 inch connecting the slices to keep them together. This creates the “Hasselback” effect.
- Once sliced, I gently separate the slices just enough to allow for even cooking and browning. Be careful not to tear the sausage.
Making the Batter:
- In a large bowl, I whisk together the flour, baking powder, salt, black pepper, garlic powder, and onion powder. This ensures all the dry ingredients are evenly distributed.
- In a separate bowl, I whisk together the milk and beaten egg until well combined. This creates a smooth, consistent batter.
- Gradually add the wet ingredients to the dry ingredients, whisking constantly until a smooth batter forms. Avoid overmixing; a few lumps are okay.
- Important Note: The consistency of the batter should be similar to pancake batter – not too thick, not too thin. If it’s too thick, add a tablespoon or two of milk at a time until you reach the desired consistency. If it’s too thin, add a tablespoon or two of flour.
Preparing the Breadcrumb Coating:
- In a shallow dish, I combine the breadcrumbs, Parmesan cheese, and chopped parsley. Mixing these together creates a flavorful and textured coating.
- If using, I add the shredded cheddar cheese to the breadcrumb mixture at this stage. I gently toss everything together to ensure even distribution.
Cooking the Hasselback Kielbasa Bites:
- I heat the vegetable oil in a large skillet over medium-high heat. The oil should be hot enough that a small amount of batter dropped in sizzles immediately.
- I carefully dip each Kielbasa slice into the batter, ensuring it’s fully coated. I then dredge the battered Kielbasa in the breadcrumb mixture, pressing gently to adhere the coating.
- I carefully place the coated Kielbasa slices into the hot oil, ensuring not to overcrowd the pan. Overcrowding will lower the oil temperature and result in greasy, undercooked bites.
- I cook the Kielbasa bites for approximately 2-3 minutes per side, or until they are golden brown and cooked through. I use tongs to gently turn them to ensure even browning.
- As the Kielbasa bites are cooked, I remove them from the skillet and place them on a wire rack or paper towel-lined plate to drain any excess oil. This helps to keep them crispy.
- Important Note: Keep a close eye on the cooking process, as the cooking time may vary depending on the thickness of the Kielbasa slices and the heat of your stove. Adjust the cooking time as needed.
Serving Suggestions:
- Once all the Kielbasa bites are cooked, I serve them immediately. They are best enjoyed hot and fresh.
- I offer a variety of dipping sauces for guests to choose from, such as honey mustard, BBQ sauce, or even a spicy mayo. The options are endless!
- These Hasselback Kielbasa Bites are delicious as an appetizer, snack, or even a fun addition to a game day spread. They are also great served alongside your favorite sides.
- For a more substantial meal, consider serving them with a side salad or some roasted vegetables. The possibilities are endless!
-
Storage:
Leftover Hasselback Kielbasa Bites can be stored in an airtight container in the refrigerator for up to 3 days. Reheat them in a skillet or oven until warmed through.
-
Freezing:
You can also freeze the cooked Kielbasa bites for longer storage. Allow them to cool completely before placing them in a freezer-safe bag or container. They can be stored in the freezer for up to 3 months. Reheat from frozen in the oven or microwave.
Conclusion:
So there you have it – my recipe for irresistible Hasselback Kielbasa Bites! I truly believe this recipe is a must-try for several reasons. First, it’s incredibly easy. The Hasselback technique, while seemingly intimidating, is surprisingly simple to master, and the results are stunning. The beautiful, fan-like slices create a wonderfully crispy exterior while keeping the inside juicy and flavorful. Second, it’s incredibly versatile. You can easily adapt this recipe to your own taste preferences and what you have on hand. Need a spicier kick? Add a pinch of cayenne pepper or some chopped jalapeños. Prefer a sweeter flavor profile? A drizzle of honey or maple syrup after cooking would be divine.
Third, and perhaps most importantly, these Hasselback Kielbasa Bites are incredibly delicious! The combination of the crispy exterior, the savory kielbasa, and the flavorful seasonings is simply unbeatable. They’re the perfect appetizer for any gathering, from casual get-togethers to more formal parties. They’re also fantastic as a standalone snack – I often find myself grabbing a few for a quick and satisfying bite.
Serving Suggestions:
I love serving my Hasselback Kielbasa Bites with a variety of dipping sauces. A creamy horseradish sauce is a classic pairing, but you could also try a spicy mustard, a tangy barbecue sauce, or even a simple sour cream dip with fresh herbs. They also pair beautifully with a crisp, cold beer or a light, fruity wine.
For a more substantial meal, consider serving these bites alongside some roasted vegetables, a fresh salad, or even some creamy mashed potatoes. They’re also a fantastic addition to a charcuterie board, adding a touch of warmth and savory flavor to the mix. The possibilities are truly endless!
Variations to Explore:
Don’t be afraid to experiment with different types of kielbasa! You can use any variety you like, from mild to spicy, smoked to uncured. You can also try substituting other sausages, such as andouille or chorizo, for a completely different flavor profile. Adding different herbs and spices is another great way to customize these bites. Try experimenting with rosemary, thyme, garlic powder, or paprika to create your own unique flavor combination.
For a fun twist, try adding some cheese to the inside of the kielbasa before baking. Cheddar, pepper jack, or even a creamy goat cheese would all be delicious additions. You could also wrap the cooked kielbasa bites in bacon for an extra layer of smoky flavor and crispiness. The possibilities are truly endless!
Give it a Try!
I genuinely hope you’ll give my recipe for Hasselback Kielbasa Bites a try. I’m confident that you’ll love them as much as I do. They’re a guaranteed crowd-pleaser, perfect for any occasion. Once you’ve made them, I’d love to hear about your experience! Share your photos and feedback on social media using the hashtag #HasselbackKielbasaBites – I can’t wait to see your creations!
Remember, cooking should be fun and creative! Don’t be afraid to experiment and make this recipe your own. The most important thing is to enjoy the process and the delicious results. Happy cooking!
Share Your Hasselback Kielbasa Bites Success!
I’m so excited for you to try this recipe and experience the joy of creating these amazing Hasselback Kielbasa Bites. Your feedback is invaluable, so please share your photos and experiences on social media. Let’s build a community of Hasselback Kielbasa Bites enthusiasts! Tag me and use the hashtag #HasselbackKielbasaBites so I can see your culinary masterpieces. I look forward to seeing what you create!
Hasselback Kielbasa Bites: A Simple & Delicious Appetizer Recipe
Crispy Kielbasa bites with a crunchy breadcrumb coating, perfect as an appetizer or snack.
Ingredients
- 1 lb Kielbasa sausage, sliced 1/4 inch thick (partially sliced, Hasselback style)
- 1 cup all-purpose flour
- 1 teaspoon baking powder
- 1/2 teaspoon salt
- 1/4 teaspoon black pepper
- 1/2 teaspoon garlic powder
- 1/4 teaspoon onion powder
- 1 cup milk
- 1 large egg, beaten
- 1/2 cup vegetable oil, for frying
- 1/2 cup bread crumbs
- 1/4 cup grated Parmesan cheese
- 2 tablespoons chopped fresh parsley
- Optional: 1/4 cup shredded cheddar cheese
Instructions
- Slice the Kielbasa sausage 1/4 inch thick, leaving about 1/8 inch connecting the slices to create a Hasselback effect. Gently separate the slices to allow for even cooking.
- In a large bowl, whisk together flour, baking powder, salt, pepper, garlic powder, and onion powder.
- In a separate bowl, whisk together milk and egg.
- Gradually add wet ingredients to dry ingredients, whisking until smooth. Adjust consistency with milk (if too thick) or flour (if too thin) to resemble pancake batter.
- In a shallow dish, combine breadcrumbs, Parmesan cheese, and parsley.
- Add optional cheddar cheese and mix well.
- Heat vegetable oil in a large skillet over medium-high heat.
- Dip each Kielbasa slice in batter, then dredge in breadcrumb mixture, pressing gently.
- Carefully place coated Kielbasa in hot oil, avoiding overcrowding.
- Cook 2-3 minutes per side, or until golden brown and cooked through. Turn gently with tongs.
- Remove from skillet and place on a wire rack or paper towel-lined plate to drain excess oil.
Notes
- Monitor cooking time closely; it may vary depending on Kielbasa thickness and stove heat.
- Overcrowding the pan will lower the oil temperature and result in greasy, undercooked bites.
- Leftovers can be stored in the refrigerator for up to 3 days and reheated. They can also be frozen for up to 3 months.