
Fudgy Chewy Brookies: Prepare to meet your new favorite dessert mashup! Imagine the rich, decadent fudginess of a brownie perfectly intertwined with the satisfying chewiness of a chocolate chip cookie. Sounds divine, right? These aren’t just any ordinary cookies; they’re a symphony of textures and flavors that will leave you craving more.
While the precise origin of the brookie remains somewhat shrouded in mystery, its popularity has exploded in recent years, becoming a staple in bakeries and home kitchens alike. This delightful hybrid speaks to our inherent desire for the best of both worlds – the comforting familiarity of classic treats combined into one irresistible bite. The beauty of the fudgy chewy brookie lies in its simplicity and adaptability. You can customize it with your favorite chocolate chips, nuts, or even a swirl of caramel for an extra touch of indulgence.
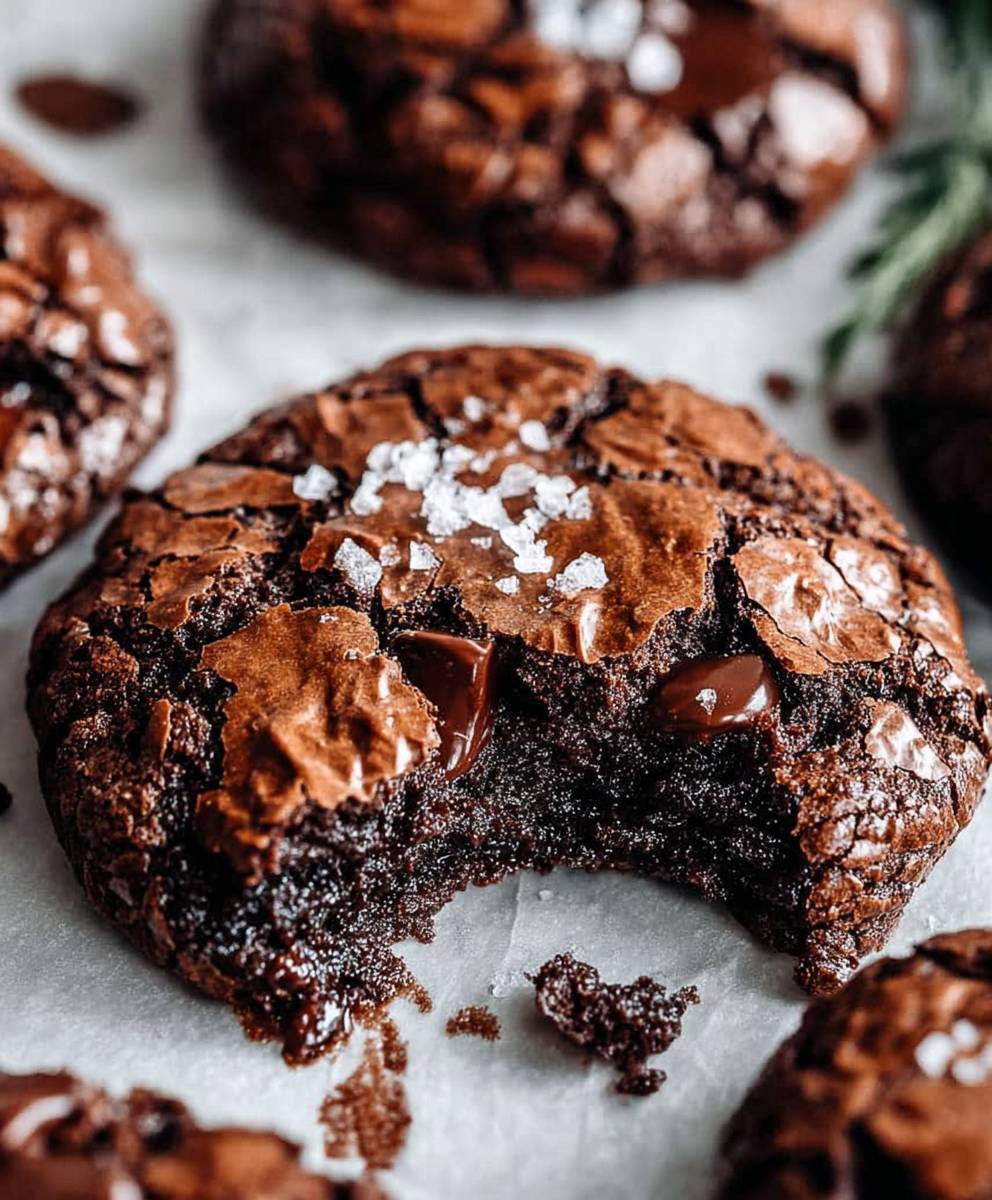
What makes these fudgy chewy brookies so universally loved? It’s the perfect balance of textures: the slightly crisp edges, the gooey center, and the satisfying chew that keeps you coming back for more. Plus, they’re incredibly easy to make, requiring minimal ingredients and effort. Whether you’re baking for a crowd, treating yourself after a long day, or simply looking for a fun and delicious baking project, brookies are always a winning choice. Get ready to experience dessert perfection!

Ingredients:
- For the Brownie Layer:
- 1 cup (2 sticks) unsalted butter, melted
- 2 cups granulated sugar
- 1 cup unsweetened cocoa powder
- 1 teaspoon salt
- 1 teaspoon baking powder
- 1 tablespoon vanilla extract
- 4 large eggs
- 1 cup all-purpose flour
- 1 cup chocolate chips (semi-sweet or dark, your preference!)
- For the Cookie Layer:
- 1 cup (2 sticks) unsalted butter, softened
- ¾ cup granulated sugar
- ¾ cup packed brown sugar
- 2 large eggs
- 1 tablespoon vanilla extract
- 2 ¼ cups all-purpose flour
- 1 teaspoon baking soda
- 1 teaspoon salt
- 2 cups chocolate chips (milk chocolate or a mix, if you’re feeling adventurous!)
Preparing the Brownie Layer:
Okay, let’s start with the fudgy brownie base. This is where the magic begins!
- Melt the Butter: In a large, microwave-safe bowl, melt the butter. You can do this in 30-second intervals, stirring in between, until it’s completely melted and smooth. Be careful not to overheat it!
- Combine Wet Ingredients: Add the granulated sugar to the melted butter and whisk vigorously until well combined. The mixture should be smooth and glossy. This step is important for that shiny brownie top!
- Add Cocoa and Dry Ingredients: Now, sift in the cocoa powder, salt, and baking powder. Sifting helps prevent lumps and ensures everything is evenly distributed. Whisk until just combined. Don’t overmix at this stage.
- Incorporate Vanilla and Eggs: Stir in the vanilla extract. Then, add the eggs one at a time, mixing well after each addition. Make sure each egg is fully incorporated before adding the next. This helps create a rich and chewy texture.
- Add Flour: Gradually add the all-purpose flour, mixing until just combined. Be careful not to overmix, as this can lead to tough brownies. A few streaks of flour are okay at this point.
- Fold in Chocolate Chips: Finally, gently fold in the chocolate chips. I like to use semi-sweet or dark chocolate chips for a richer flavor, but you can use whatever you prefer.
Preparing the Cookie Layer:
Now for the cookie dough! This part is just as important for that perfect brookies balance.
- Cream Butter and Sugars: In a large bowl (or the bowl of your stand mixer), cream together the softened butter, granulated sugar, and brown sugar until light and fluffy. This usually takes about 3-5 minutes. The mixture should be pale and creamy.
- Add Eggs and Vanilla: Beat in the eggs one at a time, mixing well after each addition. Then, stir in the vanilla extract.
- Combine Dry Ingredients: In a separate bowl, whisk together the all-purpose flour, baking soda, and salt. This ensures that the baking soda and salt are evenly distributed throughout the dough.
- Gradually Add Dry Ingredients to Wet Ingredients: Gradually add the dry ingredients to the wet ingredients, mixing until just combined. Again, be careful not to overmix.
- Fold in Chocolate Chips: Gently fold in the chocolate chips. I like to use milk chocolate chips for the cookie layer, but you can use a mix of milk and semi-sweet, or even white chocolate chips!
Assembling and Baking the Brookies:
This is where the magic truly happens! Get ready to create brookies perfection.
- Prepare the Baking Pan: Preheat your oven to 350°F (175°C). Grease and flour a 9×13 inch baking pan. You can also line the pan with parchment paper, leaving an overhang on the sides, for easy removal.
- Spread the Brownie Batter: Pour the brownie batter into the prepared baking pan and spread it evenly.
- Drop Cookie Dough by Spoonfuls: Drop spoonfuls of the cookie dough evenly over the brownie batter. You don’t need to completely cover the brownie batter; just make sure there’s a good amount of cookie dough in each bite.
- Swirl (Optional): If you want a marbled effect, you can gently swirl the cookie dough into the brownie batter using a knife or skewer. Be careful not to overmix, as this can muddy the colors.
- Bake: Bake for 30-35 minutes, or until a toothpick inserted into the center comes out with moist crumbs attached. The edges should be set, and the cookie dough should be golden brown.
- Cool: Let the brookies cool completely in the pan before cutting into squares. This is important because they will continue to set as they cool. If you try to cut them while they’re still warm, they will be too gooey and messy.
- Cut and Serve: Once the brookies are completely cool, cut them into squares and serve. Enjoy!
Tips and Tricks for Perfect Brookies:
Here are a few extra tips to ensure your brookies are the best they can be!
- Don’t Overmix: Overmixing the brownie and cookie dough can lead to tough brookies. Mix until just combined.
- Use Room Temperature Ingredients: Using room temperature butter and eggs for the cookie dough will help them cream together more easily and create a smoother dough.
- Adjust Baking Time: Baking times may vary depending on your oven. Keep an eye on the brookies and adjust the baking time as needed.
- Let Them Cool Completely: I know it’s tempting to dig in while they’re still warm, but letting the brookies cool completely will allow them to set properly and make them easier to cut.
- Add-Ins: Feel free to add other mix-ins to the brownie or cookie dough, such as nuts, pretzels, or different types of chocolate chips.
- Storage: Store the brookies in an airtight container at room temperature for up to 3 days. You can also freeze them for longer storage.
- For Extra Fudgy Brownies: Use a higher ratio of butter to flour in the brownie batter. You can also add a tablespoon of cornstarch to the batter for a chewier texture.
- For Chewier Cookies: Use more brown sugar than granulated sugar in the cookie dough. Brown sugar contains molasses, which adds moisture and chewiness.
- Salted Caramel Brookies: Drizzle salted caramel sauce over the brookies after they’ve cooled for an extra decadent treat.
- Peanut Butter Brookies: Swirl peanut butter into the brownie batter before baking for a delicious peanut butter twist.
Troubleshooting:
Sometimes things don’t go exactly as planned. Here are some common issues and how to fix them:
- Brookies are too dry: This could be due to overbaking or using too much flour. Make sure to measure your flour accurately and don’t overbake the brookies.
- Brookies are too gooey: This could be due to underbaking. Bake the brookies for a few more minutes until the edges are set and a toothpick inserted into the center comes out with moist crumbs attached.
- Brookies are too tough: This could be due to overmixing the dough. Mix the dough until just combined.
- Brookies are not rising: This could be due to using old baking powder or baking soda. Make sure your baking powder and baking soda are fresh.
Variations:
Want to mix things up? Here are a few fun variations you can try:
- Blondie Brookies: Substitute the brownie layer with a blondie layer by omitting the cocoa powder and adding a bit more vanilla extract.
- Oreo Brookies: Press Oreo cookies into the brownie batter before adding the cookie dough for a cookies and cream twist.
- Nutella Brookies: Swirl Nutella into the brownie batter for a hazelnut chocolate delight.
- Peppermint Brookies: Add peppermint extract to the brownie batter and top with crushed peppermint candies for a festive treat.
Enjoy!
I hope you enjoy making these fudgy, chewy brookies as much as I do! They’re the perfect treat for any occasion.
Conclusion:
And there you have it! These Fudgy Chewy Brookies are truly something special, a delightful marriage of brownie decadence and cookie comfort that will leave you craving more. I know I always do! The irresistible combination of textures – the fudgy center, the chewy edges, and the slight crispness on top – is simply divine. But beyond the textures, it’s the rich, chocolatey flavor that really seals the deal. This isn’t just another dessert; it’s an experience.
Why are these Brookies a must-try? Because they’re incredibly easy to make, require minimal ingredients, and deliver maximum flavor. Seriously, you probably have most of the ingredients in your pantry right now! Plus, they’re a guaranteed crowd-pleaser, perfect for potlucks, bake sales, or just a cozy night in. Forget choosing between a brownie and a cookie – with these Brookies, you get the best of both worlds!
But the fun doesn’t stop there! These Brookies are incredibly versatile. For a truly decadent experience, try serving them warm with a scoop of vanilla ice cream and a drizzle of chocolate sauce. Or, if you’re feeling adventurous, add a sprinkle of sea salt on top before baking to enhance the chocolate flavor.
Here are a few more serving suggestions and variations to get your creative juices flowing:
Serving Suggestions:
- Warm with Ice Cream: A classic pairing that never fails.
- Drizzled with Caramel: Adds a touch of sweetness and complexity.
- Served with Fresh Berries: The acidity of the berries cuts through the richness of the Brookies.
- As an Ice Cream Sandwich: Use two Brookies to sandwich your favorite ice cream flavor.
- Crumbled over Yogurt: A delicious and slightly healthier way to enjoy them.
Variations:
- Add Nuts: Walnuts, pecans, or almonds would be fantastic additions.
- Use Different Chocolate Chips: Experiment with milk chocolate, dark chocolate, or even white chocolate chips.
- Add a Swirl of Peanut Butter: For a Reese’s-inspired treat.
- Incorporate Espresso Powder: To enhance the chocolate flavor and add a subtle coffee kick.
- Make them Gluten-Free: Substitute the all-purpose flour with a gluten-free blend.
I truly believe that everyone should experience the joy of biting into a perfectly baked, fudgy, chewy Brookie. It’s a simple pleasure that can brighten any day. So, what are you waiting for? Preheat your oven, gather your ingredients, and get ready to bake up a batch of these amazing treats.
I’m so excited for you to try this recipe! And I’m even more excited to hear about your experience. Did you make any variations? Did you serve them with ice cream? What did your friends and family think? Please, please, please share your thoughts and photos in the comments below! I love seeing your creations and hearing your feedback. Your experiences help me improve my recipes and inspire other bakers. Don’t be shy – let me know how your Fudgy Chewy Brookies turned out! Happy baking!
Fudgy Chewy Brookies: The Ultimate Recipe for Brownie Cookie Bliss
Fudgy brownies topped with chewy chocolate chip cookie dough, these Brookies are the ultimate dessert mashup!
Ingredients
- 1 cup (2 sticks) unsalted butter, melted
- 2 cups granulated sugar
- 1 cup unsweetened cocoa powder
- 1 teaspoon salt
- 1 teaspoon baking powder
- 1 tablespoon vanilla extract
- 4 large eggs
- 1 cup all-purpose flour
- 1 cup chocolate chips (semi-sweet or dark, your preference!)
- 1 cup (2 sticks) unsalted butter, softened
- ¾ cup granulated sugar
- ¾ cup packed brown sugar
- 2 large eggs
- 1 tablespoon vanilla extract
- 2 ¼ cups all-purpose flour
- 1 teaspoon baking soda
- 1 teaspoon salt
- 2 cups chocolate chips (milk chocolate or a mix, if you’re feeling adventurous!)
Instructions
- Melt the Butter: In a large, microwave-safe bowl, melt the butter. You can do this in 30-second intervals, stirring in between, until it’s completely melted and smooth. Be careful not to overheat it!
- Combine Wet Ingredients: Add the granulated sugar to the melted butter and whisk vigorously until well combined. The mixture should be smooth and glossy. This step is important for that shiny brownie top!
- Add Cocoa and Dry Ingredients: Now, sift in the cocoa powder, salt, and baking powder. Sifting helps prevent lumps and ensures everything is evenly distributed. Whisk until just combined. Don’t overmix at this stage.
- Incorporate Vanilla and Eggs: Stir in the vanilla extract. Then, add the eggs one at a time, mixing well after each addition. Make sure each egg is fully incorporated before adding the next. This helps create a rich and chewy texture.
- Add Flour: Gradually add the all-purpose flour, mixing until just combined. Be careful not to overmix, as this can lead to tough brownies. A few streaks of flour are okay at this point.
- Fold in Chocolate Chips: Finally, gently fold in the chocolate chips. I like to use semi-sweet or dark chocolate chips for a richer flavor, but you can use whatever you prefer.
- Cream Butter and Sugars: In a large bowl (or the bowl of your stand mixer), cream together the softened butter, granulated sugar, and brown sugar until light and fluffy. This usually takes about 3-5 minutes. The mixture should be pale and creamy.
- Add Eggs and Vanilla: Beat in the eggs one at a time, mixing well after each addition. Then, stir in the vanilla extract.
- Combine Dry Ingredients: In a separate bowl, whisk together the all-purpose flour, baking soda, and salt. This ensures that the baking soda and salt are evenly distributed throughout the dough.
- Gradually Add Dry Ingredients to Wet Ingredients: Gradually add the dry ingredients to the wet ingredients, mixing until just combined. Again, be careful not to overmix.
- Fold in Chocolate Chips: Gently fold in the chocolate chips. I like to use milk chocolate chips for the cookie layer, but you can use a mix of milk and semi-sweet, or even white chocolate chips!
- Prepare the Baking Pan: Preheat your oven to 350°F (175°C). Grease and flour a 9×13 inch baking pan. You can also line the pan with parchment paper, leaving an overhang on the sides, for easy removal.
- Spread the Brownie Batter: Pour the brownie batter into the prepared baking pan and spread it evenly.
- Drop Cookie Dough by Spoonfuls: Drop spoonfuls of the cookie dough evenly over the brownie batter. You don’t need to completely cover the brownie batter; just make sure there’s a good amount of cookie dough in each bite.
- Swirl (Optional): If you want a marbled effect, you can gently swirl the cookie dough into the brownie batter using a knife or skewer. Be careful not to overmix, as this can muddy the colors.
- Bake: Bake for 30-35 minutes, or until a toothpick inserted into the center comes out with moist crumbs attached. The edges should be set, and the cookie dough should be golden brown.
- Cool: Let the brookies cool completely in the pan before cutting into squares. This is important because they will continue to set as they cool. If you try to cut them while they’re still warm, they will be too gooey and messy.
- Cut and Serve: Once the brookies are completely cool, cut them into squares and serve. Enjoy!
Notes
- Don’t Overmix: Overmixing the brownie and cookie dough can lead to tough brookies. Mix until just combined.
- Use Room Temperature Ingredients: Using room temperature butter and eggs for the cookie dough will help them cream together more easily and create a smoother dough.
- Adjust Baking Time: Baking times may vary depending on your oven. Keep an eye on the brookies and adjust the baking time as needed.
- Let Them Cool Completely: I know it’s tempting to dig in while they’re still warm, but letting the brookies cool completely will allow them to set properly and make them easier to cut.
- Add-Ins: Feel free to add other mix-ins to the brownie or cookie dough, such as nuts, pretzels, or different types of chocolate chips.
- Storage: Store the brookies in an airtight container at room temperature for up to 3 days. You can also freeze them for longer storage.
- For Extra Fudgy Brownies: Use a higher ratio of butter to flour in the brownie batter. You can also add a tablespoon of cornstarch to the batter for a chewier texture.
- For Chewier Cookies: Use more brown sugar than granulated sugar in the cookie dough. Brown sugar contains molasses, which adds moisture and chewiness.
- Salted Caramel Brookies: Drizzle salted caramel sauce over the brookies after they’ve cooled for an extra decadent treat.
- Peanut Butter Brookies: Swirl peanut butter into the brownie batter before baking for a delicious peanut butter twist.
Printable Recipe Card
Want just the essential recipe details without scrolling through the article? Get our printable recipe card with just the ingredients and instructions.