
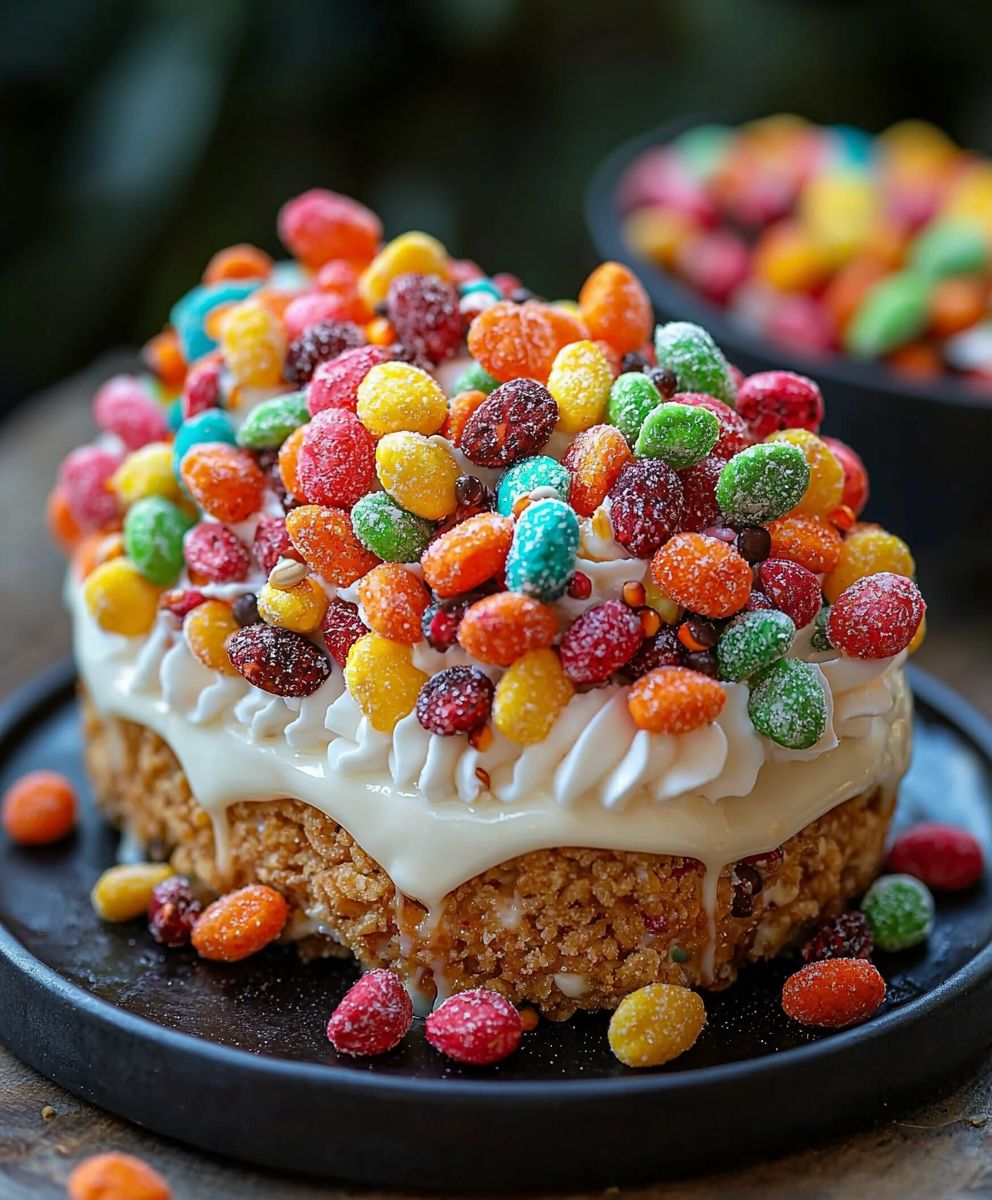
Fruity Pebbles Cheesecake Tacos: Prepare to have your mind blown! Imagine the creamy, dreamy indulgence of cheesecake, the playful crunch of a taco shell, and the nostalgic burst of Fruity Pebbles cereal all rolled into one utterly irresistible dessert. This isn’t just a recipe; it’s an experience, a carnival of flavors and textures that will transport you back to Saturday morning cartoons while simultaneously satisfying your sophisticated sweet tooth.
While not steeped in centuries of tradition, the beauty of these Fruity Pebbles Cheesecake Tacos lies in their modern, whimsical appeal. They represent a fusion of classic comfort food and innovative culinary creativity. Think of them as the dessert equivalent of a pop art masterpiece – bold, unexpected, and undeniably fun.
Why do people adore this delightful concoction? It’s simple: the combination is pure genius. The tangy cheesecake filling provides a luxurious counterpoint to the sweet, crunchy cereal shell. The “taco” format makes it incredibly easy to eat and share, perfect for parties or a fun family treat. Plus, who can resist the vibrant colors and playful spirit of Fruity Pebbles? It’s a guaranteed crowd-pleaser that’s as visually appealing as it is delicious. Get ready to make some memories with this unforgettable dessert!

Ingredients:
- For the Fruity Pebbles Taco Shells:
- 2 cups Fruity Pebbles cereal
- 2 tablespoons unsalted butter, melted
- 1 tablespoon granulated sugar
- For the Cheesecake Filling:
- 16 ounces cream cheese, softened
- 1 cup powdered sugar
- 1 teaspoon vanilla extract
- 1/2 cup heavy cream
- 1/4 cup Fruity Pebbles cereal, crushed (for mixing in)
- For the Fruity Pebbles Coating (Optional):
- 1 cup Fruity Pebbles cereal, finely crushed
- For the Toppings (Optional):
- Whipped cream
- Fresh berries (strawberries, blueberries, raspberries)
- Chocolate syrup
- Extra Fruity Pebbles cereal
Making the Fruity Pebbles Taco Shells
- Prepare the Fruity Pebbles Mixture: In a food processor, pulse the 2 cups of Fruity Pebbles cereal until they are finely crushed. You want them to be almost like a coarse flour. Don’t over-process them into a powder, though; you still want some texture.
- Combine Ingredients: In a medium bowl, combine the crushed Fruity Pebbles cereal, melted butter, and granulated sugar. Mix well until all the ingredients are evenly distributed and the mixture resembles wet sand. This is what will hold your taco shells together, so make sure everything is nicely combined.
- Shape the Taco Shells: This is where things get a little creative! You’ll need a non-stick baking sheet lined with parchment paper. Preheat your oven to 350°F (175°C).
- Option 1 (Using a Taco Shell Mold): If you have a taco shell mold, lightly grease it. Press the Fruity Pebbles mixture firmly into the mold, ensuring it’s evenly distributed. Bake for 8-10 minutes, or until the edges are lightly golden brown. Let cool completely in the mold before carefully removing.
- Option 2 (Free-Form Taco Shells): If you don’t have a mold, you can create free-form taco shells. Place a small mound (about 2-3 tablespoons) of the Fruity Pebbles mixture onto the prepared baking sheet. Use your fingers or the back of a spoon to flatten the mound into a thin circle, about 4-5 inches in diameter. Gently fold the circle in half to create a taco shape. You might need to use a small piece of crumpled aluminum foil to prop up the taco shell and maintain its shape during baking. Bake for 8-10 minutes, or until the edges are lightly golden brown. Let cool completely on the baking sheet before carefully transferring to a wire rack.
- Cool Completely: It’s crucial to let the taco shells cool completely before filling them. This allows them to harden and become more stable. If you try to fill them while they’re still warm, they’ll likely crumble.
Preparing the Cheesecake Filling
- Soften the Cream Cheese: Make sure your cream cheese is completely softened to room temperature. This is essential for a smooth and creamy filling. If it’s not soft enough, you’ll end up with lumps in your cheesecake filling.
- Beat the Cream Cheese: In a large bowl, using an electric mixer (either a stand mixer or a hand mixer), beat the softened cream cheese until it’s smooth and creamy. This usually takes about 2-3 minutes.
- Add Powdered Sugar and Vanilla: Gradually add the powdered sugar to the cream cheese, beating on low speed until it’s fully incorporated. Be careful not to add the powdered sugar too quickly, or you’ll end up with a cloud of sugar dust! Add the vanilla extract and mix until combined.
- Whip in the Heavy Cream: Slowly pour in the heavy cream while continuing to beat on low speed. Gradually increase the speed to medium and beat until the mixture is light and fluffy. Be careful not to over-beat, as this can cause the filling to become too thick. You want a nice, smooth, and spreadable consistency.
- Fold in Crushed Fruity Pebbles: Gently fold in the 1/4 cup of crushed Fruity Pebbles cereal. This adds a little extra flavor and texture to the filling. Be careful not to over-mix, as this can deflate the filling.
- Chill the Filling (Optional): For a firmer filling, you can chill the cheesecake filling in the refrigerator for about 30 minutes before filling the taco shells. This will make it easier to work with.
Assembling the Fruity Pebbles Cheesecake Tacos
- Prepare the Fruity Pebbles Coating (Optional): If you want to coat the edges of your taco shells with crushed Fruity Pebbles, spread the finely crushed Fruity Pebbles cereal onto a shallow plate.
- Fill the Taco Shells: Carefully spoon or pipe the cheesecake filling into the cooled Fruity Pebbles taco shells. Be generous with the filling, but don’t overfill them, or they’ll be difficult to eat.
- Coat the Edges (Optional): If you’re using the Fruity Pebbles coating, gently press the edges of the filled taco shells into the crushed Fruity Pebbles cereal, coating the filling.
- Add Toppings (Optional): Now for the fun part! Get creative with your toppings. Add a dollop of whipped cream, fresh berries, a drizzle of chocolate syrup, or sprinkle with extra Fruity Pebbles cereal. The possibilities are endless!
- Serve Immediately: These Fruity Pebbles Cheesecake Tacos are best served immediately. The taco shells can soften over time, so enjoy them while they’re still crisp and the filling is nice and creamy.
Tips and Variations:
- Make Ahead: You can make the taco shells and cheesecake filling ahead of time. Store the taco shells in an airtight container at room temperature and the cheesecake filling in the refrigerator. Assemble the tacos just before serving.
- Different Cereals: Feel free to experiment with different cereals for the taco shells. Cocoa Pebbles, Rice Krispies, or even crushed graham crackers would work well.
- Flavor Variations: Add different extracts to the cheesecake filling, such as lemon extract, almond extract, or even a little bit of citrus zest.
- Chocolate Drizzle: Drizzle melted chocolate over the taco shells before filling them for an extra layer of flavor.
- Vegan Option: Use vegan cream cheese and vegan butter to make this recipe vegan-friendly.
Conclusion:
And there you have it! These Fruity Pebbles Cheesecake Tacos are so much more than just a dessert; they’re a vibrant explosion of flavor and fun, guaranteed to bring a smile to anyone’s face. I truly believe this recipe is a must-try for anyone looking to add a touch of whimsy and deliciousness to their life. The creamy, tangy cheesecake filling perfectly complements the crunchy, sweet Fruity Pebbles shell, creating a textural and taste sensation that’s simply irresistible.
But why is this recipe a must-try? It’s not just about the taste (though that’s a huge part of it!). It’s about the experience. It’s about the joy of creating something unique and unexpected. It’s about the sheer delight of biting into a taco that’s filled with cheesecake and covered in colorful cereal. It’s a conversation starter, a party pleaser, and a guaranteed mood booster. Plus, it’s surprisingly easy to make! You don’t need to be a professional baker to whip up these delightful treats. The recipe is straightforward and uses readily available ingredients, making it accessible to bakers of all skill levels.
Now, let’s talk serving suggestions and variations! These Fruity Pebbles Cheesecake Tacos are fantastic on their own, but you can definitely elevate them even further. Consider drizzling them with melted white chocolate or a raspberry sauce for an extra touch of sweetness and elegance. A sprinkle of edible glitter would also add a magical touch, especially for kids’ parties. For a more sophisticated twist, try using a different type of cereal for the shell. Cocoa Pebbles would create a rich, chocolatey version, while Rice Krispies would offer a lighter, more subtle flavor. You could even experiment with different cheesecake flavors! A lemon cheesecake filling would provide a bright and tangy contrast to the sweet cereal, while a strawberry cheesecake filling would complement the fruity flavors perfectly.
Another fun variation is to create mini Fruity Pebbles Cheesecake Tacos using smaller tortillas. These bite-sized treats are perfect for parties and gatherings, allowing your guests to sample a variety of flavors and toppings. You could even set up a taco bar with different fillings, cereals, and toppings, allowing everyone to create their own personalized cheesecake taco masterpiece. Imagine the possibilities!
I’m so excited for you to try this recipe and experience the joy of Fruity Pebbles Cheesecake Tacos for yourself. I poured my heart into perfecting this recipe, and I truly believe it’s something special. Don’t be afraid to get creative and experiment with different flavors and toppings to make it your own. Remember, baking is all about having fun and expressing your creativity.
So, what are you waiting for? Gather your ingredients, preheat your oven, and get ready to embark on a culinary adventure! I’m confident that you’ll love these Fruity Pebbles Cheesecake Tacos as much as I do.
And finally, I would absolutely love to hear about your experience! Once you’ve tried the recipe, please come back and share your thoughts in the comments below. Did you make any variations? What did your friends and family think? Any tips or tricks you’d like to share? Your feedback is invaluable and helps me to continue creating delicious and inspiring recipes. So, go ahead, give these Fruity Pebbles Cheesecake Tacos a try – you won’t regret it! Happy baking!
Fruity Pebbles Cheesecake Tacos: A Deliciously Fun Dessert Recipe
Crispy Fruity Pebbles taco shells filled with creamy cheesecake filling and topped with your favorite goodies! A fun and colorful dessert that's perfect for parties or a sweet treat.
Ingredients
- 2 cups Fruity Pebbles cereal
- 2 tablespoons unsalted butter, melted
- 1 tablespoon granulated sugar
- 16 ounces cream cheese, softened
- 1 cup powdered sugar
- 1 teaspoon vanilla extract
- 1/2 cup heavy cream
- 1/4 cup Fruity Pebbles cereal, crushed (for mixing in)
- 1 cup Fruity Pebbles cereal, finely crushed
- Whipped cream
- Fresh berries (strawberries, blueberries, raspberries)
- Chocolate syrup
- Extra Fruity Pebbles cereal
Instructions
- In a food processor, pulse the 2 cups of Fruity Pebbles cereal until they are finely crushed. You want them to be almost like a coarse flour. Don’t over-process them into a powder, though; you still want some texture.
- In a medium bowl, combine the crushed Fruity Pebbles cereal, melted butter, and granulated sugar. Mix well until all the ingredients are evenly distributed and the mixture resembles wet sand. This is what will hold your taco shells together, so make sure everything is nicely combined.
- Preheat your oven to 350°F (175°C). Line a non-stick baking sheet with parchment paper.
- If you have a taco shell mold, lightly grease it. Press the Fruity Pebbles mixture firmly into the mold, ensuring it’s evenly distributed. Bake for 8-10 minutes, or until the edges are lightly golden brown. Let cool completely in the mold before carefully removing.
- If you don’t have a mold, you can create free-form taco shells. Place a small mound (about 2-3 tablespoons) of the Fruity Pebbles mixture onto the prepared baking sheet. Use your fingers or the back of a spoon to flatten the mound into a thin circle, about 4-5 inches in diameter. Gently fold the circle in half to create a taco shape. You might need to use a small piece of crumpled aluminum foil to prop up the taco shell and maintain its shape during baking. Bake for 8-10 minutes, or until the edges are lightly golden brown. Let cool completely on the baking sheet before carefully transferring to a wire rack.
- It’s crucial to let the taco shells cool completely before filling them. This allows them to harden and become more stable. If you try to fill them while they’re still warm, they’ll likely crumble.
- Make sure your cream cheese is completely softened to room temperature. This is essential for a smooth and creamy filling. If it’s not soft enough, you’ll end up with lumps in your cheesecake filling.
- In a large bowl, using an electric mixer (either a stand mixer or a hand mixer), beat the softened cream cheese until it’s smooth and creamy. This usually takes about 2-3 minutes.
- Gradually add the powdered sugar to the cream cheese, beating on low speed until it’s fully incorporated. Be careful not to add the powdered sugar too quickly, or you’ll end up with a cloud of sugar dust! Add the vanilla extract and mix until combined.
- Slowly pour in the heavy cream while continuing to beat on low speed. Gradually increase the speed to medium and beat until the mixture is light and fluffy. Be careful not to over-beat, as this can cause the filling to become too thick. You want a nice, smooth, and spreadable consistency.
- Gently fold in the 1/4 cup of crushed Fruity Pebbles cereal. This adds a little extra flavor and texture to the filling. Be careful not to over-mix, as this can deflate the filling.
- For a firmer filling, you can chill the cheesecake filling in the refrigerator for about 30 minutes before filling the taco shells. This will make it easier to work with.
- If you want to coat the edges of your taco shells with crushed Fruity Pebbles, spread the finely crushed Fruity Pebbles cereal onto a shallow plate.
- Carefully spoon or pipe the cheesecake filling into the cooled Fruity Pebbles taco shells. Be generous with the filling, but don’t overfill them, or they’ll be difficult to eat.
- If you’re using the Fruity Pebbles coating, gently press the edges of the filled taco shells into the crushed Fruity Pebbles cereal, coating the filling.
- Now for the fun part! Get creative with your toppings. Add a dollop of whipped cream, fresh berries, a drizzle of chocolate syrup, or sprinkle with extra Fruity Pebbles cereal. The possibilities are endless!
- These Fruity Pebbles Cheesecake Tacos are best served immediately. The taco shells can soften over time, so enjoy them while they’re still crisp and the filling is nice and creamy.
Notes
- Make Ahead: You can make the taco shells and cheesecake filling ahead of time. Store the taco shells in an airtight container at room temperature and the cheesecake filling in the refrigerator. Assemble the tacos just before serving.
- Different Cereals: Feel free to experiment with different cereals for the taco shells. Cocoa Pebbles, Rice Krispies, or even crushed graham crackers would work well.
- Flavor Variations: Add different extracts to the cheesecake filling, such as lemon extract, almond extract, or even a little bit of citrus zest.
- Chocolate Drizzle: Drizzle melted chocolate over the taco shells before filling them for an extra layer of flavor.
- Vegan Option: Use vegan cream cheese and vegan butter to make this recipe vegan-friendly.