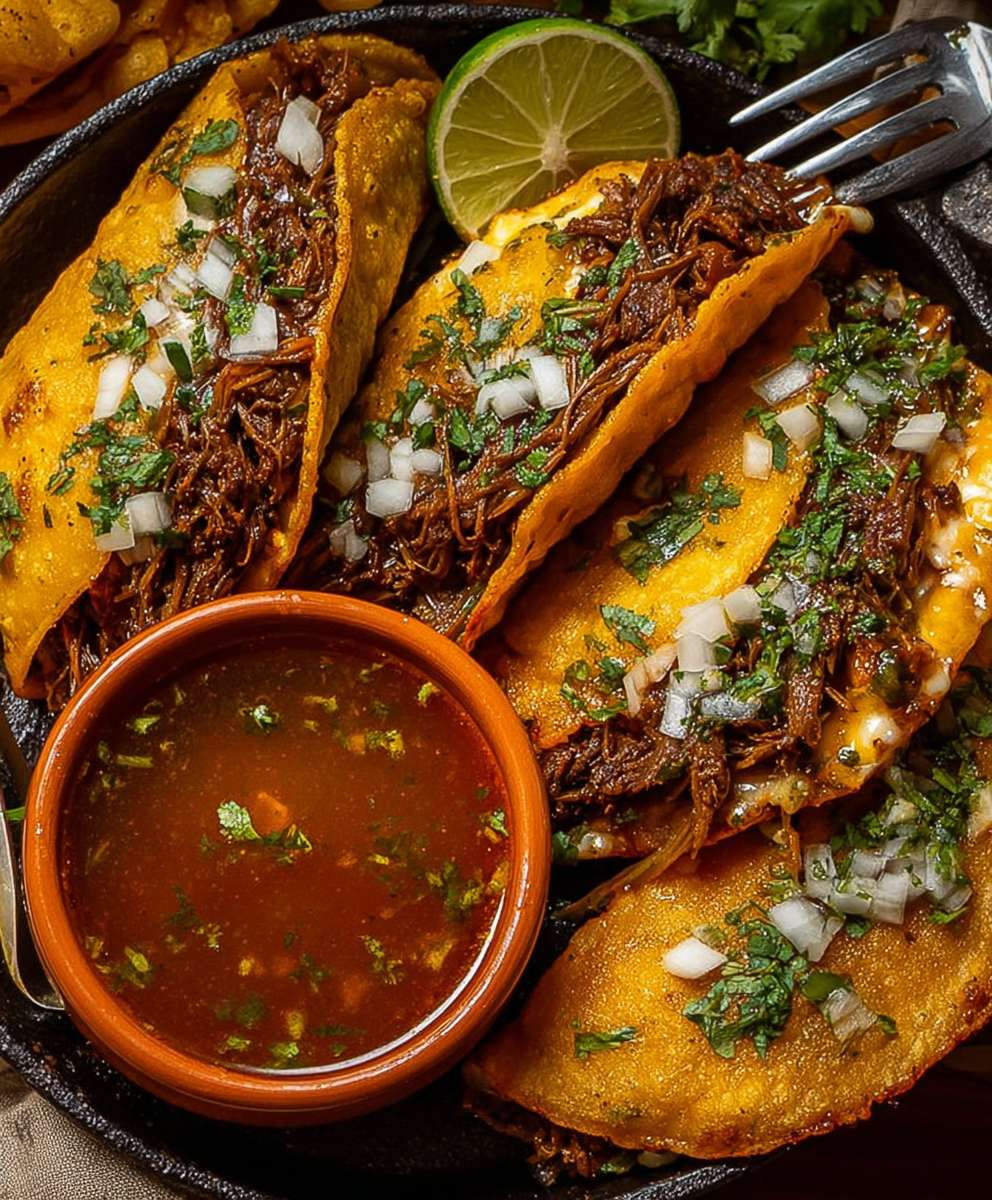
Fave Birria Tacos: Prepare to be transported to a world of rich, savory flavors with a dish that’s taking the culinary scene by storm! Imagine tender, slow-cooked beef, simmered in a complex blend of chilies and spices, its deep, earthy aroma filling your kitchen. Then, picture that succulent meat shredded and nestled into crispy, cheese-laden tortillas, ready to be dipped into a flavorful consommé. Yes, we’re talking about Birria Tacos, and trust me, these will quickly become your new obsession.
Birria, traditionally a goat stew originating from Jalisco, Mexico, has a history steeped in tradition and celebration. Over time, regional variations emerged, with beef becoming a popular alternative. The magic of Birria lies in its slow cooking process, allowing the flavors to meld and deepen, creating a truly unforgettable culinary experience. The transformation into tacos, especially with the addition of melted cheese and a rich dipping broth, has catapulted this dish to international fame.
What makes Fave Birria Tacos so irresistible? It’s the symphony of textures and tastes! The tender, juicy beef contrasts beautifully with the crispy tortilla and the gooey, melted cheese. The consommé, infused with the same spices as the meat, adds a layer of depth and warmth that’s simply divine. Plus, they are incredibly versatile. Whether you’re hosting a casual gathering or simply craving a comforting meal, these Fave Birria Tacos are guaranteed to be a crowd-pleaser. Get ready to experience a flavor explosion that will leave you wanting more!
Ingredients:
- For the Birria:
- 3 lbs beef chuck roast, cut into 2-3 inch chunks
- 1 lb beef short ribs
- 1 large white onion, quartered
- 6 cloves garlic, roughly chopped
- 4 dried guajillo chiles, stemmed and seeded
- 4 dried ancho chiles, stemmed and seeded
- 2 dried pasilla chiles, stemmed and seeded
- 1 (14.5 oz) can diced tomatoes, undrained
- 2 tablespoons tomato paste
- 1 tablespoon apple cider vinegar
- 1 teaspoon dried oregano
- 1 teaspoon ground cumin
- 1/2 teaspoon ground cinnamon
- 1/4 teaspoon ground cloves
- 2 bay leaves
- 8 cups beef broth (or water)
- Salt and black pepper to taste
- 2 tablespoons vegetable oil
- For the Tacos:
- 24 corn tortillas
- 2 cups shredded Oaxaca cheese (or Monterey Jack)
- 1/2 cup chopped cilantro
- 1/2 cup chopped white onion
- Lime wedges, for serving
- Vegetable oil, for frying
- For the Consommé (Dipping Sauce):
- Reserved birria broth (from cooking the meat)
- Chopped cilantro, for garnish
- Chopped white onion, for garnish
- Lime wedges, for serving
Preparing the Birria:
- Toast the Dried Chiles: This step is crucial for unlocking the rich flavors of the chiles. In a large, dry skillet over medium heat, toast the guajillo, ancho, and pasilla chiles for about 2-3 minutes per side. Be careful not to burn them, as this will make them bitter. They should become fragrant and slightly pliable. Remove from the skillet and set aside to cool slightly.
- Rehydrate the Chiles: Once the chiles are cool enough to handle, place them in a bowl and cover them with hot water. Let them soak for at least 30 minutes, or until they are softened. This will make them easier to blend.
- Sear the Beef: Season the beef chuck roast and short ribs generously with salt and black pepper. In a large Dutch oven or heavy-bottomed pot, heat the vegetable oil over medium-high heat. Sear the beef in batches until browned on all sides. Don’t overcrowd the pot, as this will lower the temperature and prevent the beef from browning properly. Remove the seared beef from the pot and set aside.
- Sauté Aromatics: Add the quartered onion and chopped garlic to the pot and sauté over medium heat until softened and slightly browned, about 5-7 minutes. This will build a flavorful base for the birria.
- Blend the Chile Sauce: Drain the soaked chiles, reserving about 1 cup of the soaking liquid. Place the chiles in a blender along with the diced tomatoes, tomato paste, apple cider vinegar, oregano, cumin, cinnamon, and cloves. Add enough of the reserved soaking liquid to help the mixture blend smoothly. Blend until completely smooth, about 1-2 minutes.
- Combine and Simmer: Pour the chile sauce into the Dutch oven with the sautéed onions and garlic. Cook for 2-3 minutes, stirring constantly, to allow the flavors to meld. Add the seared beef, bay leaves, and beef broth (or water) to the pot. The liquid should cover the beef; add more broth or water if needed. Bring the mixture to a boil, then reduce the heat to low, cover, and simmer for at least 3-4 hours, or until the beef is very tender and easily shreds with a fork. The longer it simmers, the more flavorful it will become. I usually aim for 4 hours!
- Shred the Beef: Once the beef is cooked, remove it from the pot and shred it with two forks. Discard the bay leaves.
- Strain the Broth: Strain the broth through a fine-mesh sieve, reserving the broth (this is your consommé!). Discard the solids. This step ensures a smooth and flavorful dipping sauce.
- Return Beef to Broth: Return the shredded beef to the strained broth. This will keep the beef moist and flavorful.
Assembling and Cooking the Tacos:
- Prepare Your Work Station: Have all your ingredients ready to go: the shredded birria, shredded Oaxaca cheese, chopped cilantro, chopped white onion, corn tortillas, and vegetable oil. This will make the assembly process much smoother.
- Heat a Large Skillet or Griddle: Heat a large skillet or griddle over medium heat. You’ll need enough surface area to cook several tacos at once.
- Dip the Tortillas: Dip each corn tortilla into the birria broth, coating both sides. This is what gives the tacos their signature red color and incredible flavor. Don’t soak them for too long, just a quick dip is enough.
- Fill the Tacos: Place the dipped tortilla on the hot skillet or griddle. Add a generous amount of shredded Oaxaca cheese and shredded birria to one half of the tortilla.
- Fold and Cook: Fold the tortilla in half to create a taco. Cook for 2-3 minutes per side, or until the tortilla is golden brown and crispy and the cheese is melted and gooey. You can press down on the tacos with a spatula to help them cook evenly and get extra crispy.
- Repeat: Repeat steps 3-5 with the remaining tortillas, cheese, and birria.
- Keep Warm (Optional): If you’re making a large batch of tacos, you can keep them warm in a preheated oven (200°F) until ready to serve.
Serving:
- Prepare the Consommé: Ladle the reserved birria broth (consommé) into small bowls or cups. Garnish with chopped cilantro and chopped white onion.
- Garnish the Tacos: Garnish the birria tacos with chopped cilantro and chopped white onion.
- Serve Immediately: Serve the birria tacos hot, with the consommé for dipping and lime wedges for squeezing. The combination of the crispy, cheesy tacos and the flavorful dipping sauce is simply irresistible!
Tips for the Best Birria Tacos:
- Don’t Skip the Chile Toasting: Toasting the dried chiles is essential for bringing out their flavor. Be careful not to burn them, as this will make them bitter.
- Simmer Low and Slow: The longer the birria simmers, the more flavorful it will become. Aim for at least 3-4 hours, or even longer if you have the time.
- Use Good Quality Cheese: Oaxaca cheese is the traditional choice for birria tacos, but Monterey Jack or a similar melting cheese will also work well.
- Don’t Overfill the Tacos: Overfilling the tacos can make them difficult to cook and eat. A generous amount of cheese and birria is enough.
- Get the Tortillas Crispy: The key to a great birria taco is a crispy tortilla. Cook the tacos until they are golden brown and slightly charred.
- Adjust the Spice Level: If you prefer a spicier birria, you can add a dried chile de árbol or a pinch of cayenne pepper to the chile sauce.
- Make it Ahead: The birria can be made ahead of time and stored in the refrigerator for up to 3 days. This is a great option if you’re short on time. Simply reheat the birria before assembling the tacos.
- Freeze for Later: You can also freeze the cooked birria for up to 2 months. Thaw it overnight in the refrigerator before reheating and assembling the tacos.
Variations:
- Birria Ramen: Use the birria broth as a base for ramen. Add cooked ramen noodles, shredded birria, and your favorite ramen toppings.
- Birria Pizza: Top a pizza crust with birria, cheese, and your favorite pizza toppings.
- Birria Grilled Cheese: Make a grilled cheese sandwich with birria and cheese.
- Birria Quesadillas: Fill quesadillas with birria and cheese.
Enjoy!
Conclusion:
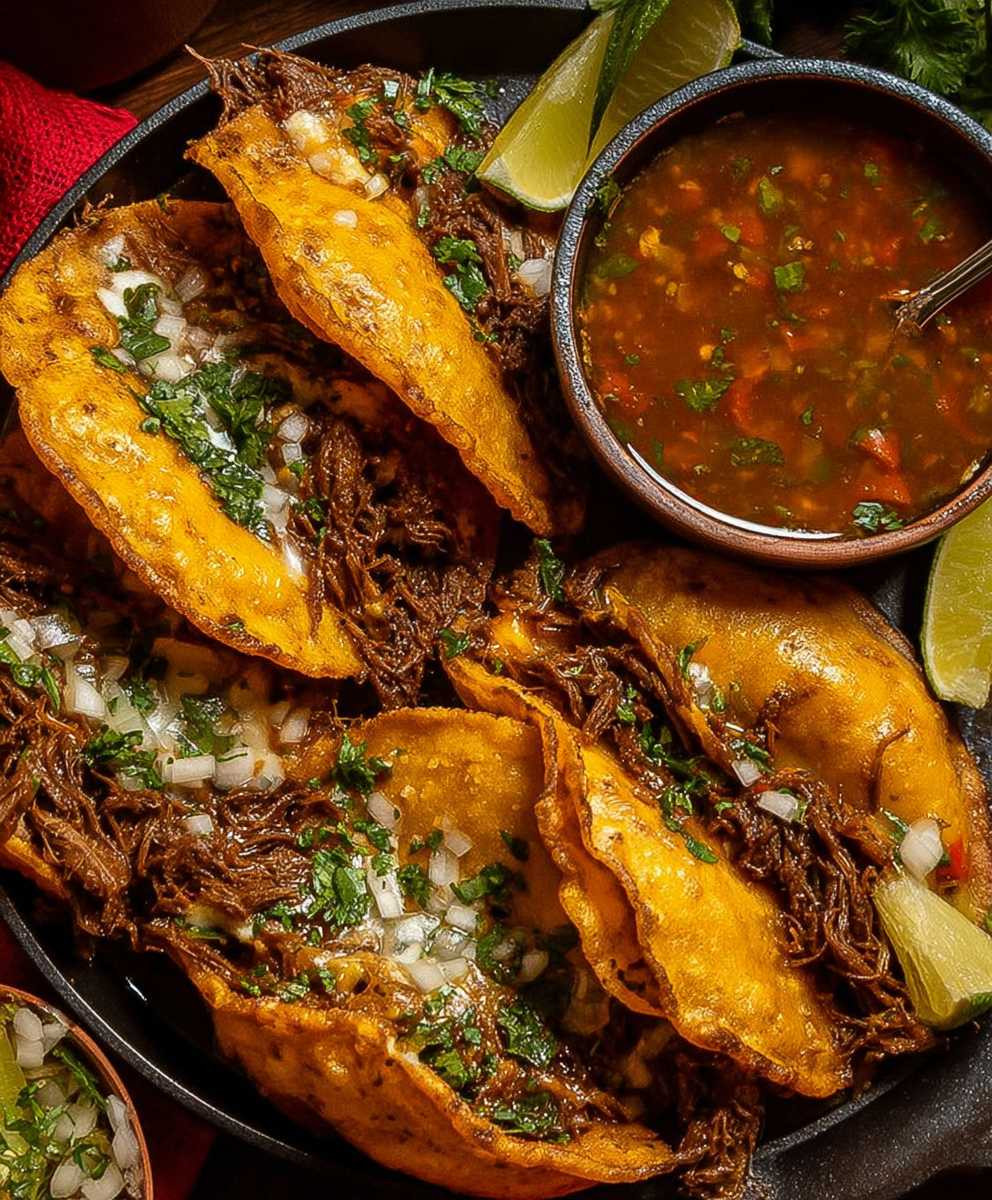
Okay, friends, let’s be honest – you’ve scrolled this far because something about these Birria Tacos called to you, right? And I’m here to tell you, that instinct is spot on! This isn’t just another taco recipe; it’s an experience. The rich, deeply flavorful birria, the crispy, cheese-laden tortillas dipped in that glorious consommé… it’s a symphony of textures and tastes that will absolutely blow your mind. Trust me, once you’ve had these, you’ll understand why everyone is obsessed. This recipe is a must-try because it delivers authentic, restaurant-quality birria tacos right in your own kitchen, without requiring hours of slaving over a stove. The detailed instructions and helpful tips ensure that even a novice cook can achieve incredible results.
But the best part? It’s completely customizable!
Serving Suggestions and Variations
While these Birria Tacos are amazing on their own, there are so many ways to elevate the experience. For a truly authentic touch, serve them with a side of finely chopped white onion, fresh cilantro, and a squeeze of lime. The acidity of the lime and the freshness of the cilantro perfectly complement the richness of the birria.
Feeling adventurous? Try these variations:
* Birria Ramen: Strain the consommé and use it as a base for a flavorful ramen soup. Top with the shredded birria meat, a soft-boiled egg, and your favorite ramen toppings.
* Birria Pizza: Spread the birria meat and cheese over a pizza crust, bake until golden brown, and drizzle with consommé for a truly decadent treat.
* Birria Quesadillas: Use the birria and cheese as a filling for quesadillas, and serve with a side of sour cream or guacamole.
* Spicy Kick: If you like a little heat, add a few chopped chipotle peppers in adobo sauce to the birria during the braising process.
* Vegetarian Option: While traditional birria is made with meat, you can adapt this recipe using mushrooms or jackfruit for a delicious vegetarian alternative. Simply braise the mushrooms or jackfruit in the same flavorful broth.
The possibilities are endless! Don’t be afraid to experiment and make this recipe your own.
Now it’s Your Turn!
I’ve poured my heart and soul into perfecting this recipe, and I’m so excited for you to try it. I truly believe that these are the best Birria Tacos you’ll ever make. So, gather your ingredients, put on some music, and get ready to create something truly special.
Once you’ve made them, I would absolutely love to hear about your experience! Did you make any variations? What did your family and friends think? Share your photos and stories in the comments below. Your feedback helps me continue to improve and create even more delicious recipes for you.
Happy cooking, and enjoy every single bite! I can’t wait to see your Birria Taco creations!
Fave Birria Tacos: The Ultimate Guide to Deliciousness
Tender, slow-cooked beef simmered in a rich chile broth, shredded, and served in crispy, cheese-filled tortillas with a flavorful consommé for dipping.
Ingredients
- 3 lbs beef chuck roast, cut into 2-3 inch chunks
- 1 lb beef short ribs
- 1 large white onion, quartered
- 6 cloves garlic, roughly chopped
- 4 dried guajillo chiles, stemmed and seeded
- 4 dried ancho chiles, stemmed and seeded
- 2 dried pasilla chiles, stemmed and seeded
- 1 (14.5 oz) can diced tomatoes, undrained
- 2 tablespoons tomato paste
- 1 tablespoon apple cider vinegar
- 1 teaspoon dried oregano
- 1 teaspoon ground cumin
- 1/2 teaspoon ground cinnamon
- 1/4 teaspoon ground cloves
- 2 bay leaves
- 8 cups beef broth (or water)
- Salt and black pepper to taste
- 2 tablespoons vegetable oil
- 24 corn tortillas
- 2 cups shredded Oaxaca cheese (or Monterey Jack)
- 1/2 cup chopped cilantro
- 1/2 cup chopped white onion
- Lime wedges, for serving
- Vegetable oil, for frying
- Reserved birria broth (from cooking the meat)
- Chopped cilantro, for garnish
- Chopped white onion, for garnish
- Lime wedges, for serving
Instructions
- In a large, dry skillet over medium heat, toast the guajillo, ancho, and pasilla chiles for about 2-3 minutes per side. Be careful not to burn them. Remove from the skillet and set aside to cool slightly.
- Place the chiles in a bowl and cover them with hot water. Let them soak for at least 30 minutes, or until they are softened.
- Season the beef chuck roast and short ribs generously with salt and black pepper. In a large Dutch oven or heavy-bottomed pot, heat the vegetable oil over medium-high heat. Sear the beef in batches until browned on all sides. Remove the seared beef from the pot and set aside.
- Add the quartered onion and chopped garlic to the pot and sauté over medium heat until softened and slightly browned, about 5-7 minutes.
- Drain the soaked chiles, reserving about 1 cup of the soaking liquid. Place the chiles in a blender along with the diced tomatoes, tomato paste, apple cider vinegar, oregano, cumin, cinnamon, and cloves. Add enough of the reserved soaking liquid to help the mixture blend smoothly. Blend until completely smooth, about 1-2 minutes.
- Pour the chile sauce into the Dutch oven with the sautéed onions and garlic. Cook for 2-3 minutes, stirring constantly. Add the seared beef, bay leaves, and beef broth (or water) to the pot. The liquid should cover the beef; add more broth or water if needed. Bring the mixture to a boil, then reduce the heat to low, cover, and simmer for at least 3-4 hours, or until the beef is very tender and easily shreds with a fork.
- Once the beef is cooked, remove it from the pot and shred it with two forks. Discard the bay leaves.
- Strain the broth through a fine-mesh sieve, reserving the broth (this is your consommé!). Discard the solids.
- Return the shredded beef to the strained broth.
- Have all your ingredients ready to go: the shredded birria, shredded Oaxaca cheese, chopped cilantro, chopped white onion, corn tortillas, and vegetable oil.
- Heat a large skillet or griddle over medium heat.
- Dip each corn tortilla into the birria broth, coating both sides.
- Place the dipped tortilla on the hot skillet or griddle. Add a generous amount of shredded Oaxaca cheese and shredded birria to one half of the tortilla.
- Fold the tortilla in half to create a taco. Cook for 2-3 minutes per side, or until the tortilla is golden brown and crispy and the cheese is melted and gooey. You can press down on the tacos with a spatula to help them cook evenly and get extra crispy.
- Repeat steps 3-5 with the remaining tortillas, cheese, and birria.
- If you’re making a large batch of tacos, you can keep them warm in a preheated oven (200°F) until ready to serve.
- Ladle the reserved birria broth (consommé) into small bowls or cups. Garnish with chopped cilantro and chopped white onion.
- Garnish the birria tacos with chopped cilantro and chopped white onion.
- Serve the birria tacos hot, with the consommé for dipping and lime wedges for squeezing.
Notes
- Don’t Skip the Chile Toasting: Toasting the dried chiles is essential for bringing out their flavor. Be careful not to burn them, as this will make them bitter.
- Simmer Low and Slow: The longer the birria simmers, the more flavorful it will become. Aim for at least 3-4 hours, or even longer if you have the time.
- Use Good Quality Cheese: Oaxaca cheese is the traditional choice for birria tacos, but Monterey Jack or a similar melting cheese will also work well.
- Don’t Overfill the Tacos: Overfilling the tacos can make them difficult to cook and eat. A generous amount of cheese and birria is enough.
- Get the Tortillas Crispy: The key to a great birria taco is a crispy tortilla. Cook the tacos until they are golden brown and slightly charred.
- Adjust the Spice Level: If you prefer a spicier birria, you can add a dried chile de árbol or a pinch of cayenne pepper to the chile sauce.
- Make it Ahead: The birria can be made ahead of time and stored in the refrigerator for up to 3 days. This is a great option if you’re short on time. Simply reheat the birria before assembling the tacos.
- Freeze for Later: You can also freeze the cooked birria for up to 2 months. Thaw it overnight in the refrigerator before reheating and assembling the tacos.
Printable Recipe Card
Want just the essential recipe details without scrolling through the article? Get our printable recipe card with just the ingredients and instructions.

