

Meet Your New Pixelated Pal – “Linky the Brave”!
Get ready to embark on a delightful crafting quest with this adorable Toon Link amigurumi! Whether you’re a seasoned crafter or just starting your crochet journey, this charming hero is perfect for bringing a touch of Hyrule magic into your home. With his iconic green tunic and brave spirit, Linky the Brave will become your favorite crafting companion. This easy-to-follow pattern creates a cuddly 20-25cm figure that’s perfect for display, gifting, or snuggling during your own adventures!
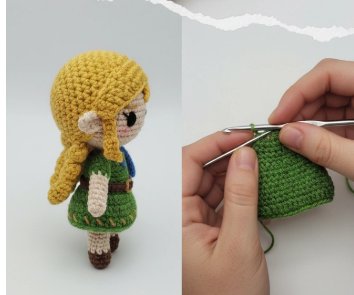
Materials Needed
- Yarn: Beige (skin tone) and brown (hair) – worsted weight yarn recommended
- Hook: 4mm crochet hook
- Eyes: 9mm safety eyes (2 pieces)
- Stuffing: Fiberfill stuffing
- Additional supplies: Yarn needle, scissors, stitch markers
Abbreviations
- R – Round
- mc – magic circle
- sc – single crochet
- inc – increase (2 sc in same stitch)
- dec – decrease (sc 2 together)
- BLO – back loops only
- sl st – slip stitch
- F.o. – fasten off
Pattern Instructions
Head (Beige)
R1: 6 sc in mc (6)
R2: inc in each st around (12)
R3: sc, inc repeat around (18)
R4: 2 sc, inc repeat around (24)
R5: 3 sc, inc repeat around (30)
R6: 4 sc, inc repeat around (36)
R7-R12: sc around (36)
R13: 4 sc, dec repeat around (30)
R14: 3 sc, dec repeat around (24)
Insert safety eyes between R9 and R10, about 6 stitches apart
Stuff firmly
R15: 2 sc, dec repeat around (18)
R16: sc, dec repeat around (12)
R17: dec around (6)
F.o., weave through remaining stitches and pull tight
Body (Beige)
R1: 6 sc in mc (6)
R2: inc in each st around (12)
R3: sc, inc repeat around (18)
R4: 2 sc, inc repeat around (24)
R5-R10: sc around (24)
R11: 2 sc, dec repeat around (18)
R12-R13: sc around (18)
Stuff firmly
R14: sc, dec repeat around (12)
R15: dec around (6)
F.o., weave through remaining stitches and pull tight
Arms (Beige) – Make 2
R1: 6 sc in mc (6)
R2: sc, inc repeat around (9)
R3-R8: sc around (9)
Stuff lightly
R9: dec, 7 sc (8)
R10: dec, 6 sc (7)
F.o., leave long tail for sewing
Legs (Beige) – Make 2
R1: 6 sc in mc (6)
R2: inc in each st around (12)
R3: BLO sc around (12)
R4-R8: sc around (12)
Stuff firmly
R9: sc, dec repeat around (8)
R10-R11: sc around (8)
F.o., leave long tail for sewing
Hair (Brown)
R1: 6 sc in mc (6)
R2: inc in each st around (12)
R3: sc, inc repeat around (18)
R4: 2 sc, inc repeat around (24)
R5: 3 sc, inc repeat around (30)
R6: 4 sc, inc repeat around (36)
R7-R8: sc around (36)
F.o., leave long tail for sewing
Ears (Beige) – Make 2
R1: 4 sc in mc (4)
R2: sc, inc repeat around (6)
R3: 2 sc, inc repeat around (8)
R4: sc around (8)
F.o., leave long tail for sewing
Don’t stuff ears
Assembly Instructions
- Attach the hair: Position the hair piece on top of the head, covering the crown area. Sew securely around the edges.
- Add the ears: Sew ears to the sides of the head, positioned slightly below the hair line for that characteristic pointed elf ear look.
- Attach the body: Sew the head to the body, making sure it’s centered and secure.
- Add arms and legs:
– Attach arms to the sides of the body at shoulder height
– Sew legs to the bottom of the body, positioning them so your Toon Link can sit or stand
- Final touches:
– Embroider a small smile with brown yarn
– Add any additional facial features if desired
– Give your creation a final check and adjust stuffing if needed
Your Adventure Begins Here!
Congratulations on completing your very own Toon Link amigurumi! Linky the Brave is now ready to join you on countless adventures, whether that’s sitting proudly on your shelf, accompanying you on travels, or becoming a cherished gift for a fellow Legend of Zelda fan. The beauty of amigurumi lies not just in the finished product, but in the meditative joy of creating something wonderful with your own two hands. We hope this pattern brought you as much happiness to make as it will to enjoy. Happy crafting, and may your hook always find the perfect stitch! 🧶✨
Don’t forget to share photos of your finished Toon Link on social media – we’d love to see your creative interpretations and color variations!