
Classic Chocolate Cake: just the name conjures up images of rich, decadent layers, doesn’t it? I can almost smell the intoxicating aroma wafting from the oven right now! This isn’t just any cake; it’s a timeless dessert that has graced countless birthdays, anniversaries, and “just because” moments. For generations, chocolate cake has been the go-to treat for celebrations big and small, and for good reason.
While the exact origins of chocolate cake are debated, its popularity exploded in the early 20th century with the increased availability of cocoa powder. It quickly became a staple in American households and beyond. But what is it about this particular dessert that makes it so universally loved?
I believe it’s the perfect combination of flavors and textures. The deep, satisfying taste of chocolate, whether it’s a bittersweet dark chocolate or a creamy milk chocolate, is undeniably appealing. Then there’s the texture – a moist, tender crumb that practically melts in your mouth. And let’s not forget the frosting! From a simple chocolate ganache to a fluffy buttercream, the possibilities are endless. Plus, a classic chocolate cake is surprisingly easy to make, making it a perfect choice for both experienced bakers and those just starting out. So, are you ready to bake a cake that will impress everyone?

Ingredients:
- For the Cake:
- 2 cups (250g) all-purpose flour
- 2 cups (400g) granulated sugar
- ¾ cup (75g) unsweetened cocoa powder
- 1 ½ teaspoons baking powder
- 1 ½ teaspoons baking soda
- 1 teaspoon salt
- 1 cup (240ml) buttermilk (or 1 cup milk + 1 tablespoon lemon juice or vinegar, let sit for 5 minutes)
- ½ cup (120ml) vegetable oil
- 2 large eggs
- 2 teaspoons vanilla extract
- 1 cup (240ml) boiling water
- For the Chocolate Buttercream Frosting:
- 1 cup (2 sticks or 226g) unsalted butter, softened
- 3 cups (360g) powdered sugar, sifted
- ¾ cup (75g) unsweetened cocoa powder
- ½ cup (120ml) milk or heavy cream
- 1 teaspoon vanilla extract
- Pinch of salt
Preparing the Cake Batter:
- Preheat and Prepare Pans: First things first, let’s get our oven preheated to 350°F (175°C). While it’s heating up, grease and flour two 9-inch round cake pans. You can also line the bottoms with parchment paper rounds for extra insurance against sticking. This step is crucial for easy cake removal later! I like to use baking spray that contains flour, it makes the process so much easier.
- Combine Dry Ingredients: In a large mixing bowl, whisk together the flour, sugar, cocoa powder, baking powder, baking soda, and salt. Make sure everything is well combined so that the leavening agents are evenly distributed throughout the batter. This ensures a consistent rise and texture.
- Add Wet Ingredients (Except Boiling Water): In the same bowl, add the buttermilk, vegetable oil, eggs, and vanilla extract. Beat with an electric mixer on medium speed for about 2 minutes, or until the batter is smooth and well combined. Don’t overmix at this stage, just ensure everything is incorporated.
- Incorporate Boiling Water: This is where the magic happens! Carefully pour the boiling water into the batter while mixing on low speed. The batter will become very thin, almost like a liquid. Don’t worry, this is perfectly normal! The hot water helps to bloom the cocoa powder, intensifying the chocolate flavor and creating a moist, tender crumb.
Baking the Cakes:
- Divide Batter Evenly: Pour the batter evenly into the prepared cake pans. I find it helpful to use a kitchen scale to ensure that each pan has the same amount of batter. This will result in cakes that bake at the same rate and are the same height.
- Bake: Place the pans in the preheated oven and bake for 30-35 minutes, or until a wooden skewer inserted into the center comes out clean. Keep a close eye on them, as baking times can vary depending on your oven.
- Cool in Pans: Once the cakes are done, remove them from the oven and let them cool in the pans for about 10 minutes. This allows them to set slightly and prevents them from breaking when you try to remove them.
- Invert and Cool Completely: After 10 minutes, invert the cakes onto a wire rack and let them cool completely before frosting. This is a crucial step! Frosting a warm cake will result in a melty, messy disaster. Patience is key!
Preparing the Chocolate Buttercream Frosting:
- Cream the Butter: In a large mixing bowl, beat the softened butter with an electric mixer on medium-high speed until it is light and fluffy. This usually takes about 3-5 minutes. The butter should be pale in color and have a smooth, creamy texture.
- Add Powdered Sugar and Cocoa Powder: Gradually add the sifted powdered sugar and cocoa powder to the butter, beating on low speed until combined. Sifting the powdered sugar is important to prevent lumps in your frosting.
- Add Milk and Vanilla: Add the milk (or heavy cream) and vanilla extract to the mixture and beat on medium speed until the frosting is smooth and creamy. If the frosting is too thick, add a little more milk, one tablespoon at a time, until you reach the desired consistency. If it’s too thin, add a little more powdered sugar.
- Add Salt: Add a pinch of salt to balance the sweetness and enhance the chocolate flavor.
- Beat Until Fluffy: Continue beating the frosting for another 2-3 minutes, or until it is light and fluffy. This will incorporate air into the frosting, making it easier to spread and giving it a smoother texture.
Assembling the Cake:
- Level the Cakes (Optional): If your cakes have a slight dome on top, you can use a serrated knife to level them. This will create a more even surface for frosting and stacking. I usually skip this step unless the domes are significant.
- Place First Layer on Serving Plate: Place one cake layer on a serving plate or cake stand.
- Frost the First Layer: Spread a generous layer of chocolate buttercream frosting evenly over the top of the first cake layer.
- Add Second Layer: Carefully place the second cake layer on top of the frosting.
- Frost the Entire Cake: Frost the top and sides of the cake with the remaining chocolate buttercream frosting. You can use a spatula or an offset spatula to create a smooth, even finish.
- Decorate (Optional): Decorate the cake as desired. You can use chocolate shavings, sprinkles, fresh berries, or anything else that you like. I sometimes drizzle melted chocolate over the top for an extra touch of decadence.
Tips and Tricks for the Perfect Chocolate Cake:
- Use High-Quality Cocoa Powder: The quality of your cocoa powder will significantly impact the flavor of your cake. I recommend using a Dutch-processed cocoa powder for a richer, more intense chocolate flavor.
- Don’t Overbake: Overbaking will result in a dry, crumbly cake. Check for doneness with a wooden skewer, and remove the cakes from the oven as soon as the skewer comes out clean.
- Cool Completely Before Frosting: As mentioned earlier, this is crucial! Frosting a warm cake will result in a melty mess.
- Soften the Butter Properly: The butter for the frosting should be softened but not melted. It should be soft enough to easily cream with an electric mixer.
- Sift the Powdered Sugar: Sifting the powdered sugar will prevent lumps in your frosting and ensure a smooth, creamy texture.
- Adjust the Frosting Consistency: If your frosting is too thick, add a little more milk or cream. If it’s too thin, add a little more powdered sugar.
- Chill the Cake Before Serving: Chilling the cake for at least 30 minutes before serving will allow the frosting to set and make it easier to slice.
- Buttermilk Substitute: If you don’t have buttermilk on hand, you can easily make a substitute by adding 1 tablespoon of lemon juice or vinegar to 1 cup of milk. Let it sit for 5 minutes before using.
- Storage: Store leftover cake in an airtight container at room temperature for up to 3 days, or in the refrigerator for up to 5 days.
- Make Ahead: You can bake the cake layers ahead of time and freeze them for up to 2 months. Wrap them tightly in plastic wrap and then in foil. Thaw them completely before frosting. You can also make the frosting ahead of time and store it in the refrigerator for up to 3 days. Let it come to room temperature and re-whip it before using.
Troubleshooting:
- Cake is Dry: Possible causes include overbaking, using too much flour, or not enough liquid. Make sure to measure your ingredients accurately and check for doneness with a wooden skewer.
- Cake is Dense: Possible causes include overmixing the batter, using old baking powder or baking soda, or not enough leavening agents. Be careful not to overmix the batter, and make sure your baking powder and baking soda are fresh.
- Frosting is Too Thick: Add a little more milk or cream, one tablespoon at a time, until you reach the desired consistency.
- Frosting is Too Thin: Add a little more powdered
Conclusion:
This isn’t just another chocolate cake recipe; it’s an invitation to experience pure, unadulterated chocolate bliss. From its incredibly moist crumb to its intensely rich flavor, this classic chocolate cake is guaranteed to become a family favorite. I truly believe this recipe is a must-try because it delivers on its promise of a decadent, satisfying dessert every single time. It’s the kind of cake that makes any occasion feel special, whether it’s a birthday celebration or simply a cozy Sunday afternoon treat.
But the best part? It’s incredibly versatile! While it’s absolutely divine as is, served with a simple dusting of powdered sugar, there are endless ways to customize it to your liking. For a truly indulgent experience, try pairing it with a scoop of vanilla bean ice cream or a dollop of freshly whipped cream. The cool creaminess perfectly complements the warm, rich chocolate.
If you’re feeling adventurous, consider adding a layer of chocolate ganache for an extra layer of decadence. A simple ganache made with equal parts chocolate and heavy cream will elevate this cake to a whole new level. Or, for a lighter touch, try frosting it with a light and airy cream cheese frosting. The tanginess of the cream cheese provides a delightful contrast to the sweetness of the cake.
Another fantastic variation is to incorporate some espresso powder into the batter. The espresso enhances the chocolate flavor, making it even more intense and complex. You could also add a handful of chocolate chips to the batter for an extra burst of chocolatey goodness in every bite.
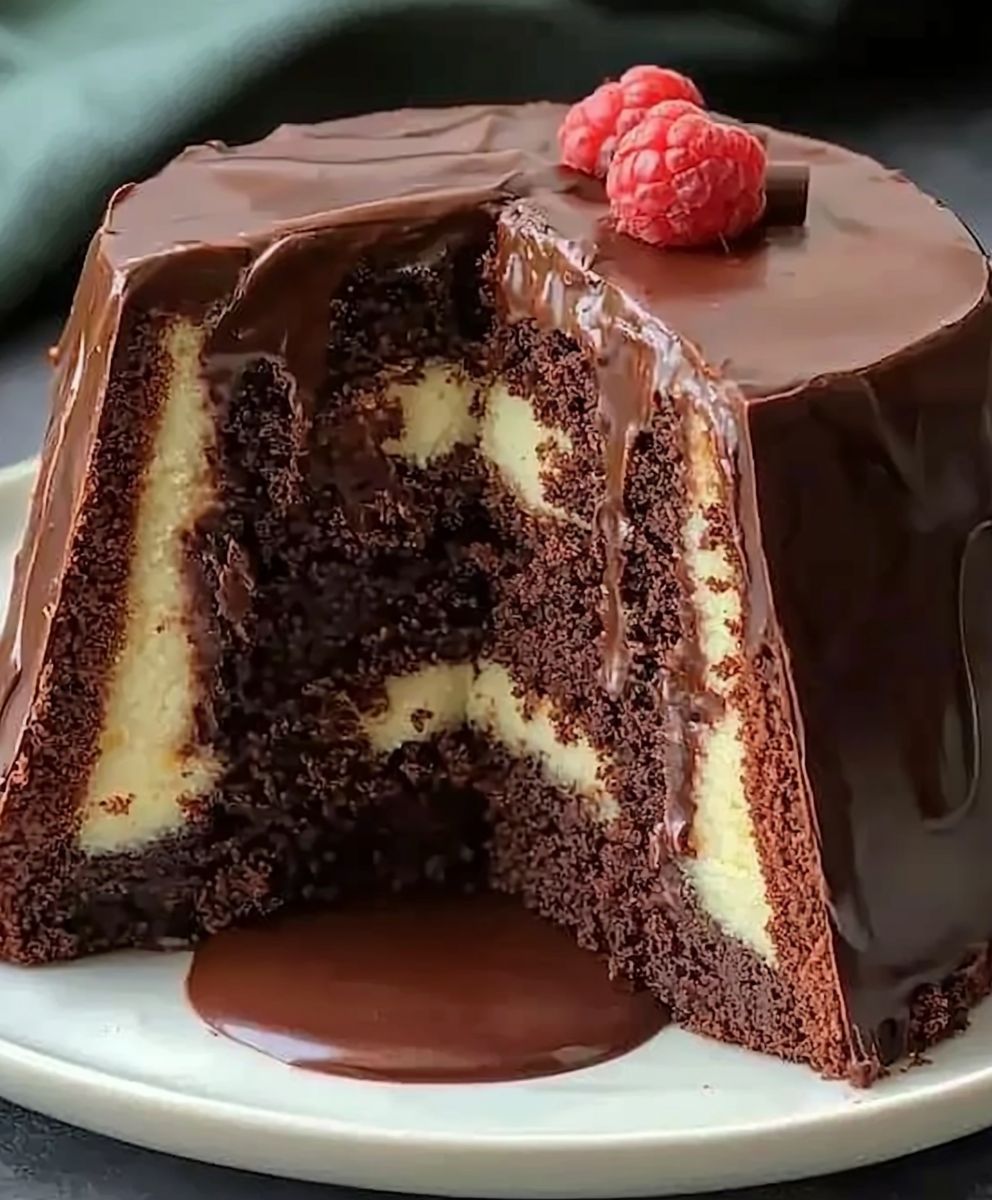
For a more sophisticated presentation, consider layering the cake with raspberry jam and frosting it with a chocolate buttercream. The combination of chocolate and raspberry is a classic for a reason, and it’s sure to impress your guests. You could even decorate it with fresh raspberries and chocolate shavings for a truly stunning dessert.
And don’t forget about serving suggestions! This cake is perfect for any occasion, from casual gatherings to formal dinner parties. Serve it with a glass of milk, a cup of coffee, or a dessert wine for a truly memorable experience. It’s also a great option for potlucks and bake sales, as it’s always a crowd-pleaser.
I’ve poured my heart and soul into perfecting this recipe, and I’m confident that you’ll love it as much as I do. It’s a recipe that I’ve made countless times, and it always brings a smile to my face. The aroma of chocolate baking in the oven is simply irresistible, and the taste of that first bite is pure heaven.
So, what are you waiting for? Grab your apron, preheat your oven, and get ready to bake the best classic chocolate cake you’ve ever tasted. I promise you won’t be disappointed.
And most importantly, I want to hear about your experience! Once you’ve tried this recipe, please come back and share your thoughts in the comments below. Let me know what variations you tried, what serving suggestions you enjoyed, and any tips or tricks you discovered along the way. I’m always eager to learn from my readers and to see how you’ve made this recipe your own. Happy baking!
Classic Chocolate Cake: The Ultimate Recipe for Decadent Delight
Decadent and moist chocolate cake with a rich chocolate buttercream frosting. Perfect for birthdays or any special occasion!
Ingredients
- 2 cups (250g) all-purpose flour
- 2 cups (400g) granulated sugar
- ¾ cup (75g) unsweetened cocoa powder
- 1 ½ teaspoons baking powder
- 1 ½ teaspoons baking soda
- 1 teaspoon salt
- 1 cup (240ml) buttermilk (or 1 cup milk + 1 tablespoon lemon juice or vinegar, let sit for 5 minutes)
- ½ cup (120ml) vegetable oil
- 2 large eggs
- 2 teaspoons vanilla extract
- 1 cup (240ml) boiling water
- 1 cup (2 sticks or 226g) unsalted butter, softened
- 3 cups (360g) powdered sugar, sifted
- ¾ cup (75g) unsweetened cocoa powder
- ½ cup (120ml) milk or heavy cream
- 1 teaspoon vanilla extract
- Pinch of salt
Instructions
- Preheat oven to 350°F (175°C). Grease and flour two 9-inch round cake pans. Line the bottoms with parchment paper rounds.
- In a large mixing bowl, whisk together the flour, sugar, cocoa powder, baking powder, baking soda, and salt.
- In the same bowl, add the buttermilk, vegetable oil, eggs, and vanilla extract. Beat with an electric mixer on medium speed for about 2 minutes, or until smooth and well combined.
- Carefully pour the boiling water into the batter while mixing on low speed. The batter will become very thin.
- Pour the batter evenly into the prepared cake pans.
- Bake for 30-35 minutes, or until a wooden skewer inserted into the center comes out clean.
- Remove from oven and let cool in the pans for about 10 minutes.
- After 10 minutes, invert the cakes onto a wire rack and let them cool completely before frosting.
- In a large mixing bowl, beat the softened butter with an electric mixer on medium-high speed until light and fluffy (3-5 minutes).
- Gradually add the sifted powdered sugar and cocoa powder to the butter, beating on low speed until combined.
- Add the milk (or heavy cream) and vanilla extract and beat on medium speed until smooth and creamy. Adjust milk/powdered sugar for desired consistency.
- Add a pinch of salt.
- Continue beating the frosting for another 2-3 minutes, or until light and fluffy.
- If cakes have a dome, level them with a serrated knife.
- Place one cake layer on a serving plate or cake stand.
- Spread a generous layer of chocolate buttercream frosting evenly over the top of the first cake layer.
- Carefully place the second cake layer on top of the frosting.
- Frost the top and sides of the cake with the remaining chocolate buttercream frosting.
- Decorate the cake as desired.
Notes
- Use high-quality Dutch-processed cocoa powder for a richer flavor.
- Don’t overbake the cake.
- Cool the cake completely before frosting.
- Soften the butter properly for the frosting.
- Sift the powdered sugar to prevent lumps.
- Adjust the frosting consistency as needed.
- Chill the cake before serving.
- Buttermilk Substitute: 1 tablespoon of lemon juice or vinegar to 1 cup of milk, let sit for 5 minutes.
- Storage: Store leftover cake in an airtight container at room temperature for up to 3 days, or in the refrigerator for up to 5 days.
- Make Ahead: Bake and freeze cake layers for up to 2 months. Make frosting ahead and store in the refrigerator for up to 3 days.
Printable Recipe Card
Want just the essential recipe details without scrolling through the article? Get our printable recipe card with just the ingredients and instructions.