
Oreo cheesecake bites: Prepare to enter a world of creamy, chocolatey bliss! Imagine the satisfying crunch of an Oreo cookie base giving way to a luscious, melt-in-your-mouth cheesecake filling. These aren’t just desserts; they’re miniature masterpieces of flavor and texture, perfect for satisfying your sweet tooth or wowing guests at your next gathering.
While the exact origins of cheesecake are debated, its roots can be traced back to ancient Greece. However, the modern cheesecake, and by extension, these delightful Oreo cheesecake bites, owe much to American ingenuity. The addition of the iconic Oreo cookie elevates this classic dessert to a whole new level of indulgence.
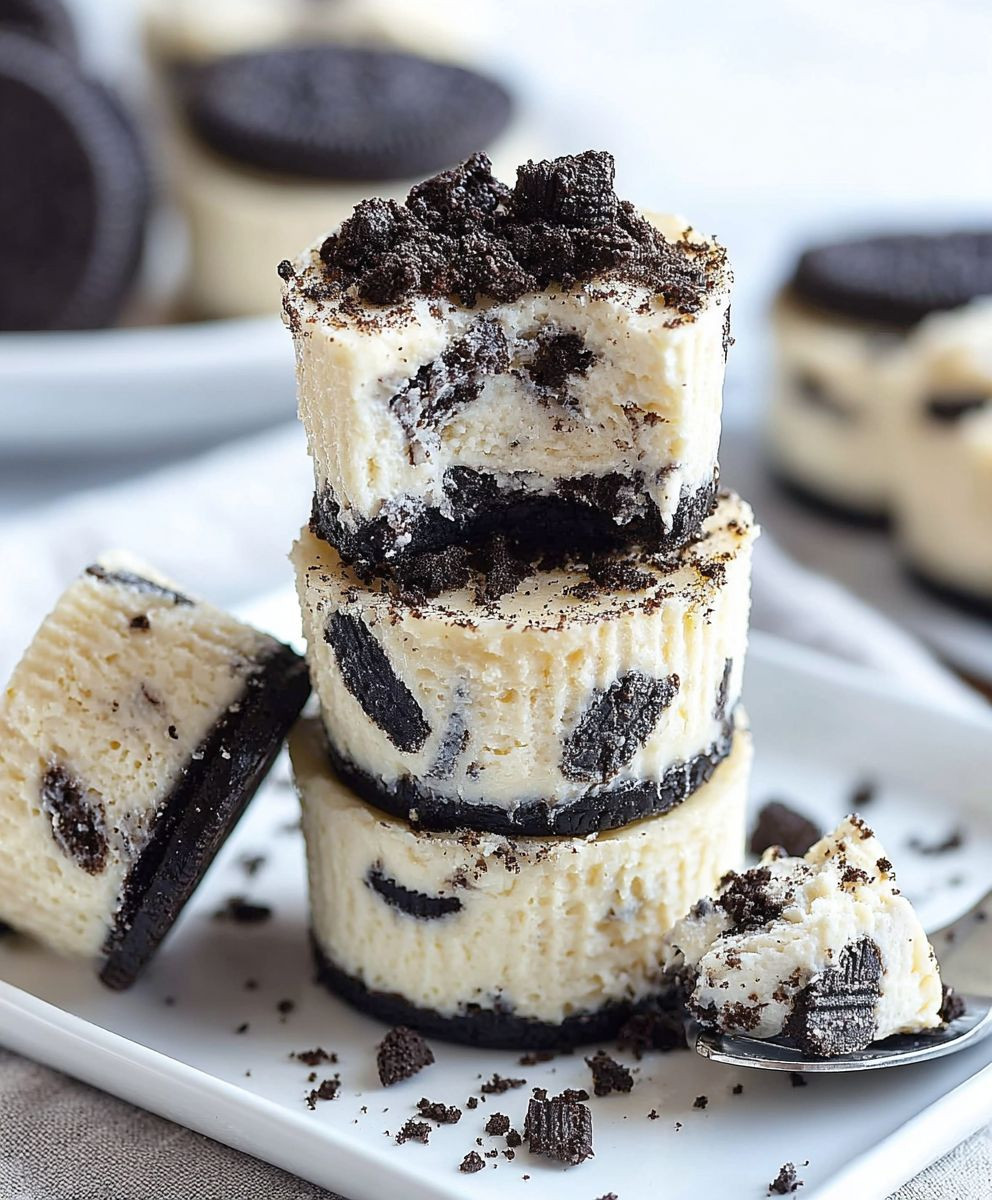
What makes these little treats so irresistible? It’s the perfect balance of flavors and textures. The rich, creamy cheesecake filling contrasts beautifully with the crisp, chocolatey Oreo crust. Plus, their bite-sized format makes them incredibly convenient and portion-controlled (if you can resist eating more than one!). Whether you’re a seasoned baker or a kitchen novice, these Oreo cheesecake bites are surprisingly easy to make, guaranteeing a crowd-pleasing dessert every time. Get ready to experience a symphony of flavors in every single bite!

Ingredients:
- For the Crust:
- 36 Oreo cookies (regular, not Double Stuf), finely crushed
- 6 tablespoons (3 ounces) unsalted butter, melted
- For the Cheesecake Filling:
- 24 ounces cream cheese, softened to room temperature
- 1 cup granulated sugar
- 1 teaspoon vanilla extract
- 2 large eggs
- 1/4 cup heavy cream
- 12 Oreo cookies (regular, not Double Stuf), coarsely chopped
- For the Garnish (Optional):
- Mini Oreo cookies
- Chocolate shavings
- Whipped cream
Preparing the Oreo Crust:
Okay, let’s get started with the foundation of our delicious Oreo cheesecake bites – the crust! This is super easy and sets the stage for the creamy goodness to come.
- Crush the Oreos: The first step is to crush those Oreos! You can use a food processor for a really fine crumb, which is what I usually do. Just pulse them until they’re uniformly crushed. If you don’t have a food processor, no worries! You can put the Oreos in a large zip-top bag, seal it tightly, and then use a rolling pin to crush them. Just make sure you get them pretty fine – you don’t want big chunks in your crust.
- Melt the Butter: Next, melt the butter. You can do this in the microwave in short bursts (about 30 seconds at a time), stirring in between, or you can melt it in a saucepan over low heat. Just be careful not to burn it!
- Combine the Crumbs and Butter: Now, in a medium bowl, combine the crushed Oreo crumbs and the melted butter. Mix them together really well until the crumbs are evenly moistened. The mixture should resemble wet sand. This is what will hold your crust together.
- Prepare the Muffin Tin: Line a 24-cup mini muffin tin with paper liners. This makes it super easy to remove the cheesecake bites later and keeps them from sticking. If you don’t have liners, you can grease the muffin tin really well with cooking spray.
- Press the Crust into the Liners: Take about a tablespoon of the Oreo crumb mixture and press it firmly into the bottom of each muffin liner. I like to use the bottom of a measuring cup or a small spoon to really pack it down. This will create a nice, solid base for the cheesecake filling. Make sure the crust is evenly distributed in each cup.
- Pre-bake the Crust (Optional): This step is optional, but I find that pre-baking the crust for a few minutes helps it to set up and prevents it from becoming soggy. If you want to pre-bake, place the muffin tin in a preheated oven at 350°F (175°C) for about 5 minutes. Then, remove it from the oven and let it cool slightly while you prepare the cheesecake filling.
Making the Cheesecake Filling:
Alright, now for the star of the show – the creamy, dreamy cheesecake filling! This is where the magic happens, and it’s surprisingly simple to make.
- Soften the Cream Cheese: This is crucial! Make sure your cream cheese is softened to room temperature before you start. This will ensure that your filling is smooth and lump-free. If you’re in a hurry, you can microwave the cream cheese in short bursts (about 15 seconds at a time), but be careful not to melt it.
- Beat the Cream Cheese and Sugar: In a large bowl, using an electric mixer (either a stand mixer or a hand mixer), beat the softened cream cheese and granulated sugar together until smooth and creamy. This usually takes about 2-3 minutes. Make sure to scrape down the sides of the bowl occasionally to ensure everything is evenly mixed.
- Add the Vanilla Extract: Stir in the vanilla extract. This adds a lovely flavor to the cheesecake filling.
- Incorporate the Eggs: Add the eggs one at a time, beating well after each addition. Be careful not to overmix at this stage, as overmixing can incorporate too much air into the batter, which can cause the cheesecake bites to crack during baking.
- Add the Heavy Cream: Stir in the heavy cream. This will make the filling even creamier and richer.
- Fold in the Chopped Oreos: Gently fold in the coarsely chopped Oreo cookies. You want to distribute them evenly throughout the filling without overmixing.
Baking the Oreo Cheesecake Bites:
We’re almost there! Now it’s time to bake these little beauties and let them transform into irresistible cheesecake bites.
- Preheat the Oven: Preheat your oven to 325°F (160°C).
- Fill the Muffin Liners: Spoon the cheesecake filling into the muffin liners, filling them almost to the top. You want to leave a little bit of space at the top to prevent them from overflowing during baking.
- Bake the Cheesecake Bites: Place the muffin tin in the preheated oven and bake for 18-22 minutes, or until the edges are set and the centers are just slightly jiggly. The baking time may vary depending on your oven, so keep an eye on them.
- Cool the Cheesecake Bites: Once the cheesecake bites are done, turn off the oven and crack the oven door slightly. Let the cheesecake bites cool in the oven for about 30 minutes. This helps to prevent them from cracking as they cool.
- Refrigerate the Cheesecake Bites: After 30 minutes, remove the muffin tin from the oven and let the cheesecake bites cool completely at room temperature. Then, transfer them to the refrigerator and chill for at least 2 hours, or preferably overnight. This allows the cheesecake filling to set up completely and develop its full flavor.
Garnishing and Serving:
The final touch! Now for the fun part – decorating and enjoying your homemade Oreo cheesecake bites.
- Remove from Muffin Tin: Once the cheesecake bites are chilled, carefully remove them from the muffin tin. If you used paper liners, this should be super easy. If you didn’t use liners, you may need to run a thin knife around the edges to loosen them.
- Garnish (Optional): Now you can get creative with the garnishes! I like to top mine with mini Oreo cookies, chocolate shavings, and a dollop of whipped cream. You can also drizzle them with melted chocolate or sprinkle them with crushed Oreos. The possibilities are endless!
- Serve and Enjoy: Serve the Oreo cheesecake bites chilled and enjoy! These are perfect for parties, potlucks, or just a delicious treat for yourself.
Tips and Variations:
- Double Stuf Oreos: While I recommend regular Oreos for the best texture, you can use Double Stuf Oreos if you prefer. Just be aware that the crust and filling might be a little sweeter.
- Different Oreo Flavors: Get creative with different Oreo flavors! Golden Oreos, Mint Oreos, or any other flavor would work well in this recipe.
- Chocolate Crust: For an even more decadent treat, you can add a tablespoon of cocoa powder to the Oreo crumb mixture for the crust.
- No-Bake Version: If you don’t want to bake the cheesecake bites, you can make a no-bake version. Simply prepare the crust as directed, then chill it in the refrigerator while you make the filling. For the filling, use a no-bake cheesecake recipe or add a packet of gelatin to the filling to help it set up.
- Freezing: These cheesecake bites freeze beautifully! To freeze, place them in a single layer on a baking sheet and freeze until solid. Then, transfer them to a freezer-safe container or bag. They can be stored in the freezer for up to 2 months. Thaw them in the refrigerator before serving.
Enjoy your delicious Oreo cheesecake bites!
Conclusion:
And there you have it! These Oreo cheesecake bites are truly a must-try for anyone who loves a little bit of indulgence without the fuss. From the satisfying crunch of the Oreo cookie base to the creamy, dreamy cheesecake filling, every bite is an explosion of flavor and texture that will leave you wanting more. I know I always do!
But what makes these little treats so special? It’s the perfect balance of simplicity and decadence. They’re incredibly easy to make, requiring minimal ingredients and effort, yet they deliver a gourmet-level experience. Forget spending hours in the kitchen – these cheesecake bites are ready in a flash, making them ideal for last-minute gatherings, potlucks, or simply satisfying a sweet craving.
Beyond their ease of preparation, these Oreo cheesecake bites are also incredibly versatile. Looking for serving suggestions? Serve them chilled straight from the refrigerator for a refreshing treat on a warm day. Or, for an extra touch of elegance, drizzle them with melted chocolate or caramel sauce. A sprinkle of crushed Oreos on top adds a beautiful finishing touch and intensifies that signature Oreo flavor.
But the fun doesn’t stop there! Feel free to experiment with variations to create your own signature cheesecake bites. Try using different flavors of Oreos, such as golden Oreos or mint Oreos, to add a unique twist. You could also incorporate other mix-ins into the cheesecake filling, such as chocolate chips, chopped nuts, or even a swirl of peanut butter. For a festive touch, add a few drops of food coloring to the filling to match the occasion. Imagine red and green cheesecake bites for Christmas or pastel-colored bites for Easter! The possibilities are truly endless.
These Oreo cheesecake bites are also perfect for portion control. Their small size makes them ideal for enjoying a little treat without overindulging. They’re also a great option for parties, as guests can easily grab a bite-sized dessert without making a mess. Plus, they’re always a crowd-pleaser, guaranteed to disappear quickly!
I truly believe that this recipe is a winner. It’s simple, delicious, and endlessly adaptable. Whether you’re a seasoned baker or a complete beginner, you’ll be able to whip up a batch of these irresistible cheesecake bites with ease.
So, what are you waiting for? Gather your ingredients, preheat your oven, and get ready to embark on a cheesecake adventure! I’m confident that you’ll love these Oreo cheesecake bites as much as I do.
And now, for the most important part: I want to hear about your experience! Did you try the recipe? Did you make any variations? What did your friends and family think? Share your thoughts, photos, and tips in the comments below. I can’t wait to see what you create! Your feedback is invaluable and helps me continue to improve and share delicious recipes with the world. Happy baking, and enjoy every single bite of these delightful Oreo cheesecake bites!
Oreo Cheesecake Bites: The Ultimate No-Bake Recipe
Rich Oreo crust and creamy cheesecake filling in mini form, perfect for parties or a sweet treat.
Ingredients
- 36 Oreo cookies (regular, not Double Stuf), finely crushed
- 6 tablespoons (3 ounces) unsalted butter, melted
- 24 ounces cream cheese, softened to room temperature
- 1 cup granulated sugar
- 1 teaspoon vanilla extract
- 2 large eggs
- 1/4 cup heavy cream
- 12 Oreo cookies (regular, not Double Stuf), coarsely chopped
- Mini Oreo cookies
- Chocolate shavings
- Whipped cream
Instructions
- Crush the Oreos: Use a food processor or a zip-top bag and rolling pin to finely crush the 36 Oreos for the crust.
- Melt the Butter: Melt the butter in the microwave or in a saucepan over low heat.
- Combine Crumbs and Butter: In a medium bowl, combine the crushed Oreo crumbs and melted butter. Mix well until evenly moistened.
- Prepare Muffin Tin: Line a 24-cup mini muffin tin with paper liners or grease well with cooking spray.
- Press Crust into Liners: Press about a tablespoon of the Oreo crumb mixture firmly into the bottom of each muffin liner.
- Pre-bake Crust (Optional): Bake the crust in a preheated oven at 350°F (175°C) for about 5 minutes. Let cool slightly.
- Soften Cream Cheese: Ensure cream cheese is softened to room temperature.
- Beat Cream Cheese and Sugar: In a large bowl, beat the softened cream cheese and granulated sugar together until smooth and creamy.
- Add Vanilla Extract: Stir in the vanilla extract.
- Incorporate Eggs: Add the eggs one at a time, beating well after each addition.
- Add Heavy Cream: Stir in the heavy cream.
- Fold in Chopped Oreos: Gently fold in the coarsely chopped Oreo cookies.
- Preheat Oven: Preheat oven to 325°F (160°C).
- Fill Muffin Liners: Spoon the cheesecake filling into the muffin liners, filling them almost to the top.
- Bake Cheesecake Bites: Bake for 18-22 minutes, or until the edges are set and the centers are just slightly jiggly.
- Cool Cheesecake Bites: Turn off the oven and crack the oven door slightly. Let the cheesecake bites cool in the oven for about 30 minutes.
- Refrigerate Cheesecake Bites: Remove from oven and let cool completely at room temperature. Then, refrigerate for at least 2 hours, or preferably overnight.
- Remove from Muffin Tin: Carefully remove the cheesecake bites from the muffin tin.
- Garnish (Optional): Top with mini Oreo cookies, chocolate shavings, and/or whipped cream.
- Serve and Enjoy: Serve chilled.
Notes
- For best texture, use regular Oreos. Double Stuf Oreos will make the crust and filling sweeter.
- Get creative with different Oreo flavors like Golden or Mint.
- Add a tablespoon of cocoa powder to the Oreo crumb mixture for a chocolate crust.
- For a no-bake version, chill the crust and use a no-bake cheesecake filling recipe.
- Cheesecake bites can be frozen for up to 2 months. Thaw in the refrigerator before serving.
Printable Recipe Card
Want just the essential recipe details without scrolling through the article? Get our printable recipe card with just the ingredients and instructions.