
Easy Christmas Spritz Cookies: the very words conjure up images of twinkling lights, festive gatherings, and the sweet, buttery aroma filling your kitchen. Have you ever wondered how these delightful little morsels became a holiday staple? Spritz cookies, with their charming shapes and delicate crumb, trace their roots back to Germany, where the word “spritzen” means “to squirt,” referring to the method of pressing the dough through a cookie press.
These cookies arrived in America with German immigrants and quickly became a beloved part of Christmas celebrations. What’s not to love? The buttery, melt-in-your-mouth texture, combined with the endless possibilities for decorating, makes them a crowd-pleaser for all ages. Plus, they are surprisingly easy to make, especially with a good cookie press!
I know that during the busy holiday season, time is precious. That’s why I’m sharing my foolproof recipe for Easy Christmas Spritz Cookies. This recipe simplifies the process without sacrificing any of the delicious flavor or festive charm. Get ready to create a batch of these beautiful and tasty cookies that will be the star of your Christmas cookie platter!

Ingredients:
- For the Cookies:
- 1 cup (2 sticks) unsalted butter, softened
- ¾ cup granulated sugar
- 1 large egg
- 1 teaspoon vanilla extract
- ½ teaspoon almond extract (optional, but highly recommended!)
- 2 ¼ cups all-purpose flour
- ½ teaspoon baking powder
- ¼ teaspoon salt
- For the Decoration:
- Sprinkles! (Various colors and shapes for festive fun)
- Optional: Melted chocolate (dark, milk, or white) for drizzling
Preparing the Dough: The Foundation of Deliciousness
Okay, let’s get started! The key to amazing spritz cookies is a well-made dough. Don’t skip any steps, and you’ll be rewarded with melt-in-your-mouth goodness.
- Cream the Butter and Sugar: In a large bowl (or the bowl of your stand mixer), cream together the softened butter and granulated sugar until light and fluffy. This usually takes about 3-5 minutes. You want it to be pale and almost airy. This step is crucial for incorporating air into the dough, which will give the cookies their delicate texture. If using a hand mixer, make sure to scrape down the sides of the bowl occasionally to ensure everything is evenly mixed.
- Add the Egg and Extracts: Beat in the egg until fully incorporated. Then, stir in the vanilla extract and almond extract (if using). The almond extract adds a lovely subtle flavor that complements the buttery taste of the cookies. Don’t overmix at this stage; just combine until everything is homogenous.
- Combine Dry Ingredients: In a separate medium bowl, whisk together the all-purpose flour, baking powder, and salt. Whisking ensures that the baking powder and salt are evenly distributed throughout the flour, which is important for consistent baking.
- Gradually Add Dry Ingredients to Wet Ingredients: Gradually add the dry ingredients to the wet ingredients, mixing on low speed until just combined. Be careful not to overmix the dough, as this can develop the gluten in the flour and result in tough cookies. Mix until the flour is almost completely incorporated, then stop and scrape down the sides of the bowl. Give it one or two more quick pulses until everything is just combined. A slightly shaggy dough is perfectly fine at this point.
- Chill the Dough: Wrap the dough in plastic wrap and chill it in the refrigerator for at least 30 minutes, or even better, for an hour. Chilling the dough is essential because it allows the butter to firm up, which will prevent the cookies from spreading too much during baking. It also makes the dough easier to handle and pipe. If you’re short on time, you can chill it for a shorter period, but the cookies might spread a bit more.
Cookie Press Magic: Shaping Your Spritz
Now for the fun part! Getting the hang of the cookie press can take a little practice, but once you do, it’s incredibly satisfying.
- Preheat Oven and Prepare Baking Sheets: Preheat your oven to 375°F (190°C). Line baking sheets with parchment paper or silicone baking mats. Parchment paper prevents the cookies from sticking and makes cleanup a breeze. Silicone mats provide even more insulation and can help prevent the bottoms of the cookies from browning too quickly.
- Load the Cookie Press: Remove the chilled dough from the refrigerator. If it’s too firm to work with, let it sit at room temperature for a few minutes until it’s pliable but still cold. Load the dough into your cookie press according to the manufacturer’s instructions. Make sure the dough is packed tightly to avoid air pockets.
- Press the Cookies: Attach your desired cookie press disc. Hold the cookie press firmly against the ungreased baking sheet and press the trigger to release the dough. Lift the press straight up after each cookie. You might need to experiment a bit to find the right pressure and technique. Don’t worry if the first few cookies aren’t perfect; just scrape the dough back into the press and try again. Aim for cookies that are about 1-2 inches in size.
- Decorate with Sprinkles: Immediately after pressing the cookies onto the baking sheet, decorate them with sprinkles. The sprinkles will adhere best to the dough while it’s still soft. Get creative with your sprinkle combinations!
Baking and Cooling: The Final Touches
Almost there! Baking time is crucial for achieving that perfect golden-brown color and slightly crisp texture.
- Bake the Cookies: Bake the cookies for 8-10 minutes, or until the edges are lightly golden brown. Keep a close eye on them, as they can burn easily. The baking time will vary depending on your oven, so start checking them at 8 minutes.
- Cool the Cookies: Remove the baking sheets from the oven and let the cookies cool on the baking sheets for a few minutes before transferring them to a wire rack to cool completely. This allows the cookies to firm up and prevents them from breaking.
Optional: Chocolate Drizzle Extravaganza
If you’re feeling extra fancy, a chocolate drizzle adds a touch of elegance and decadence to these already delightful cookies.
- Melt the Chocolate: Melt your chocolate of choice (dark, milk, or white) in a double boiler or in the microwave in 30-second intervals, stirring in between, until smooth. Be careful not to overheat the chocolate, as it can seize up.
- Drizzle the Chocolate: Dip a fork into the melted chocolate and drizzle it over the cooled cookies. You can create simple lines or more elaborate patterns.
- Let the Chocolate Set: Let the chocolate set completely before serving or storing the cookies. You can speed up the setting process by placing the cookies in the refrigerator for a few minutes.
Storage: Keeping Your Cookies Fresh
These cookies are best enjoyed fresh, but they can be stored for several days if properly stored.
- Store in an Airtight Container: Store the cooled cookies in an airtight container at room temperature. This will help to keep them fresh and prevent them from drying out.
- Layer with Parchment Paper: If you’re stacking the cookies, layer them with parchment paper to prevent them from sticking together.
- Freezing: Spritz cookies can also be frozen for longer storage. Freeze them in a single layer on a baking sheet until solid, then transfer them to a freezer-safe bag or container. They can be frozen for up to 2-3 months. Thaw them at room temperature before serving.
Tips for Perfect Spritz Cookies:
- Softened Butter is Key: Make sure your butter is properly softened, but not melted. It should be soft enough to easily cream with the sugar, but still hold its shape.
- Don’t Overmix: Overmixing the dough will develop the gluten in the flour, resulting in tough cookies. Mix until just combined.
- Chill the Dough: Chilling the dough is essential for preventing the cookies from spreading too much during baking.
- Experiment with Flavors: Feel free to experiment with different extracts and spices to create your own unique flavor combinations. Lemon extract, orange extract, or even a pinch of cinnamon can add a delicious twist.
- Practice with the Cookie Press: Don’t be discouraged if your first few cookies aren’t perfect. It takes a little practice to get the hang of the cookie press.
- Use High-Quality Sprinkles: The quality of your sprinkles can make a big difference in the appearance of your cookies. Look for sprinkles that are vibrant and have a good texture.
Troubleshooting:
- Cookies Spreading Too Much: If your cookies are spreading too much during baking, it could be due to several factors. Make sure your butter is not too soft, and that you’re chilling the dough for long enough. You can also try adding a tablespoon or two of flour to the dough.
- Dough Too Stiff: If your dough is too stiff to press through the cookie press, let it sit at room temperature for a few minutes until it’s pliable but still cold. You can also try adding a tablespoon of milk or cream to the dough.
- Cookies Burning: If your cookies are burning on the bottom, try lowering the oven temperature by 25 degrees and baking them for a longer period. You can also try using silicone baking mats, which provide more insulation and can help prevent the bottoms of the cookies from browning too quickly.
Conclusion:
And there you have it! These Easy Christmas Spritz Cookies are more than just a pretty treat; they’re a shortcut to holiday happiness. I truly believe this recipe is a must-try this Christmas season, and here’s why: it’s incredibly simple, even for novice bakers. The dough comes together quickly, the pressing is surprisingly therapeutic, and the results are consistently delicious and festive. Forget spending hours slaving away in the kitchen – these cookies deliver maximum impact with minimal effort, leaving you more time to enjoy the holidays with loved ones.
But the best part? The endless possibilities! While I’ve shared my go-to recipe, feel free to get creative with your flavorings and decorations. A dash of almond extract instead of vanilla? Absolutely! A sprinkle of chopped nuts before baking? Go for it! You can even experiment with different food colorings to create a rainbow of Christmas cheer.
Serving Suggestions and Variations:
These cookies are perfect on their own, of course, but they also shine when paired with a warm mug of hot chocolate or a glass of chilled eggnog. Consider arranging them on a festive platter for your holiday gatherings, or package them in decorative tins as thoughtful homemade gifts.
For a fun variation, try dipping the cooled cookies in melted chocolate and then sprinkling them with crushed peppermint candies or festive sprinkles. You could also sandwich two cookies together with a layer of buttercream frosting or raspberry jam for an extra-special treat. If you’re feeling adventurous, experiment with different extracts like lemon, orange, or even rum for a unique flavor profile.
Don’t be afraid to let your creativity flow and make these cookies your own! The beauty of this recipe lies in its versatility. It’s a blank canvas just waiting for your personal touch.
I’m confident that these Easy Christmas Spritz Cookies will become a beloved tradition in your home, just as they have in mine. They’re the perfect way to spread holiday cheer and create lasting memories with family and friends.
So, what are you waiting for? Preheat your oven, gather your ingredients, and get ready to bake up a batch of these delightful cookies. I promise you won’t regret it!
And most importantly, I want to hear about your experience! Did you try the recipe? What variations did you make? How did your cookies turn out? Share your photos and stories in the comments below. I can’t wait to see your creations and hear about your baking adventures. Happy baking, and happy holidays! I hope you enjoy making this Easy Christmas Spritz Cookies recipe as much as I do. Let me know if you have any questions. I am here to help!
Easy Christmas Spritz Cookies: A Festive Baking Guide
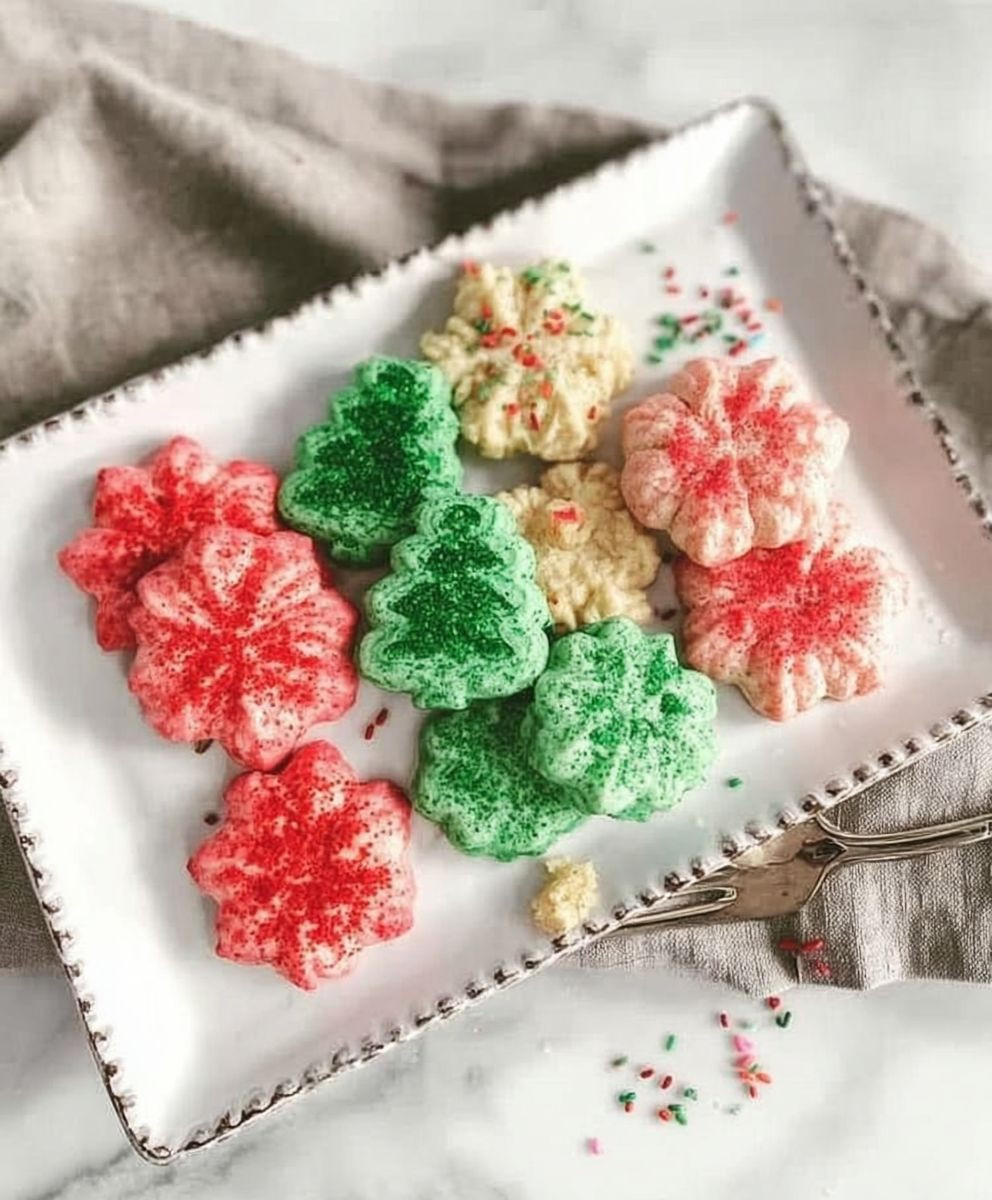
Buttery, melt-in-your-mouth Spritz cookies pressed into festive shapes and decorated with colorful sprinkles. Perfect for holidays and celebrations.
Ingredients
- 1 cup (2 sticks) unsalted butter, softened
- ¾ cup granulated sugar
- 1 large egg
- 1 teaspoon vanilla extract
- ½ teaspoon almond extract (optional, but highly recommended!)
- 2 ¼ cups all-purpose flour
- ½ teaspoon baking powder
- ¼ teaspoon salt
- Sprinkles! (Various colors and shapes for festive fun)
- Optional: Melted chocolate (dark, milk, or white) for drizzling
Instructions
- Cream the Butter and Sugar: In a large bowl (or the bowl of your stand mixer), cream together the softened butter and granulated sugar until light and fluffy. This usually takes about 3-5 minutes. You want it to be pale and almost airy. If using a hand mixer, make sure to scrape down the sides of the bowl occasionally to ensure everything is evenly mixed.
- Add the Egg and Extracts: Beat in the egg until fully incorporated. Then, stir in the vanilla extract and almond extract (if using). Don’t overmix at this stage; just combine until everything is homogenous.
- Combine Dry Ingredients: In a separate medium bowl, whisk together the all-purpose flour, baking powder, and salt.
- Gradually Add Dry Ingredients to Wet Ingredients: Gradually add the dry ingredients to the wet ingredients, mixing on low speed until just combined. Be careful not to overmix the dough. Mix until the flour is almost completely incorporated, then stop and scrape down the sides of the bowl. Give it one or two more quick pulses until everything is just combined. A slightly shaggy dough is perfectly fine at this point.
- Chill the Dough: Wrap the dough in plastic wrap and chill it in the refrigerator for at least 30 minutes, or even better, for an hour.
- Preheat Oven and Prepare Baking Sheets: Preheat your oven to 375°F (190°C). Line baking sheets with parchment paper or silicone baking mats.
- Load the Cookie Press: Remove the chilled dough from the refrigerator. If it’s too firm to work with, let it sit at room temperature for a few minutes until it’s pliable but still cold. Load the dough into your cookie press according to the manufacturer’s instructions. Make sure the dough is packed tightly to avoid air pockets.
- Press the Cookies: Attach your desired cookie press disc. Hold the cookie press firmly against the ungreased baking sheet and press the trigger to release the dough. Lift the press straight up after each cookie. Aim for cookies that are about 1-2 inches in size.
- Decorate with Sprinkles: Immediately after pressing the cookies onto the baking sheet, decorate them with sprinkles.
- Bake the Cookies: Bake the cookies for 8-10 minutes, or until the edges are lightly golden brown. Keep a close eye on them, as they can burn easily.
- Cool the Cookies: Remove the baking sheets from the oven and let the cookies cool on the baking sheets for a few minutes before transferring them to a wire rack to cool completely.
- Optional: Chocolate Drizzle: Melt your chocolate of choice (dark, milk, or white) in a double boiler or in the microwave in 30-second intervals, stirring in between, until smooth. Dip a fork into the melted chocolate and drizzle it over the cooled cookies. Let the chocolate set completely before serving or storing the cookies.
- Storage: Store the cooled cookies in an airtight container at room temperature. Layer with parchment paper to prevent them from sticking together. For longer storage, freeze them in a single layer on a baking sheet until solid, then transfer them to a freezer-safe bag or container. They can be frozen for up to 2-3 months. Thaw them at room temperature before serving.
Notes
- Softened butter is key, but not melted.
- Don’t overmix the dough.
- Chilling the dough is essential.
- Experiment with different extracts and spices.
- Practice with the cookie press.
- Use high-quality sprinkles.
- If cookies are spreading too much, make sure your butter is not too soft, and that you’re chilling the dough for long enough. You can also try adding a tablespoon or two of flour to the dough.
- If your dough is too stiff to press through the cookie press, let it sit at room temperature for a few minutes until it’s pliable but still cold. You can also try adding a tablespoon of milk or cream to the dough.
- If your cookies are burning on the bottom, try lowering the oven temperature by 25 degrees and baking them for a longer period. You can also try using silicone baking mats.