
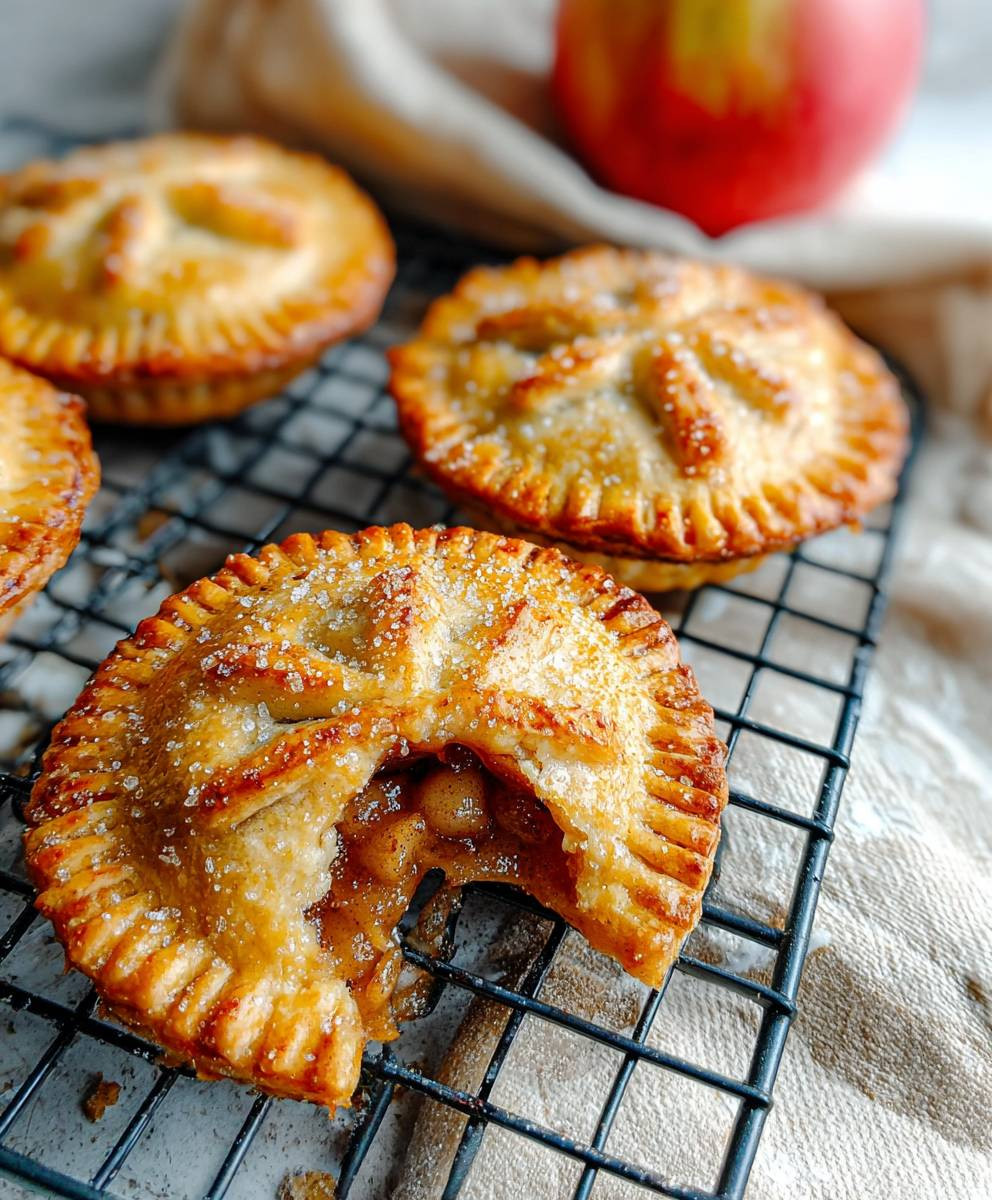
Mini apple pies, those delightful, hand-held pockets of autumnal bliss, are about to become your new favorite dessert! Imagine biting into a perfectly flaky crust, giving way to a warm, cinnamon-spiced apple filling that practically melts in your mouth. Is your mouth watering yet? Mine is! These aren’t just any pies; they’re individual servings of pure comfort, perfect for parties, potlucks, or simply a cozy night in.
The concept of apple pie, in its larger form, has roots stretching back to medieval Europe, where early versions were often savory rather than sweet. Over time, as apples became more readily available and sugar more affordable, the sweet apple pie we know and love today began to emerge. Bringing it to a smaller scale, like these mini apple pies, makes it even more accessible and fun to eat!
People adore apple pie for its comforting flavors and textures. The sweet-tartness of the apples, combined with the warm spices like cinnamon and nutmeg, creates a symphony of flavors that evokes feelings of nostalgia and home. Plus, the contrast between the crisp, buttery crust and the soft, tender filling is simply irresistible. And let’s be honest, who can resist the convenience of a perfectly portioned, single-serving pie? Get ready to bake up a batch of these little gems and experience the joy for yourself!

Ingredients:
- For the Crust:
- 2 ½ cups all-purpose flour, plus more for dusting
- 1 teaspoon salt
- 1 cup (2 sticks) unsalted butter, cold and cut into cubes
- ½ cup vegetable shortening, cold
- 6-8 tablespoons ice water
- For the Apple Filling:
- 6 medium apples (such as Honeycrisp, Gala, or Fuji), peeled, cored, and diced
- ½ cup granulated sugar
- ¼ cup packed light brown sugar
- 2 tablespoons all-purpose flour
- 1 teaspoon ground cinnamon
- ¼ teaspoon ground nutmeg
- ¼ teaspoon ground allspice
- 2 tablespoons lemon juice
- 2 tablespoons unsalted butter, cut into small pieces
- For the Egg Wash:
- 1 large egg
- 1 tablespoon milk or water
- For the Topping (Optional):
- Turbinado sugar or coarse sugar
Preparing the Dough:
Okay, let’s get started with the crust! This is the foundation of our mini apple pies, and a good crust makes all the difference. Don’t be intimidated; I’ll walk you through it step-by-step.
- Combine Dry Ingredients: In a large bowl, whisk together the flour and salt. This ensures the salt is evenly distributed, which is crucial for flavor.
- Cut in the Butter and Shortening: Add the cold, cubed butter and cold shortening to the flour mixture. This is where the magic happens! You want to “cut” the fat into the flour until the mixture resembles coarse crumbs. You can use a pastry blender, your fingers (work quickly to keep the fat cold!), or a food processor. If using a food processor, pulse until the mixture resembles coarse crumbs. Be careful not to over-process! We want small pieces of fat, not a smooth paste. The small pieces of fat will create flaky layers when baked.
- Add Ice Water: Gradually add the ice water, one tablespoon at a time, mixing gently after each addition. The amount of water you need will vary depending on the humidity and the flour you’re using. Mix until the dough just comes together. It should be slightly shaggy, but not sticky. Be careful not to overwork the dough, as this will develop the gluten and make the crust tough.
- Form Dough into Disks: Divide the dough in half and form each half into a flat disk. Wrap each disk tightly in plastic wrap.
- Chill the Dough: Refrigerate the dough for at least 2 hours, or preferably overnight. This allows the gluten to relax, which will make the dough easier to roll out and prevent it from shrinking during baking. Chilling also helps the fat solidify, which is essential for a flaky crust.
Preparing the Apple Filling:
While the dough is chilling, let’s get the apple filling ready. This is where we get to infuse our pies with delicious apple flavor and warm spices!
- Prepare the Apples: Peel, core, and dice the apples into small, even pieces. I like to use a combination of apple varieties for a more complex flavor, but you can use your favorite.
- Combine Filling Ingredients: In a large bowl, combine the diced apples, granulated sugar, brown sugar, flour, cinnamon, nutmeg, and allspice. The flour will help thicken the filling as it bakes.
- Add Lemon Juice: Stir in the lemon juice. This will help prevent the apples from browning and add a touch of brightness to the filling.
- Melt Butter into Filling: Gently toss the apple mixture with the small pieces of butter. The butter will melt during baking and add richness and flavor to the filling.
- Let the Filling Sit: Let the filling sit for about 15-20 minutes. This will allow the apples to release some of their juices, which will help create a saucy filling.
Assembling the Mini Apple Pies:
Now for the fun part – putting everything together! This is where our mini apple pies start to take shape.
- Preheat Oven and Prepare Muffin Tin: Preheat your oven to 375°F (190°C). Lightly grease a 24-cup mini muffin tin. You can also use muffin liners if you prefer, but I find that greasing the tin works best for easy removal.
- Roll Out the Dough: On a lightly floured surface, roll out one disk of dough to about 1/8-inch thickness. Use a 3-inch round cookie cutter (or a glass or jar lid) to cut out circles of dough. You should get about 12 circles from each disk.
- Place Dough Circles in Muffin Tin: Gently press each dough circle into a cup of the prepared muffin tin. Make sure the dough comes up the sides of the cup.
- Fill the Pies: Spoon the apple filling into each dough-lined cup, filling them almost to the top. Don’t overfill, or the filling will bubble over during baking.
- Create Top Crust (Optional): If you want a top crust, roll out the second disk of dough and cut out more 3-inch circles. You can also cut out smaller circles or strips of dough to create a lattice top. Place the top crust on each pie, crimping the edges to seal. If you’re using a solid top crust, be sure to cut a few slits in the top to allow steam to escape.
- Prepare Egg Wash: In a small bowl, whisk together the egg and milk (or water).
- Brush with Egg Wash: Brush the top of each pie with the egg wash. This will give them a beautiful golden-brown color.
- Sprinkle with Sugar (Optional): Sprinkle the tops of the pies with turbinado sugar or coarse sugar for added sweetness and sparkle.
Baking the Mini Apple Pies:
Almost there! Now it’s time to bake our mini apple pies to golden-brown perfection.
- Bake: Bake for 20-25 minutes, or until the crust is golden brown and the filling is bubbly. Keep an eye on them, as baking times may vary depending on your oven. If the crust starts to brown too quickly, you can tent the pies with foil.
- Cool: Let the pies cool in the muffin tin for about 5-10 minutes before carefully transferring them to a wire rack to cool completely. This will prevent them from sticking to the tin.
Serving and Storing:
These mini apple pies are best served warm or at room temperature. They’re delicious on their own, but you can also serve them with a scoop of vanilla ice cream or a dollop of whipped cream.
To store, keep them in an airtight container at room temperature for up to 2 days, or in the refrigerator for up to 5 days. You can also freeze them for longer storage. To reheat, bake them in a preheated oven at 350°F (175°C) for about 10-15 minutes, or until warmed through.
Conclusion:
And there you have it! These mini apple pies are truly a must-try for anyone craving a comforting, perfectly portioned dessert. From the flaky, buttery crust to the warm, spiced apple filling, every bite is an explosion of autumnal flavors that will leave you wanting more. I know I always do! The best part? They’re surprisingly easy to make, even if you’re not a seasoned baker. The simplicity of the recipe allows the natural sweetness of the apples to really shine through, creating a dessert that’s both satisfying and wholesome.
But the reasons to try these little gems don’t stop there. Think about it: they’re perfect for individual servings, eliminating the need to slice and serve a larger pie. This makes them ideal for parties, potlucks, or even just a cozy night in when you want a sweet treat without the commitment of a whole pie. Plus, their adorable size makes them incredibly appealing to both kids and adults alike. I’ve never seen anyone turn down a mini apple pie!
Now, let’s talk about serving suggestions and variations. While these mini apple pies are delicious on their own, a scoop of vanilla ice cream or a dollop of whipped cream takes them to the next level. The cold creaminess perfectly complements the warm, spiced filling, creating a delightful contrast in textures and temperatures. For an extra touch of elegance, you could dust them with powdered sugar or drizzle them with caramel sauce.
If you’re feeling adventurous, there are plenty of ways to customize this recipe to your liking. Try adding a handful of chopped walnuts or pecans to the apple filling for a nutty crunch. Or, experiment with different spices, such as cardamom or ginger, to create a unique flavor profile. You could even use a different type of apple, like Granny Smith for a tart twist or Honeycrisp for extra sweetness. Another fun variation is to add a crumble topping instead of a traditional pie crust top. A simple mixture of flour, butter, and sugar creates a delicious, crunchy topping that adds another layer of texture to these mini pies.
For a truly decadent experience, consider serving these mini apple pies with a warm cup of spiced cider or a glass of dessert wine. The combination of flavors is simply divine and will transport you to a cozy autumn evening. And if you’re looking for a festive treat for the holidays, these mini apple pies are sure to be a crowd-pleaser. They’re the perfect size for adding to a dessert platter or gifting to friends and family.
I truly believe that everyone should experience the joy of biting into a warm, homemade mini apple pie. So, I encourage you to give this recipe a try. Don’t be intimidated by the thought of making pie crust – it’s easier than you think! And even if your first attempt isn’t perfect, I guarantee they’ll still taste delicious.
Once you’ve made these mini apple pies, I’d love to hear about your experience! Share your photos and comments on social media using [Your Hashtag Here]. Let me know what variations you tried and what your family and friends thought. I’m always looking for new ideas and inspiration, and I can’t wait to see your creations. Happy baking! I am sure you will love this recipe as much as I do.
Mini Apple Pies: The Perfect Bite-Sized Dessert
Delicious and easy mini apple pies with flaky crust and warm, spiced apple filling. Perfect fall treat!
Ingredients
- 2 ½ cups all-purpose flour, plus more for dusting
- 1 teaspoon salt
- 1 cup (2 sticks) unsalted butter, cold and cut into cubes
- ½ cup vegetable shortening, cold
- 6-8 tablespoons ice water
- 6 medium apples (such as Honeycrisp, Gala, or Fuji), peeled, cored, and diced
- ½ cup granulated sugar
- ¼ cup packed light brown sugar
- 2 tablespoons all-purpose flour
- 1 teaspoon ground cinnamon
- ¼ teaspoon ground nutmeg
- ¼ teaspoon ground allspice
- 2 tablespoons lemon juice
- 2 tablespoons unsalted butter, cut into small pieces
- 1 large egg
- 1 tablespoon milk or water
- Turbinado sugar or coarse sugar
Instructions
- Combine Dry Ingredients (Crust): In a large bowl, whisk together the flour and salt.
- Cut in the Butter and Shortening (Crust): Add the cold, cubed butter and cold shortening to the flour mixture. Cut the fat into the flour until the mixture resembles coarse crumbs using a pastry blender, fingers, or a food processor.
- Add Ice Water (Crust): Gradually add the ice water, one tablespoon at a time, mixing gently after each addition, until the dough just comes together.
- Form Dough into Disks (Crust): Divide the dough in half and form each half into a flat disk. Wrap each disk tightly in plastic wrap.
- Chill the Dough (Crust): Refrigerate the dough for at least 2 hours, or preferably overnight.
- Prepare the Apples (Filling): Peel, core, and dice the apples into small, even pieces.
- Combine Filling Ingredients (Filling): In a large bowl, combine the diced apples, granulated sugar, brown sugar, flour, cinnamon, nutmeg, and allspice.
- Add Lemon Juice (Filling): Stir in the lemon juice.
- Melt Butter into Filling (Filling): Gently toss the apple mixture with the small pieces of butter.
- Let the Filling Sit (Filling): Let the filling sit for about 15-20 minutes.
- Preheat Oven and Prepare Muffin Tin: Preheat your oven to 375°F (190°C). Lightly grease a 24-cup mini muffin tin.
- Roll Out the Dough: On a lightly floured surface, roll out one disk of dough to about 1/8-inch thickness. Use a 3-inch round cookie cutter to cut out circles of dough.
- Place Dough Circles in Muffin Tin: Gently press each dough circle into a cup of the prepared muffin tin.
- Fill the Pies: Spoon the apple filling into each dough-lined cup, filling them almost to the top.
- Create Top Crust (Optional): Roll out the second disk of dough and cut out more 3-inch circles. Place the top crust on each pie, crimping the edges to seal. Cut slits in the top if using a solid crust.
- Prepare Egg Wash: In a small bowl, whisk together the egg and milk (or water).
- Brush with Egg Wash: Brush the top of each pie with the egg wash.
- Sprinkle with Sugar (Optional): Sprinkle the tops of the pies with turbinado sugar or coarse sugar.
- Bake: Bake for 20-25 minutes, or until the crust is golden brown and the filling is bubbly.
- Cool: Let the pies cool in the muffin tin for about 5-10 minutes before carefully transferring them to a wire rack to cool completely.
Notes
- Use cold butter and shortening for the flakiest crust.
- Don’t overwork the dough.
- Chilling the dough is essential.
- Use a combination of apple varieties for a more complex flavor.
- Let the filling sit to release juices.
- Serve warm or at room temperature with ice cream or whipped cream.
- Store in an airtight container at room temperature for up to 2 days, or in the refrigerator for up to 5 days. Freeze for longer storage.
- Reheat in a preheated oven at 350°F (175°C) for about 10-15 minutes.