
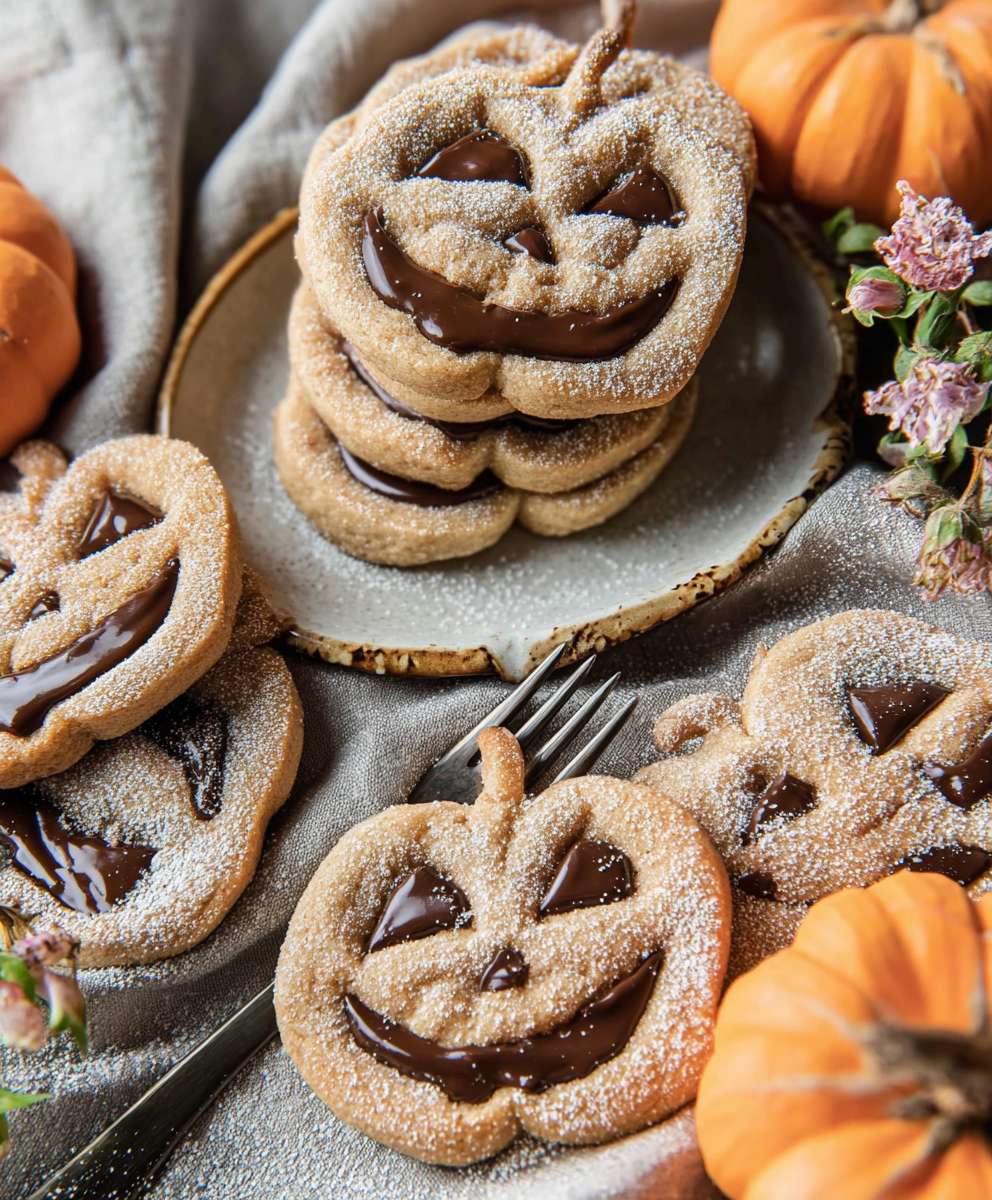
Jack O Lantern Cookies, those adorable and spooky treats, are the perfect way to celebrate the Halloween season! Imagine biting into a buttery, melt-in-your-mouth cookie, decorated with a cheerful (or slightly menacing!) jack-o’-lantern face. These aren’t just cookies; they’re edible works of art that bring a smile to everyone’s face.
While the jack-o’-lantern itself has roots in Irish folklore, where carved turnips were used to ward off evil spirits, the modern Jack O Lantern Cookies are a relatively recent invention. They’ve quickly become a beloved Halloween tradition, gracing dessert tables at parties and filling lunchboxes with festive cheer. Their popularity stems from a few key factors: they’re incredibly fun to decorate, making them a great activity for kids and adults alike. Plus, the combination of a sweet, buttery cookie with the creative freedom of decorating is simply irresistible.
But beyond the fun and festivity, these cookies are simply delicious! The crisp edges and soft centers, combined with the sweet icing, create a delightful textural experience. Whether you prefer a simple sugar cookie base or a spiced gingerbread version, these cookies are guaranteed to be a hit. So, gather your ingredients, preheat your oven, and let’s get baking! I’m excited to share my favorite recipe for these delightful Halloween treats with you.

Ingredients:
- For the Cookies:
- 3 cups all-purpose flour, plus more for dusting
- 1 teaspoon baking powder
- 1/2 teaspoon baking soda
- 1/4 teaspoon salt
- 1 cup (2 sticks) unsalted butter, softened
- 1 1/2 cups granulated sugar
- 2 large eggs
- 1 teaspoon vanilla extract
- 1/2 teaspoon orange extract (optional, but adds a nice pumpkin-y flavor!)
- For the Royal Icing:
- 4 cups powdered sugar, sifted
- 3 tablespoons meringue powder
- 1/2 cup warm water, plus more as needed
- Gel food coloring (orange, black, green – or whatever colors you like!)
Preparing the Cookie Dough:
Alright, let’s get started with the cookie dough! This is the foundation of our adorable Jack O’ Lanterns, so we want to make sure it’s just right. Don’t worry, it’s easier than you think!
- Combine Dry Ingredients: In a medium bowl, whisk together the flour, baking powder, baking soda, and salt. This ensures that everything is evenly distributed, which is key for a good cookie texture. Set this aside for now.
- Cream Butter and Sugar: In a large bowl (or the bowl of your stand mixer), cream together the softened butter and granulated sugar until light and fluffy. This usually takes about 3-5 minutes. You want the mixture to be pale and airy. This step is crucial for creating a tender cookie.
- Add Eggs and Extracts: Beat in the eggs one at a time, making sure each egg is fully incorporated before adding the next. Then, stir in the vanilla extract and orange extract (if using). The orange extract really enhances the pumpkin-y vibe, but it’s totally optional if you don’t have it on hand.
- Gradually Add Dry Ingredients: Gradually add the dry ingredients to the wet ingredients, mixing on low speed until just combined. Be careful not to overmix! Overmixing can lead to tough cookies. Mix until the flour is just incorporated and no streaks remain.
- Chill the Dough: Divide the dough in half, flatten each half into a disc, and wrap tightly in plastic wrap. Refrigerate for at least 1 hour, or even better, 2-3 hours. Chilling the dough prevents the cookies from spreading too much in the oven and makes them easier to handle. I usually chill mine overnight for best results.
Cutting and Baking the Cookies:
Now for the fun part – shaping our Jack O’ Lanterns! Make sure your workspace is clean and ready to go.
- Preheat Oven and Prepare Baking Sheets: Preheat your oven to 350°F (175°C). Line baking sheets with parchment paper or silicone baking mats. This will prevent the cookies from sticking and make cleanup a breeze.
- Roll Out the Dough: On a lightly floured surface, roll out one disc of dough to about 1/4 inch thickness. If the dough is sticking, add a little more flour.
- Cut Out Shapes: Use a pumpkin-shaped cookie cutter to cut out the cookies. You can also use a round cookie cutter and then use a knife to shape it into a pumpkin. Get creative!
- Place on Baking Sheets: Carefully transfer the cookies to the prepared baking sheets, leaving about 1 inch of space between each cookie.
- Bake: Bake for 8-10 minutes, or until the edges are lightly golden brown. Keep a close eye on them, as baking times can vary depending on your oven.
- Cool Completely: Let the cookies cool on the baking sheets for a few minutes before transferring them to a wire rack to cool completely. Make sure they are completely cool before you start decorating.
- Repeat: Repeat steps 2-6 with the remaining dough. You can re-roll the scraps of dough, but keep in mind that the more you re-roll, the tougher the cookies will become.
Preparing the Royal Icing:
Royal icing is what will bring our Jack O’ Lanterns to life! It’s a bit finicky, but with a little patience, you’ll get the hang of it. We’ll make a base icing and then divide it and color it.
- Combine Ingredients: In a large bowl (or the bowl of your stand mixer), combine the sifted powdered sugar and meringue powder. Sifting the powdered sugar is important to prevent lumps in your icing.
- Add Water: Gradually add the warm water, mixing on low speed until combined. Then, increase the speed to medium and beat for 5-7 minutes, or until the icing is smooth, glossy, and forms stiff peaks.
- Adjust Consistency: The consistency of your royal icing is crucial. You want it to be thick enough to hold its shape but thin enough to spread easily. If the icing is too thick, add a little more water, a teaspoon at a time, until you reach the desired consistency. If it’s too thin, add a little more powdered sugar, a tablespoon at a time.
- Divide and Color: Divide the icing into separate bowls, depending on how many colors you want to use. Add gel food coloring to each bowl and mix well until you achieve your desired shades. I usually make orange for the base, black for the details, and green for the stem.
- Prepare Piping Bags: Transfer each color of icing to a piping bag fitted with a small round tip (I like a #2 or #3 tip for outlining and a slightly larger tip for flooding). If you don’t have piping bags, you can use zip-top bags and snip off a tiny corner.
Decorating the Jack O’ Lantern Cookies:
This is where your creativity can really shine! Don’t be afraid to experiment and have fun. Remember, even mistakes can look cute!
- Outline the Cookies: Using the orange icing, outline each cookie. This will create a dam to prevent the flood icing from running off the edges.
- Flood the Cookies: Thin the remaining orange icing slightly by adding a few drops of water at a time until it reaches a “flood” consistency (it should be similar to thick glue). Carefully flood the inside of the outlined cookies with the thinned icing. Use a toothpick or scribe tool to pop any air bubbles and spread the icing evenly.
- Let the Base Dry: Allow the orange icing to dry completely. This usually takes at least 2-3 hours, or even overnight. This is a crucial step, as you don’t want the colors to bleed together.
- Add Details: Once the base icing is dry, use the black icing to pipe on the Jack O’ Lantern faces. Get creative with the eyes, nose, and mouth! You can make them spooky, silly, or cute.
- Add Stems: Use the green icing to pipe on the stems. You can make them simple or add details like leaves or vines.
- Add Additional Details (Optional): If you want to add even more detail, you can use other colors of icing to create patterns, textures, or embellishments. Sprinkles are always a fun addition!
- Let the Icing Set: Allow the decorated cookies to dry completely before storing them. This usually takes another 2-3 hours.
Tips and Tricks for Perfect Jack O’ Lantern Cookies:
- Use Room Temperature Ingredients: Make sure your butter and eggs are at room temperature for the best results. This will help them incorporate more easily and create a smoother dough.
- Don’t Overmix the Dough: Overmixing can develop the gluten in the flour, resulting in tough cookies. Mix until just combined.
- Chill the Dough Thoroughly: Chilling the dough is essential for preventing the cookies from spreading too much in the oven.
- Use Gel Food Coloring: Gel food coloring is more concentrated than liquid food coloring, so you’ll need less of it to achieve vibrant colors. It also won’t thin out your icing as much.
- Practice Your Piping: If you’re new to royal icing, practice your piping skills on a piece of parchment paper before decorating the cookies.
- Be Patient: Decorating cookies takes time and patience. Don’t rush the process, and enjoy the creative outlet!
- Store Properly: Store the decorated cookies in an airtight container at room temperature. They will stay fresh for several days.
Troubleshooting Royal Icing:
Conclusion:
So there you have it! These Jack O Lantern Cookies aren’t just a treat; they’re a delightful experience, a burst of autumnal joy in every bite. I truly believe this recipe is a must-try this season, and here’s why: it’s surprisingly simple, incredibly fun to make (especially with kids!), and the end result is a batch of adorable and delicious cookies that are guaranteed to bring a smile to everyone’s face. The soft, buttery cookie base, combined with the sweet and vibrant orange frosting, creates a flavor profile that’s both comforting and exciting. Forget store-bought cookies – these homemade delights are on a whole different level!
But the best part? You can totally customize them to your liking! Feeling adventurous? Try adding a pinch of cinnamon or nutmeg to the cookie dough for an extra layer of warmth. Want to make them even more festive? Use different colored sprinkles or edible glitter to decorate the faces. For a richer flavor, consider using brown butter in the cookie dough – it adds a nutty depth that’s simply irresistible.
And speaking of variations, these cookies are incredibly versatile. Serve them with a scoop of vanilla ice cream for a decadent dessert. Pack them in lunchboxes for a sweet surprise. Or, arrange them on a platter for a Halloween party – they’re sure to be a hit! You could even get creative with the frosting. Instead of traditional orange, try a chocolate ganache for a richer, more sophisticated flavor. Or, use a cream cheese frosting for a tangy twist.
Looking for serving suggestions? These Jack O Lantern Cookies are perfect with a glass of cold milk, a warm cup of apple cider, or even a pumpkin spice latte. They’re also a fantastic addition to a Halloween-themed dessert table, alongside other spooky treats like ghost-shaped meringues and spiderweb cupcakes. And don’t forget to package them up in cute little bags to give as gifts to friends and neighbors!
I’ve poured my heart into perfecting this recipe, and I’m confident that you’ll love it as much as I do. It’s more than just a recipe; it’s a way to create memories, to share joy, and to celebrate the magic of the season. So, gather your ingredients, preheat your oven, and get ready to embark on a baking adventure!
I truly hope you’ll give these Jack O Lantern Cookies a try. I’m so excited to hear about your experience! Did you make any fun variations? Did you have any baking mishaps (we’ve all been there!)? What did your family and friends think? Please, please, please share your photos and stories with me! You can tag me on social media using [Your Social Media Handle] or leave a comment below. I can’t wait to see your creations and hear all about your baking adventures. Happy baking, and happy Halloween! Let’s spread some cookie-filled joy this season! I am sure that you will love this recipe.
Jack O Lantern Cookies: Spooky & Delicious Halloween Treats
Festive Jack O' Lantern sugar cookies with vanilla-orange flavor, decorated with vibrant royal icing. Perfect for Halloween!
Ingredients
- 3 cups all-purpose flour, plus more for dusting
- 1 teaspoon baking powder
- 1/2 teaspoon baking soda
- 1/4 teaspoon salt
- 1 cup (2 sticks) unsalted butter, softened
- 1 1/2 cups granulated sugar
- 2 large eggs
- 1 teaspoon vanilla extract
- 1/2 teaspoon orange extract (optional)
- 4 cups powdered sugar, sifted
- 3 tablespoons meringue powder
- 1/2 cup warm water, plus more as needed
- Gel food coloring (orange, black, green)
Instructions
- Combine Dry Ingredients: In a medium bowl, whisk together the flour, baking powder, baking soda, and salt. Set aside.
- Cream Butter and Sugar: In a large bowl (or stand mixer), cream together the softened butter and granulated sugar until light and fluffy (3-5 minutes).
- Add Eggs and Extracts: Beat in the eggs one at a time, then stir in the vanilla extract and orange extract (if using).
- Gradually Add Dry Ingredients: Gradually add the dry ingredients to the wet ingredients, mixing on low speed until just combined. Do not overmix.
- Chill the Dough: Divide the dough in half, flatten each half into a disc, and wrap tightly in plastic wrap. Refrigerate for at least 1 hour (or 2-3 hours, or overnight).
- Preheat Oven and Prepare Baking Sheets: Preheat oven to 350°F (175°C). Line baking sheets with parchment paper or silicone baking mats.
- Roll Out the Dough: On a lightly floured surface, roll out one disc of dough to about 1/4 inch thickness.
- Cut Out Shapes: Use a pumpkin-shaped cookie cutter to cut out the cookies.
- Place on Baking Sheets: Transfer the cookies to the prepared baking sheets, leaving about 1 inch of space between each cookie.
- Bake: Bake for 8-10 minutes, or until the edges are lightly golden brown.
- Cool Completely: Let the cookies cool on the baking sheets for a few minutes before transferring them to a wire rack to cool completely.
- Repeat: Repeat steps 2-6 with the remaining dough.
- Combine Ingredients: In a large bowl (or stand mixer), combine the sifted powdered sugar and meringue powder.
- Add Water: Gradually add the warm water, mixing on low speed until combined. Then, increase the speed to medium and beat for 5-7 minutes, or until the icing is smooth, glossy, and forms stiff peaks.
- Adjust Consistency: Adjust the consistency of the icing with small amounts of water or powdered sugar until it is thick enough to hold its shape but thin enough to spread easily.
- Divide and Color: Divide the icing into separate bowls, depending on how many colors you want to use. Add gel food coloring to each bowl and mix well until you achieve your desired shades.
- Prepare Piping Bags: Transfer each color of icing to a piping bag fitted with a small round tip.
- Outline the Cookies: Using the orange icing, outline each cookie.
- Flood the Cookies: Thin the remaining orange icing slightly by adding a few drops of water at a time until it reaches a “flood” consistency. Carefully flood the inside of the outlined cookies with the thinned icing. Use a toothpick or scribe tool to pop any air bubbles and spread the icing evenly.
- Let the Base Dry: Allow the orange icing to dry completely (2-3 hours, or overnight).
- Add Details: Once the base icing is dry, use the black icing to pipe on the Jack O’ Lantern faces.
- Add Stems: Use the green icing to pipe on the stems.
- Add Additional Details (Optional): Use other colors of icing to create patterns, textures, or embellishments.
- Let the Icing Set: Allow the decorated cookies to dry completely before storing them (2-3 hours).
Notes
- Use room temperature ingredients for the best results.
- Don’t overmix the dough.
- Chill the dough thoroughly.
- Use gel food coloring.
- Practice your piping skills.
- Be patient.
- Store properly in an airtight container at room temperature.