
Homemade Apple Pie: Is there anything more comforting than the aroma of cinnamon and baked apples wafting through your kitchen? I think not! This classic dessert is more than just a sweet treat; it’s a symbol of home, hearth, and happy memories. For generations, apple pie has graced tables across America, evolving from its humble European beginnings to become a truly iconic dish.
The history of apple pie is surprisingly complex, with roots stretching back to medieval Europe. However, it was in America that it truly blossomed, becoming synonymous with American identity and values. Think of the saying, “as American as apple pie!” It speaks volumes about the dish’s cultural significance.
But what is it about homemade apple pie that makes it so universally loved? Perhaps it’s the perfect balance of sweet and tart, the tender, juicy apples nestled within a flaky, buttery crust. Or maybe it’s the sheer simplicity of the ingredients, transformed into something truly extraordinary. Whatever the reason, this dessert is a crowd-pleaser, perfect for holidays, family gatherings, or simply a cozy night in. Get ready to bake up a slice of happiness!

Ingredients:
- For the Crust:
- 2 ½ cups all-purpose flour, plus more for dusting
- 1 teaspoon salt
- 1 cup (2 sticks) unsalted butter, very cold and cut into ½-inch cubes
- ½ cup ice water, plus more if needed
- For the Apple Filling:
- 6-7 medium apples (such as Honeycrisp, Granny Smith, or Gala), peeled, cored, and sliced
- ¾ cup granulated sugar
- ¼ cup all-purpose flour
- 1 teaspoon ground cinnamon
- ¼ teaspoon ground nutmeg
- 2 tablespoons lemon juice
- 2 tablespoons unsalted butter, cut into small pieces
- For the Egg Wash (Optional):
- 1 large egg, beaten
- 1 tablespoon milk or water
- For Sprinkling (Optional):
- Turbinado sugar or granulated sugar
Preparing the Crust:
Okay, let’s start with the crust. This is the foundation of our amazing apple pie, so we want to get it right. Don’t be intimidated; it’s easier than you think!
- Combine Dry Ingredients: In a large bowl, whisk together the flour and salt. This ensures the salt is evenly distributed, which is crucial for flavor.
- Cut in the Butter: Add the cold, cubed butter to the flour mixture. Using a pastry blender or your fingertips (work quickly to keep the butter cold!), cut the butter into the flour until the mixture resembles coarse crumbs. You should still see some pea-sized pieces of butter – these are what create those flaky layers we all love.
- Add Ice Water: Gradually add the ice water, one tablespoon at a time, mixing gently after each addition. Be careful not to overmix! You want the dough to just come together. It should be slightly shaggy but not sticky. If it’s too dry, add a little more ice water, a teaspoon at a time.
- Form Dough Disks: Divide the dough in half. Gently flatten each half into a disk about 1 inch thick. Wrap each disk tightly in plastic wrap.
- Chill the Dough: Refrigerate the dough for at least 2 hours, or preferably overnight. This allows the gluten to relax, making the dough easier to roll out and preventing it from shrinking during baking. Trust me, this step is important!
Preparing the Apple Filling:
While the crust is chilling, let’s get that delicious apple filling ready. The aroma alone will make your kitchen smell heavenly!
- Prepare the Apples: Peel, core, and slice the apples. I like to slice them about ¼-inch thick. You can use a mandoline for even slices, but a good old-fashioned knife works just fine.
- Combine Filling Ingredients: In a large bowl, combine the sliced apples, granulated sugar, flour, cinnamon, and nutmeg. The flour helps to thicken the filling as it bakes.
- Add Lemon Juice: Toss the apples with the lemon juice. This prevents them from browning and adds a nice tartness to balance the sweetness.
- Mix Well: Gently mix all the ingredients together until the apples are evenly coated.
Assembling the Pie:
Now for the fun part – putting it all together! This is where your pie starts to take shape and become a work of art (or at least a delicious dessert!).
- Preheat Oven: Preheat your oven to 425°F (220°C). Make sure your oven rack is in the center position.
- Roll Out the Bottom Crust: On a lightly floured surface, roll out one of the dough disks into a 12-inch circle. It should be large enough to fit into your pie plate with some overhang.
- Transfer to Pie Plate: Carefully transfer the rolled-out dough to a 9-inch pie plate. Gently press the dough into the bottom and up the sides of the plate.
- Trim and Crimp the Edge: Trim the excess dough around the edge of the pie plate, leaving about a 1-inch overhang. Crimp the edge of the crust using your fingers or a fork to create a decorative border. This also helps to seal the filling inside.
- Add the Filling: Pour the apple filling into the prepared pie crust. Spread it evenly.
- Dot with Butter: Dot the top of the filling with the small pieces of butter. This adds richness and flavor to the filling.
- Roll Out the Top Crust: On a lightly floured surface, roll out the second dough disk into a 12-inch circle.
- Cut Vents: Cut several slits or decorative shapes into the top crust to allow steam to escape during baking. This prevents the crust from puffing up too much and cracking. You can use a knife or cookie cutters for this.
- Place Top Crust Over Filling: Carefully place the top crust over the apple filling.
- Trim and Seal: Trim the excess dough around the edge of the pie plate, leaving about a 1-inch overhang. Crimp the edge of the crust together with the bottom crust to seal the pie. You can use your fingers or a fork for this.
- Egg Wash (Optional): In a small bowl, whisk together the egg and milk or water. Brush the top crust with the egg wash. This will give the crust a beautiful golden-brown color.
- Sprinkle with Sugar (Optional): Sprinkle the top crust with turbinado sugar or granulated sugar for added sweetness and sparkle.
Baking the Pie:
Almost there! Now it’s time to bake our masterpiece. The aroma that fills your kitchen during this stage is simply irresistible.
- Bake: Bake the pie for 15 minutes at 425°F (220°C). This initial high heat helps to set the crust.
- Reduce Heat: Reduce the oven temperature to 375°F (190°C) and continue baking for 45-50 minutes, or until the crust is golden brown and the filling is bubbly. If the crust starts to brown too quickly, you can tent it with aluminum foil.
- Cool: Let the pie cool completely on a wire rack before slicing and serving. This is crucial! If you cut into it while it’s still hot, the filling will be runny. Trust me, patience is key here.
Tips and Variations:
Here are a few extra tips and ideas to make your apple pie even more amazing:
- Apple Varieties: Experiment with different apple varieties to find your favorite combination. Honeycrisp, Granny Smith, Gala, and Fuji are all great choices.
- Spice It Up: Add a pinch of ground cloves or allspice to the filling for a warmer, more complex flavor.
- Add Nuts: Sprinkle chopped walnuts or pecans over the filling before adding the top crust for a nutty crunch.
- Caramel Apple Pie: Drizzle caramel sauce over the filling before adding the top crust for a decadent twist.
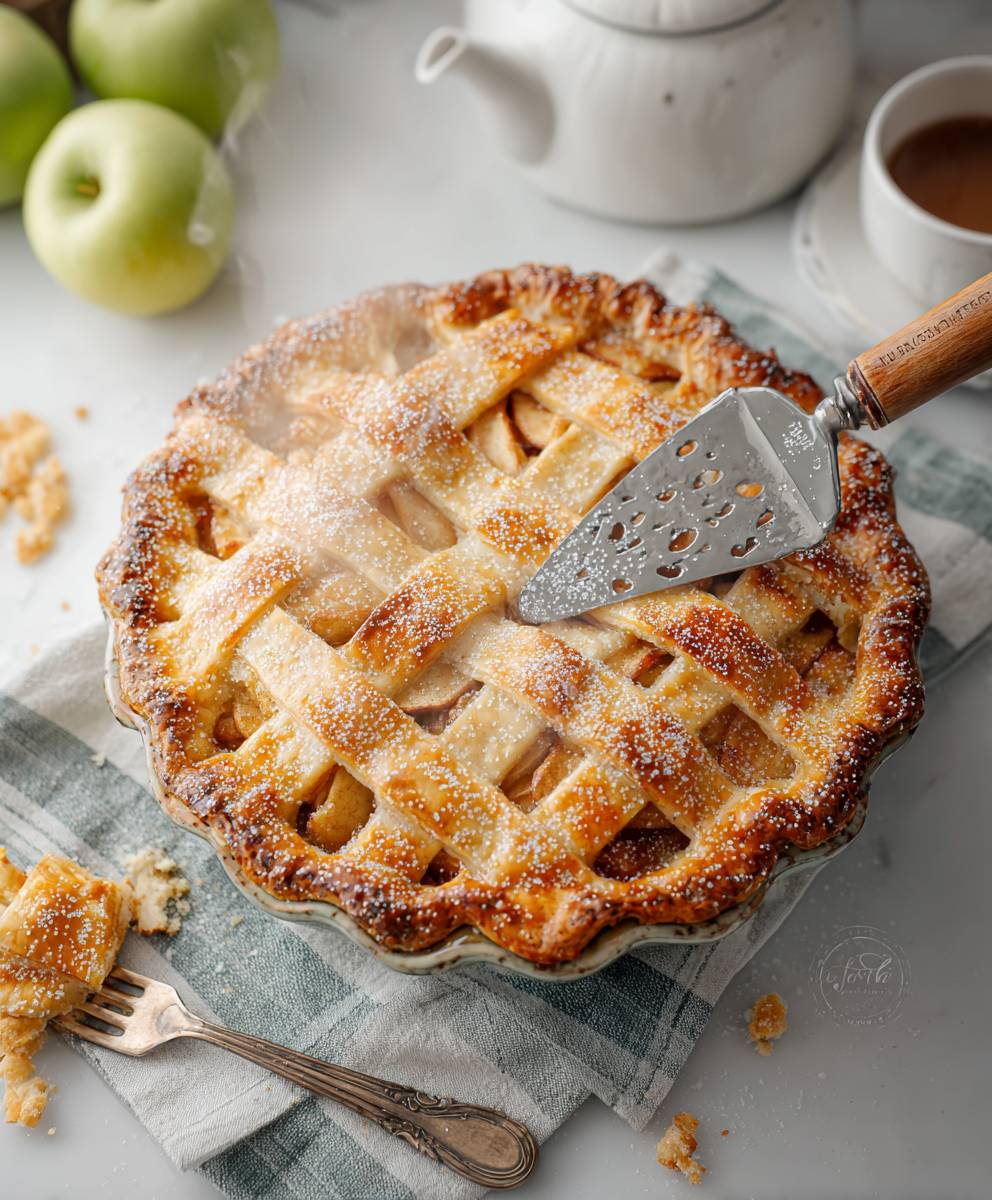
- Lattice Crust: Instead of a full top crust, create a lattice crust for a beautiful and classic look.
- Blind Baking: If you’re worried about the bottom crust becoming soggy, you can blind bake it before adding the filling. To do this, line the crust with parchment paper and fill it with pie weights or dried beans. Bake at 375°F (190°C) for 15 minutes, then remove the parchment paper and weights and bake for another 5-10 minutes, or until the crust is lightly golden.
- Serving Suggestions: Serve your apple pie warm with a scoop of vanilla ice cream, a dollop of whipped cream, or a drizzle of caramel sauce.
- Storage: Store leftover apple pie in the refrigerator for up to 3 days. You can also freeze it for longer storage. Wrap the pie tightly in plastic wrap and then in aluminum foil. To thaw, place the pie in the refrigerator overnight.
Troubleshooting:
Sometimes things don’t go exactly as planned. Here are a few common problems and how to fix them:
- Soggy Bottom Crust: Make sure your oven is hot enough and that you’re baking the pie on the bottom rack. You can also try blind baking the crust as mentioned above.
- Classic: Warm slice with vanilla ice cream.
- Decadent: Whipped cream, caramel sauce, and chopped nuts.
- Fruity Twist: Add cranberries or pears to the filling.
- Rustic Charm: Crimp the crust edges with a fork.
- Individual Treats: Bake mini pies in muffin tins.
- 2 ½ cups all-purpose flour, plus more for dusting
- 1 teaspoon salt
- 1 cup (2 sticks) unsalted butter, very cold and cut into ½-inch cubes
- ½ cup ice water, plus more if needed
- 6-7 medium apples (such as Honeycrisp, Granny Smith, or Gala), peeled, cored, and sliced
- ¾ cup granulated sugar
- ¼ cup all-purpose flour
- 1 teaspoon ground cinnamon
- ¼ teaspoon ground nutmeg
- 2 tablespoons lemon juice
- 2 tablespoons unsalted butter, cut into small pieces
- 1 large egg, beaten
- 1 tablespoon milk or water
- Turbinado sugar or granulated sugar
- In a large bowl, whisk together the flour and salt.
- Cut in the cold, cubed butter using a pastry blender or your fingertips until the mixture resembles coarse crumbs with pea-sized pieces of butter.
- Gradually add the ice water, one tablespoon at a time, mixing gently after each addition, until the dough just comes together.
- Divide the dough in half. Gently flatten each half into a disk about 1 inch thick. Wrap each disk tightly in plastic wrap.
- Refrigerate the dough for at least 2 hours, or preferably overnight.
- Peel, core, and slice the apples about ¼-inch thick.
- In a large bowl, combine the sliced apples, granulated sugar, flour, cinnamon, and nutmeg.
- Toss the apples with the lemon juice.
- Gently mix all the ingredients together until the apples are evenly coated.
- Preheat oven to 425°F (220°C).
- On a lightly floured surface, roll out one of the dough disks into a 12-inch circle.
- Carefully transfer the rolled-out dough to a 9-inch pie plate. Gently press the dough into the bottom and up the sides of the plate.
- Trim the excess dough around the edge of the pie plate, leaving about a 1-inch overhang. Crimp the edge of the crust using your fingers or a fork to create a decorative border.
- Pour the apple filling into the prepared pie crust. Spread it evenly.
- Dot the top of the filling with the small pieces of butter.
- On a lightly floured surface, roll out the second dough disk into a 12-inch circle.
- Cut several slits or decorative shapes into the top crust to allow steam to escape during baking.
- Carefully place the top crust over the apple filling.
- Trim the excess dough around the edge of the pie plate, leaving about a 1-inch overhang. Crimp the edge of the crust together with the bottom crust to seal the pie.
- (Optional) In a small bowl, whisk together the egg and milk or water. Brush the top crust with the egg wash.
- (Optional) Sprinkle the top crust with turbinado sugar or granulated sugar.
- Bake the pie for 15 minutes at 425°F (220°C).
- Reduce the oven temperature to 375°F (190°C) and continue baking for 45-50 minutes, or until the crust is golden brown and the filling is bubbly. If the crust starts to brown too quickly, you can tent it with aluminum foil.
- Let the pie cool completely on a wire rack before slicing and serving.
- Chilling the dough is crucial for a flaky crust.
- Use a variety of apples for a more complex flavor.
- Adjust spices to your preference.
- Serve warm with vanilla ice cream or whipped cream.
- Store leftover pie in the refrigerator for up to 3 days.
- For longer storage, freeze the pie wrapped tightly in plastic wrap and aluminum foil. Thaw in the refrigerator overnight.
Conclusion:
And there you have it! This isn’t just any apple pie recipe; it’s a journey back to simpler times, a warm hug on a chilly day, and a guaranteed crowd-pleaser. I truly believe this homemade apple pie is a must-try for anyone who appreciates the comforting flavors of fall and the satisfaction of creating something delicious from scratch. The combination of the perfectly spiced apple filling, the flaky, buttery crust, and the sweet aroma that fills your kitchen as it bakes is simply irresistible.
But why is this recipe so special? It’s the attention to detail, the quality of the ingredients, and the love that goes into every step. From selecting the right apples (a mix of sweet and tart varieties is key!) to carefully crafting the crust, each element contributes to the overall perfection of this pie. It’s a recipe that’s been passed down through generations, tweaked and perfected over time, and now, I’m sharing it with you.
Now, let’s talk serving suggestions! A warm slice of this apple pie is divine on its own, but it’s even better with a scoop of vanilla ice cream melting on top. The cold ice cream against the warm pie is a classic combination that never fails to delight. Or, if you’re feeling adventurous, try a dollop of freshly whipped cream or a drizzle of caramel sauce. For a truly decadent experience, add a sprinkle of chopped pecans or walnuts.
And don’t be afraid to get creative with variations! If you’re not a fan of cinnamon, try using nutmeg or allspice instead. You can also add other fruits to the filling, such as cranberries or pears. For a more rustic look, crimp the edges of the crust with a fork or use a decorative pie crust cutter. You can even make mini apple pies in muffin tins for individual servings.
Serving and Variation Ideas:
I’m so excited for you to try this recipe and experience the joy of baking your own homemade apple pie. It’s a labor of love, but the results are well worth the effort. Imagine the smiles on your family’s faces as they savor each bite, the compliments you’ll receive, and the sense of accomplishment you’ll feel knowing that you created something truly special.
So, go ahead, gather your ingredients, preheat your oven, and get ready to bake the best apple pie you’ve ever tasted. And when you do, please share your experience with me! I’d love to hear how it turned out, what variations you tried, and any tips or tricks you discovered along the way. You can leave a comment below, tag me on social media, or send me an email. I can’t wait to see your creations! Happy baking! I hope this homemade apple pie becomes a cherished tradition in your family, just as it is in mine.
Homemade Apple Pie: The Ultimate Recipe for Fall
Flaky homemade apple pie with sweet, spiced apple filling.