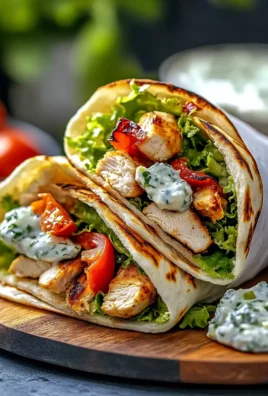
Hot Dog Relish: the vibrant, tangy condiment that can transform an ordinary hot dog into a gourmet experience! Have you ever bitten into a perfectly grilled hot dog, only to find it lacking that certain *something*? That zesty, crunchy burst of flavor that elevates it from simple street food to a culinary delight? Well, look no further, because I’m about to share my secret weapon: a homemade hot dog relish recipe that will have you ditching the store-bought stuff forever.
While the exact origins of relish are debated, its roots can be traced back to ancient civilizations who preserved vegetables in vinegar and spices. Over time, relish evolved into the diverse range of flavors and textures we enjoy today. In America, hot dog relish became a staple at ballparks and backyard barbecues, adding a touch of sweetness and acidity to the classic hot dog.
People adore hot dog relish for its incredible versatility and the way it complements the savory flavor of the hot dog. The combination of sweet, tangy, and slightly spicy notes creates a symphony of flavors that dance on your palate. Plus, the satisfying crunch of finely chopped vegetables adds a delightful textural element. Whether you prefer a sweet relish, a dill relish, or something with a bit of heat, there’s a hot dog relish out there for everyone. And the best part? It’s incredibly easy to make at home, allowing you to customize the ingredients to your exact liking. So, let’s get started and create the perfect topping for your next cookout!

Ingredients:
- 1 large green bell pepper, finely diced
- 1 large red bell pepper, finely diced
- 2 medium yellow onions, finely diced
- 1 cup finely diced celery
- 1 ½ cups granulated sugar
- 1 ½ cups white vinegar (5% acidity)
- ½ cup water
- ¼ cup yellow mustard
- 2 tablespoons mustard seeds
- 1 tablespoon celery seeds
- 1 teaspoon turmeric powder
- ½ teaspoon ground ginger
- ½ teaspoon ground cloves
- ½ teaspoon red pepper flakes (optional, for a little heat)
- 1 tablespoon kosher salt, plus more to taste
Preparing the Vegetables:
Okay, let’s get started! The key to a great hot dog relish is having all your vegetables uniformly diced. This ensures even cooking and a pleasing texture. Don’t rush this step; it’s worth the effort!
- Prepare the Bell Peppers: First, wash and dry your green and red bell peppers. Remove the stems, seeds, and membranes. Then, carefully dice them into small, even pieces, about ¼ inch in size. Consistency is key here! I like to cut them into strips first and then dice the strips.
- Dice the Onions: Peel your yellow onions and dice them as finely as you did the bell peppers. I know, onions can make you cry! Try chilling them in the freezer for about 15 minutes before dicing to minimize the tears.
- Dice the Celery: Wash and dry the celery stalks. Trim off the ends and any tough outer strings. Dice the celery into pieces similar in size to the peppers and onions.
Cooking the Relish:
Now comes the fun part – bringing all those flavors together! We’re going to simmer the vegetables in a sweet and tangy brine until they’re tender and the relish has thickened slightly.
- Combine Ingredients in a Large Pot: In a large, heavy-bottomed pot or Dutch oven, combine the diced green bell pepper, red bell pepper, yellow onions, and celery. Add the granulated sugar, white vinegar, water, yellow mustard, mustard seeds, celery seeds, turmeric powder, ground ginger, ground cloves, red pepper flakes (if using), and salt.
- Bring to a Boil: Place the pot over medium-high heat and bring the mixture to a rolling boil, stirring occasionally to prevent sticking. Make sure the sugar dissolves completely.
- Simmer and Thicken: Once boiling, reduce the heat to low, so the mixture is gently simmering. Simmer uncovered for about 45-60 minutes, or until the vegetables are tender and the relish has thickened to your desired consistency. Stir frequently, especially towards the end of the cooking time, to prevent scorching. The relish should coat the back of a spoon.
- Check for Doneness: To test for doneness, place a small spoonful of the relish on a chilled plate. Let it cool for a minute or two. If it holds its shape and doesn’t run, it’s ready. If it’s still too watery, continue simmering for a few more minutes, checking periodically.
- Adjust Seasoning: Taste the relish and adjust the seasoning as needed. You might want to add a little more salt, sugar, or vinegar to balance the flavors to your liking. Remember, the flavors will intensify as the relish cools.
Canning (Optional):
If you want to preserve your hot dog relish for later, you can easily can it using the water bath canning method. This will allow you to enjoy your homemade relish for months to come!
- Prepare Jars and Lids: Wash your canning jars (pint or half-pint size) in hot, soapy water. Rinse them well and sterilize them by boiling them in a large pot of water for 10 minutes. Keep the jars hot until ready to use. Sterilize the lids and rings according to the manufacturer’s instructions.
- Fill the Jars: Using a ladle, carefully fill the hot jars with the hot relish, leaving ½ inch of headspace at the top. Remove any air bubbles by gently tapping the jars on the counter or using a non-metallic utensil.
- Wipe Rims and Apply Lids: Wipe the rims of the jars with a clean, damp cloth to remove any food residue. Place the lids on the jars and screw on the bands until fingertip tight.
- Process in a Water Bath Canner: Place the filled jars in a water bath canner. Make sure the jars are completely covered with water (at least 1 inch above the tops of the jars). Bring the water to a rolling boil and process for 15 minutes for pint jars and 10 minutes for half-pint jars. Adjust processing time for altitude if necessary.
- Cool and Check Seals: Turn off the heat and let the jars sit in the canner for 5 minutes before removing them. Carefully remove the jars from the canner and place them on a towel-lined surface to cool completely. As the jars cool, you should hear a popping sound, which indicates that the lids have sealed properly. After the jars have cooled completely (about 12-24 hours), check the seals by pressing down on the center of each lid. If the lid doesn’t flex or pop back up, it’s sealed.
- Store Properly: Remove the bands from the sealed jars and wash the jars with soapy water. Label the jars with the date and contents. Store the jars in a cool, dark place. Properly canned relish will last for at least one year.
Refrigerating (If Not Canning):
If you’re not planning to can the relish, that’s perfectly fine! It will keep well in the refrigerator for several weeks.
- Cool the Relish: Allow the relish to cool completely before transferring it to airtight containers.
- Store in the Refrigerator: Store the cooled relish in airtight containers in the refrigerator. It will keep for up to 2-3 weeks.
Serving Suggestions:
Of course, this relish is fantastic on hot dogs! But don’t stop there. Here are some other ways to enjoy it:
- Burgers: Add a spoonful to your favorite burger for a tangy and flavorful kick.
- Sandwiches: Use it as a condiment on sandwiches, wraps, or paninis.
- Salads: Mix it into potato salad, egg salad, or tuna salad for added flavor and texture.
- Deviled Eggs: Top deviled eggs with a dollop of relish for a colorful and tasty garnish.
- Grilled Meats: Serve it alongside grilled chicken, pork, or fish.
- Appetizers: Offer it as a topping for crackers and cream cheese.
Tips and Variations:
Want to customize your hot dog relish? Here are a few ideas:
- Add Heat: Increase the amount of red pepper flakes or add a pinch of cayenne pepper for a spicier relish. You could also use a jalapeño pepper, finely diced, in addition to the bell peppers.
- Sweeten It Up: If you prefer a sweeter relish, add a little more sugar or a touch of honey or maple syrup.
- Use Different Vegetables: Experiment with other vegetables, such as carrots, zucchini, or corn. Just be sure to dice them finely and adjust the cooking time as needed.
- Add Herbs: Stir in some fresh herbs, such as parsley, cilantro, or dill, for added flavor. Add them towards the end of the cooking time to preserve their freshness.
- Use Brown Sugar: Substitute some or all of the granulated sugar with brown sugar for a richer, molasses-like flavor.
- Pickling Spice: Add a teaspoon of pickling spice for a more complex flavor profile.
Enjoy!
I hope you enjoy this homemade hot dog relish as much as I do! It’s a delicious and versatile condiment that’s sure to add a burst of flavor to your favorite dishes. Happy cooking!

Conclusion:
This Hot Dog Relish recipe isn’t just another condiment; it’s a flavor explosion waiting to happen! Seriously, forget the store-bought stuff. Once you taste the vibrant, tangy, and slightly sweet homemade version, you’ll never go back. The combination of fresh vegetables, the perfect balance of sweet and sour, and that satisfying crunch makes it an absolute must-try for anyone who loves a good hot dog, or frankly, anything that needs a flavor boost.
Think about it: summer barbecues, casual weeknight dinners, even a simple snack can be elevated with a spoonful of this amazing relish. It’s incredibly versatile, and that’s part of what makes it so special.
But don’t just limit yourself to hot dogs! This relish is fantastic on burgers, grilled chicken, or even as a topping for tacos. I’ve even been known to sneak a spoonful or two straight from the jar (don’t judge!). For a spicier kick, try adding a finely diced jalapeño or a pinch of red pepper flakes. If you prefer a sweeter relish, you can increase the amount of sugar slightly. And for a tangier flavor, add a splash more vinegar. Feel free to experiment and adjust the ingredients to suit your own taste preferences. That’s the beauty of homemade – you’re in control!
Serving suggestions? Oh, the possibilities are endless! Imagine this relish piled high on a classic Chicago-style hot dog, nestled alongside some crispy fries. Or picture it adding a burst of flavor to a grilled bratwurst at your next tailgate party. You could even use it as a base for a delicious salsa by adding some diced tomatoes and cilantro.
For a fun variation, try pickling some green tomatoes and adding them to the relish for a unique twist. Or, if you’re feeling adventurous, add a touch of curry powder for an exotic flavor profile. The key is to have fun and get creative!
I truly believe that this Hot Dog Relish recipe is a game-changer. It’s easy to make, incredibly flavorful, and so much better than anything you can buy in a store. It’s the perfect way to add a touch of homemade goodness to your meals and impress your friends and family.
So, what are you waiting for? Gather your ingredients, put on some music, and get ready to create a culinary masterpiece. I promise you won’t be disappointed.
And most importantly, I want to hear about your experience! Once you’ve tried the recipe, please come back and share your thoughts in the comments below. Did you make any variations? What did you serve it with? I’m always eager to learn from your experiences and see how you’ve made the recipe your own. Happy cooking, and enjoy! I’m confident that this will become a staple in your refrigerator, ready to brighten up any meal with its vibrant flavor. Don’t forget to tag me in your social media posts – I can’t wait to see your creations!
Hot Dog Relish: The Ultimate Guide to Toppings and Recipes
Sweet and tangy homemade hot dog relish with finely diced vegetables and flavorful spices. Perfect for hot dogs, burgers, and sandwiches!
Ingredients
- 1 large green bell pepper, finely diced
- 1 large red bell pepper, finely diced
- 2 medium yellow onions, finely diced
- 1 cup finely diced celery
- 1 ½ cups granulated sugar
- 1 ½ cups white vinegar (5% acidity)
- ½ cup water
- ¼ cup yellow mustard
- 2 tablespoons mustard seeds
- 1 tablespoon celery seeds
- 1 teaspoon turmeric powder
- ½ teaspoon ground ginger
- ½ teaspoon ground cloves
- ½ teaspoon red pepper flakes (optional, for a little heat)
- 1 tablespoon kosher salt, plus more to taste
Instructions
- Prepare the Bell Peppers: Wash and dry bell peppers. Remove stems, seeds, and membranes. Dice into small, even pieces (about ¼ inch).
- Dice the Onions: Peel and finely dice yellow onions. Chill in the freezer for 15 minutes before dicing to minimize tears.
- Dice the Celery: Wash and dry celery stalks. Trim ends and tough outer strings. Dice into pieces similar in size to the peppers and onions.
- Combine Ingredients in a Large Pot: In a large, heavy-bottomed pot or Dutch oven, combine the diced green bell pepper, red bell pepper, yellow onions, and celery. Add the granulated sugar, white vinegar, water, yellow mustard, mustard seeds, celery seeds, turmeric powder, ground ginger, ground cloves, red pepper flakes (if using), and salt.
- Bring to a Boil: Place the pot over medium-high heat and bring the mixture to a rolling boil, stirring occasionally to prevent sticking. Make sure the sugar dissolves completely.
- Simmer and Thicken: Once boiling, reduce the heat to low, so the mixture is gently simmering. Simmer uncovered for about 45-60 minutes, or until the vegetables are tender and the relish has thickened to your desired consistency. Stir frequently, especially towards the end of the cooking time, to prevent scorching. The relish should coat the back of a spoon.
- Check for Doneness: To test for doneness, place a small spoonful of the relish on a chilled plate. Let it cool for a minute or two. If it holds its shape and doesn’t run, it’s ready. If it’s still too watery, continue simmering for a few more minutes, checking periodically.
- Adjust Seasoning: Taste the relish and adjust the seasoning as needed. You might want to add a little more salt, sugar, or vinegar to balance the flavors to your liking. Remember, the flavors will intensify as the relish cools.
- Canning (Optional): If you want to preserve your hot dog relish for later, you can easily can it using the water bath canning method. This will allow you to enjoy your homemade relish for months to come!
- Prepare Jars and Lids: Wash your canning jars (pint or half-pint size) in hot, soapy water. Rinse them well and sterilize them by boiling them in a large pot of water for 10 minutes. Keep the jars hot until ready to use. Sterilize the lids and rings according to the manufacturer’s instructions.
- Fill the Jars: Using a ladle, carefully fill the hot jars with the hot relish, leaving ½ inch of headspace at the top. Remove any air bubbles by gently tapping the jars on the counter or using a non-metallic utensil.
- Wipe Rims and Apply Lids: Wipe the rims of the jars with a clean, damp cloth to remove any food residue. Place the lids on the jars and screw on the bands until fingertip tight.
- Process in a Water Bath Canner: Place the filled jars in a water bath canner. Make sure the jars are completely covered with water (at least 1 inch above the tops of the jars). Bring the water to a rolling boil and process for 15 minutes for pint jars and 10 minutes for half-pint jars. Adjust processing time for altitude if necessary.
- Cool and Check Seals: Turn off the heat and let the jars sit in the canner for 5 minutes before removing them. Carefully remove the jars from the canner and place them on a towel-lined surface to cool completely. As the jars cool, you should hear a popping sound, which indicates that the lids have sealed properly. After the jars have cooled completely (about 12-24 hours), check the seals by pressing down on the center of each lid. If the lid doesn’t flex or pop back up, it’s sealed.
- Store Properly: Remove the bands from the sealed jars and wash the jars with soapy water. Label the jars with the date and contents. Store the jars in a cool, dark place. Properly canned relish will last for at least one year.
- Refrigerating (If Not Canning): If you’re not planning to can the relish, that’s perfectly fine! It will keep well in the refrigerator for several weeks.
- Cool the Relish: Allow the relish to cool completely before transferring it to airtight containers.
- Store in the Refrigerator: Store the cooled relish in airtight containers in the refrigerator. It will keep for up to 2-3 weeks.
Notes
- Vegetable Prep is Key: Uniformly diced vegetables ensure even cooking and a pleasing texture.
- Simmering Time: Simmer until vegetables are tender and the relish has thickened to your desired consistency. It should coat the back of a spoon.
- Adjust Seasoning: Taste and adjust salt, sugar, or vinegar to balance the flavors. Flavors intensify as it cools.
- Canning: Follow proper water bath canning procedures for safe preservation.
- Variations: Add heat with more red pepper flakes or jalapeño. Sweeten with more sugar, honey, or maple syrup. Experiment with other vegetables like carrots, zucchini, or corn. Add fresh herbs like parsley, cilantro, or dill. Use brown sugar for a richer flavor. Add pickling spice for a complex flavor.