
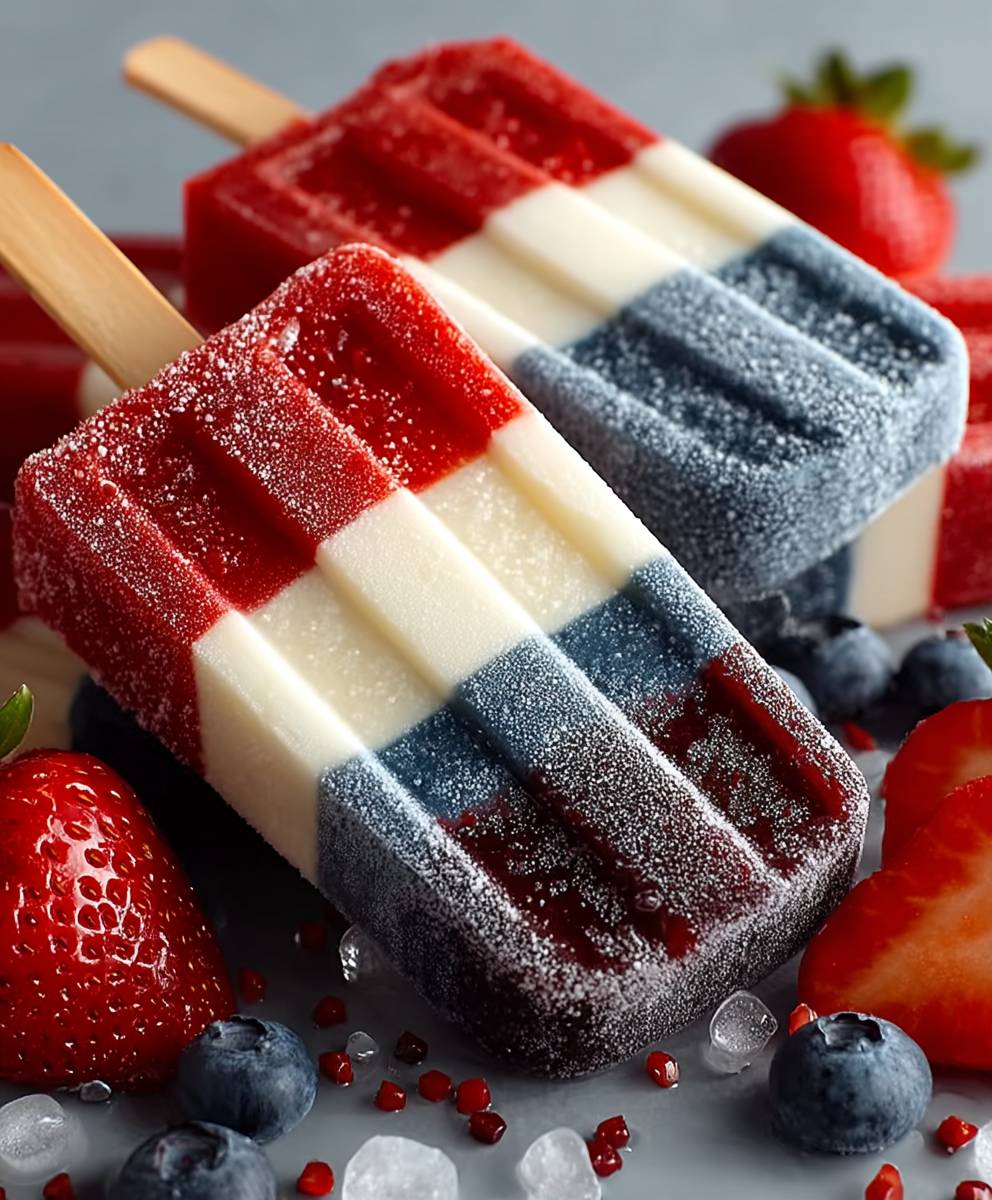
Red White Blue Popsicles are the perfect patriotic treat to celebrate summer holidays like the 4th of July or Memorial Day! Imagine biting into a refreshing, layered popsicle bursting with the flavors of fresh berries and creamy coconut. These aren’t your average store-bought pops; they’re a vibrant, homemade delight that will impress kids and adults alike.
The colors themselves hold a special significance, representing the American flag and the values of freedom and unity. While the exact origin of layered popsicles is hard to pinpoint, the concept of frozen treats dates back centuries, with variations found in different cultures worldwide. These Red White Blue Popsicles are a modern twist on a classic favorite, combining visual appeal with delicious taste.
What makes these popsicles so irresistible? It’s the delightful combination of flavors and textures. The sweet, tangy berries provide a refreshing burst, while the creamy coconut layer adds a smooth, luxurious touch. Plus, they’re incredibly easy to make! With just a few simple ingredients and a little patience, you can create a batch of these stunning popsicles that are sure to be a hit at your next summer gathering. They are also a healthier alternative to many store-bought options, allowing you to control the ingredients and avoid artificial colors and flavors. Get ready to enjoy a taste of summer with these festive and flavorful treats!

Ingredients:
- For the Red Layer (Strawberry):
- 2 cups fresh strawberries, hulled
- 1/4 cup granulated sugar (adjust to taste depending on strawberry sweetness)
- 1/4 cup water
- 1 tablespoon lemon juice (optional, enhances flavor)
- For the White Layer (Coconut Cream):
- 1 can (13.5 oz) full-fat coconut milk, refrigerated overnight
- 1/4 cup powdered sugar (adjust to taste)
- 1/2 teaspoon vanilla extract
- Pinch of salt
- For the Blue Layer (Blueberry):
- 2 cups fresh blueberries
- 1/4 cup granulated sugar (adjust to taste depending on blueberry sweetness)
- 1/4 cup water
- 1 tablespoon lemon juice (optional, enhances flavor and brightens color)
- Equipment:
- Popsicle molds (6-8 popsicle capacity)
- Blender or food processor
- Small saucepan
- Measuring cups and spoons
- Popsicle sticks
Preparing the Red Layer (Strawberry)
- Prepare the Strawberries: Wash the strawberries thoroughly and remove the hulls. Make sure to get all the green parts off, as they can be bitter. I like to give them a good rinse under cold water and then pat them dry with a paper towel.
- Combine Ingredients: In a blender or food processor, combine the hulled strawberries, granulated sugar, water, and lemon juice (if using).
- Blend Until Smooth: Blend the mixture until it is completely smooth. There should be no chunks of strawberries remaining. If you’re using a blender, you might need to scrape down the sides a few times to ensure everything is fully incorporated.
- Strain (Optional): For a smoother popsicle, you can strain the strawberry mixture through a fine-mesh sieve to remove any seeds. This is totally optional, but it does create a more refined texture. I usually skip this step because I don’t mind the little seeds.
- Pour into Molds: Carefully pour the strawberry mixture into the popsicle molds, filling them about 1/3 of the way full. Be precise here, as you want to leave room for the other layers. I find using a small measuring cup with a spout helps prevent spills.
- Freeze: Place the popsicle molds in the freezer for at least 1-2 hours, or until the strawberry layer is firm enough to support the next layer. You want it to be solid enough that the coconut layer won’t sink into it. A good test is to gently poke the surface – it should feel firm to the touch.
Preparing the White Layer (Coconut Cream)
- Separate the Coconut Cream: This is the most important step for the white layer! After refrigerating the can of full-fat coconut milk overnight, the cream will have separated from the watery liquid. Carefully scoop out the thick, solid coconut cream from the top of the can, leaving the watery liquid behind. This is what will give you that rich, creamy texture. If your coconut milk didn’t separate well, you can still use it, but the texture might be a bit less dense.
- Combine Ingredients: In a bowl, combine the coconut cream, powdered sugar, vanilla extract, and a pinch of salt.
- Whisk Until Smooth: Whisk the ingredients together until they are smooth and creamy. Make sure the powdered sugar is fully dissolved. You can use a hand mixer for this if you prefer, but whisking by hand works just fine.
- Pour into Molds: Once the strawberry layer is firm, carefully pour the coconut cream mixture into the popsicle molds, filling them another 1/3 of the way full. Again, be precise and leave room for the blueberry layer.
- Freeze: Return the popsicle molds to the freezer for another 1-2 hours, or until the coconut cream layer is firm enough to support the blueberry layer. Use the same firmness test as before – a gentle poke should reveal a solid surface.
Preparing the Blue Layer (Blueberry)
- Prepare the Blueberries: Wash the blueberries thoroughly. Remove any stems or leaves. I like to spread them out on a paper towel to dry a bit before blending.
- Combine Ingredients: In a blender or food processor, combine the blueberries, granulated sugar, water, and lemon juice (if using).
- Blend Until Smooth: Blend the mixture until it is completely smooth. Just like with the strawberries, make sure there are no chunks of blueberries remaining.
- Strain (Optional): You can strain the blueberry mixture through a fine-mesh sieve to remove the skins and seeds for a smoother popsicle. This is especially helpful with blueberries, as the skins can sometimes be a bit tough. I usually strain the blueberry layer for a more pleasant texture.
- Pour into Molds: Once the coconut cream layer is firm, carefully pour the blueberry mixture into the popsicle molds, filling them to the top.
- Insert Popsicle Sticks: Insert popsicle sticks into the center of each popsicle. Make sure they are inserted deep enough to be secure.
- Freeze Completely: Return the popsicle molds to the freezer and freeze for at least 4-6 hours, or preferably overnight, until the popsicles are completely frozen solid. This is crucial for easy removal from the molds.
Removing and Serving the Popsicles
- Loosen the Popsicles: To easily remove the popsicles from the molds, run the molds under warm water for a few seconds. Be careful not to melt the popsicles too much! You can also dip the molds in a bowl of warm water.
- Gently Pull: Gently pull on the popsicle sticks to release the popsicles from the molds. If they are still stuck, run the molds under warm water for a few more seconds.
- Serve Immediately: Serve the Red, White, and Blue popsicles immediately and enjoy! They are best enjoyed on a hot day.
- Storage: If you’re not serving them right away, wrap each popsicle individually in plastic wrap and store them in the freezer. This will prevent freezer burn and keep them fresh.
Tips and Variations:
- Sweetness Adjustment: Adjust the amount of sugar in each layer to your liking, depending on the sweetness of the fruit. Taste each mixture before freezing and add more sugar if needed.
- Fruit Variations: Feel free to experiment with other red and blue fruits, such as raspberries, cherries, or blackberries.
- Coconut Milk Substitute: If you don’t like coconut, you can substitute the coconut cream layer with Greek yogurt or a mixture of cream cheese and milk.
- Layering Technique: For a more defined layered look, make sure each layer is completely frozen before adding the next.
- Adding Texture: You can add chopped nuts, chocolate chips, or shredded coconut to any of the layers for added texture.
- Lemon/Lime Juice: The lemon juice (or lime juice) not only enhances the flavor but also helps to prevent the fruit from browning and keeps the colors vibrant.
- Popsicle Mold Types: There are many different types of popsicle molds available. Silicone molds are generally easier to use for removing the popsicles.
- Preventing Ice Crystals: Adding a small amount of corn syrup or honey to the fruit purees can help to prevent ice crystals from forming, resulting in a smoother popsicle. However, this will also increase the sweetness.
Conclusion:
And there you have it! These Red White Blue Popsicles are more than just a frozen treat; they’re a vibrant celebration on a stick, perfect for beating the summer heat and adding a festive touch to any occasion. I truly believe this recipe is a must-try for so many reasons. First, the visual appeal is undeniable. The distinct layers of red, white, and blue create a stunning presentation that’s sure to impress kids and adults alike. Forget store-bought popsicles loaded with artificial colors and flavors; these are naturally beautiful and bursting with fresh fruit goodness.
Second, the taste is simply divine. The combination of sweet strawberries, creamy coconut milk, and tangy blueberries creates a symphony of flavors that dance on your tongue. It’s a refreshing and satisfying treat that you can feel good about eating. Plus, it’s incredibly versatile!
Serving Suggestions and Variations:
Don’t be afraid to get creative with your Red White Blue Popsicles! While the recipe is fantastic as is, there are plenty of ways to customize it to your liking. For a boozy adult version, you could add a splash of vodka or rum to the strawberry layer. Just be sure to adjust the amount of liquid accordingly to ensure proper freezing.
If you’re looking for a dairy-free alternative, you can substitute the coconut milk with another plant-based milk, such as almond or oat milk. Keep in mind that the texture might be slightly different, but the flavor will still be delicious.
Another fun variation is to add small pieces of fruit to each layer. Consider adding diced strawberries, blueberries, or even raspberries for an extra burst of flavor and texture. You could also swirl in a little bit of honey or maple syrup for added sweetness, especially if your fruit isn’t quite as ripe.
For a patriotic twist, consider adding a star-shaped cutout of watermelon to the center of the white layer before freezing. This will create a visually stunning effect that’s perfect for Fourth of July celebrations.
These popsicles are also fantastic served alongside other summer desserts, such as grilled fruit, ice cream, or even a slice of pie. They’re a light and refreshing complement to richer, heavier desserts.
I personally love serving them at barbecues and picnics. They’re always a hit with both kids and adults, and they’re a great way to cool down on a hot day. Plus, they’re so easy to make ahead of time, which makes them perfect for entertaining.
I’m confident that you’ll love these Red White Blue Popsicles as much as I do. They’re easy to make, visually stunning, and incredibly delicious. They’re the perfect way to celebrate summer and add a touch of patriotism to any occasion.
So, what are you waiting for? Grab your ingredients, dust off your popsicle molds, and get ready to create some frozen magic! I can’t wait to hear about your experience making these popsicles. Please, share your photos and comments below. Let me know what variations you tried and how they turned out. I’m always looking for new and exciting ways to enjoy this classic summer treat. Happy popsicle making!
Red White Blue Popsicles: A Refreshing Summer Treat
Festive and refreshing Red, White, and Blue popsicles perfect for summer! Layers of strawberry, creamy coconut, and blueberry create a delicious and patriotic treat.
Ingredients
- 2 cups fresh strawberries, hulled
- 1/4 cup granulated sugar (adjust to taste)
- 1/4 cup water
- 1 tablespoon lemon juice (optional)
- 1 can (13.5 oz) full-fat coconut milk, refrigerated overnight
- 1/4 cup powdered sugar (adjust to taste)
- 1/2 teaspoon vanilla extract
- Pinch of salt
- 2 cups fresh blueberries
- 1/4 cup granulated sugar (adjust to taste)
- 1/4 cup water
- 1 tablespoon lemon juice (optional)
Instructions
- Prepare the Strawberries: Wash the strawberries thoroughly and remove the hulls.
- Combine Ingredients: In a blender or food processor, combine the hulled strawberries, granulated sugar, water, and lemon juice (if using).
- Blend Until Smooth: Blend the mixture until it is completely smooth.
- Strain (Optional): For a smoother popsicle, you can strain the strawberry mixture through a fine-mesh sieve to remove any seeds.
- Pour into Molds: Carefully pour the strawberry mixture into the popsicle molds, filling them about 1/3 of the way full.
- Freeze: Place the popsicle molds in the freezer for at least 1-2 hours, or until the strawberry layer is firm enough to support the next layer.
- Separate the Coconut Cream: After refrigerating the can of full-fat coconut milk overnight, carefully scoop out the thick, solid coconut cream from the top of the can, leaving the watery liquid behind.
- Combine Ingredients: In a bowl, combine the coconut cream, powdered sugar, vanilla extract, and a pinch of salt.
- Whisk Until Smooth: Whisk the ingredients together until they are smooth and creamy.
- Pour into Molds: Once the strawberry layer is firm, carefully pour the coconut cream mixture into the popsicle molds, filling them another 1/3 of the way full.
- Freeze: Return the popsicle molds to the freezer for another 1-2 hours, or until the coconut cream layer is firm enough to support the blueberry layer.
- Prepare the Blueberries: Wash the blueberries thoroughly. Remove any stems or leaves.
- Combine Ingredients: In a blender or food processor, combine the blueberries, granulated sugar, water, and lemon juice (if using).
- Blend Until Smooth: Blend the mixture until it is completely smooth.
- Strain (Optional): You can strain the blueberry mixture through a fine-mesh sieve to remove the skins and seeds for a smoother popsicle.
- Pour into Molds: Once the coconut cream layer is firm, carefully pour the blueberry mixture into the popsicle molds, filling them to the top.
- Insert Popsicle Sticks: Insert popsicle sticks into the center of each popsicle.
- Freeze Completely: Return the popsicle molds to the freezer and freeze for at least 4-6 hours, or preferably overnight, until the popsicles are completely frozen solid.
- Loosen the Popsicles: To easily remove the popsicles from the molds, run the molds under warm water for a few seconds.
- Gently Pull: Gently pull on the popsicle sticks to release the popsicles from the molds.
- Serve Immediately: Serve the Red, White, and Blue popsicles immediately and enjoy!
- Storage: If you’re not serving them right away, wrap each popsicle individually in plastic wrap and store them in the freezer.
Notes
- Sweetness Adjustment: Adjust the amount of sugar in each layer to your liking, depending on the sweetness of the fruit.
- Fruit Variations: Feel free to experiment with other red and blue fruits, such as raspberries, cherries, or blackberries.
- Coconut Milk Substitute: If you don’t like coconut, you can substitute the coconut cream layer with Greek yogurt or a mixture of cream cheese and milk.
- Layering Technique: For a more defined layered look, make sure each layer is completely frozen before adding the next.
- Adding Texture: You can add chopped nuts, chocolate chips, or shredded coconut to any of the layers for added texture.
- Lemon/Lime Juice: The lemon juice (or lime juice) not only enhances the flavor but also helps to prevent the fruit from browning and keeps the colors vibrant.
- Popsicle Mold Types: There are many different types of popsicle molds available. Silicone molds are generally easier to use for removing the popsicles.
- Preventing Ice Crystals: Adding a small amount of corn syrup or honey to the fruit purees can help to prevent ice crystals from forming, resulting in a smoother popsicle. However, this will also increase the sweetness.